Showing posts with label Christmas. Show all posts

Monday, December 7, 2020

Merry Christmas To Owl

Hello Everyone,

Little different project today.   This is a small wall hanging quilted project.  I made two of these.  One for myself and one for my buddy, Jan.  She has already received hers, so this post will not spoil the surprise.  LOL  The quilt pattern was from a pattern book I purchased at Annie's Craft Store on line.  I used heat and bond to apply the appliques and machine stitched around the appliques.  I did a little bit of machine quilting.

I used Christmas prints in 100% cotton.  I used a recycled light weight sweater for the tree.  


So glad you stopped by today.  I will be back next time with Christmas cards.  I made over 50 cards.  I did get the photos edited yesterday.  Now I have to get them addressed and mailed.  Still lots to do.  Did my Christmas gift shopping on line today.  See you soon.

Karen

Friday, December 18, 2015

Holiday Wreath

Hello Dreamers,
Been busy here working on Holiday preparations.  I am hosting Christmas dinner.  I just about have the menu planned.  I am not sure what dessert I will make.  Something gooey and chocolaty I think.  Well, on to some  crafty topics.
I have been making crocheted scarves for gifts.  Have seven made so far.
Also made a holiday wreath.   Which is the subject of today's post.

I purchased a grapevine wreath, and cut the evergreen from trees in my yard.  I had the ribbon in my stash.  Take a look.  (Made that Santa years ago.)


The evergreens were wired on and the bow hot glued.  The wreath is hung in my front foyer.  Such a nice cheery welcome for guests.
Next time, I will be back with more one layer Christmas cards.  Soooo, see you then.  Hope you are having a great day!!  Love ya.
Karen

Sunday, December 16, 2012

Christmas Morning Wall Hanging with Character Construction

Hi Dreamers!
A bit of Christmas spirit in Dreamland today.  I made a small wall hanging project with The Vintage Christmas sets from Character Construction.  I wanted to make a scene with trees and then I started thinking about a snowy morning....and then, that children would want to get out and play with the new sled.  And, that is how this project evolved.


Materials List:
Stamps: Sets #2, #3, and #4 from Vintage Christmas-Character Construction
Inks: 
Distress Inks-Forest Moss, Black Soot, Frayed Burlap
Versa Magic Chalk - Jumbo Jan, Pink Petunia, Aspen Mist
Cardstock: White and Brown
DP: holiday from My Mind's Eye
Stickles
Corragated Cardboard
Wide Wired Ribbon
Gems
a Twig


  • I used white CS and made a watercolored background for the base.  The trees are stamped in Forest Moss ink, the sledders and sentiment in Black Soot.
  • Distress the stamped piece with Frayed Burlap
  • Layer with Brown CS


  • Tear the top layer off the cardboard.
  • Distress the cardboard with the chalk inks
  • Glue the DP to the cardboard.
  • Add the stamped piece with dimensional adhesive


  • Add the gems
  • Add two ribbon loops to the back of cardboard for hanging
  • Add a big bow.
  • Add Stickles to trees
  • Hang on wall
Challenges for my Christmas Morning Wall Hanging
Simon Says Stamp: favorite--Watercolored backgrounds
Allsorts: Oh Christmas Tree
Christmas blog: Christmas tree
365 Cards: rough and smooth
One Stop Craft: distressed Christmas
Reasonable Ribbon: Christmas + ribbon
Craft a Scene: Winter scene

Isn't this a fun project.  I have it on the wall near my fireplace.  Love the vintage feel to the stamps and they work so well with the cardboard and rustic DP.   Hope your weekend is going well.  Love ya.
Karen

Tuesday, December 4, 2012

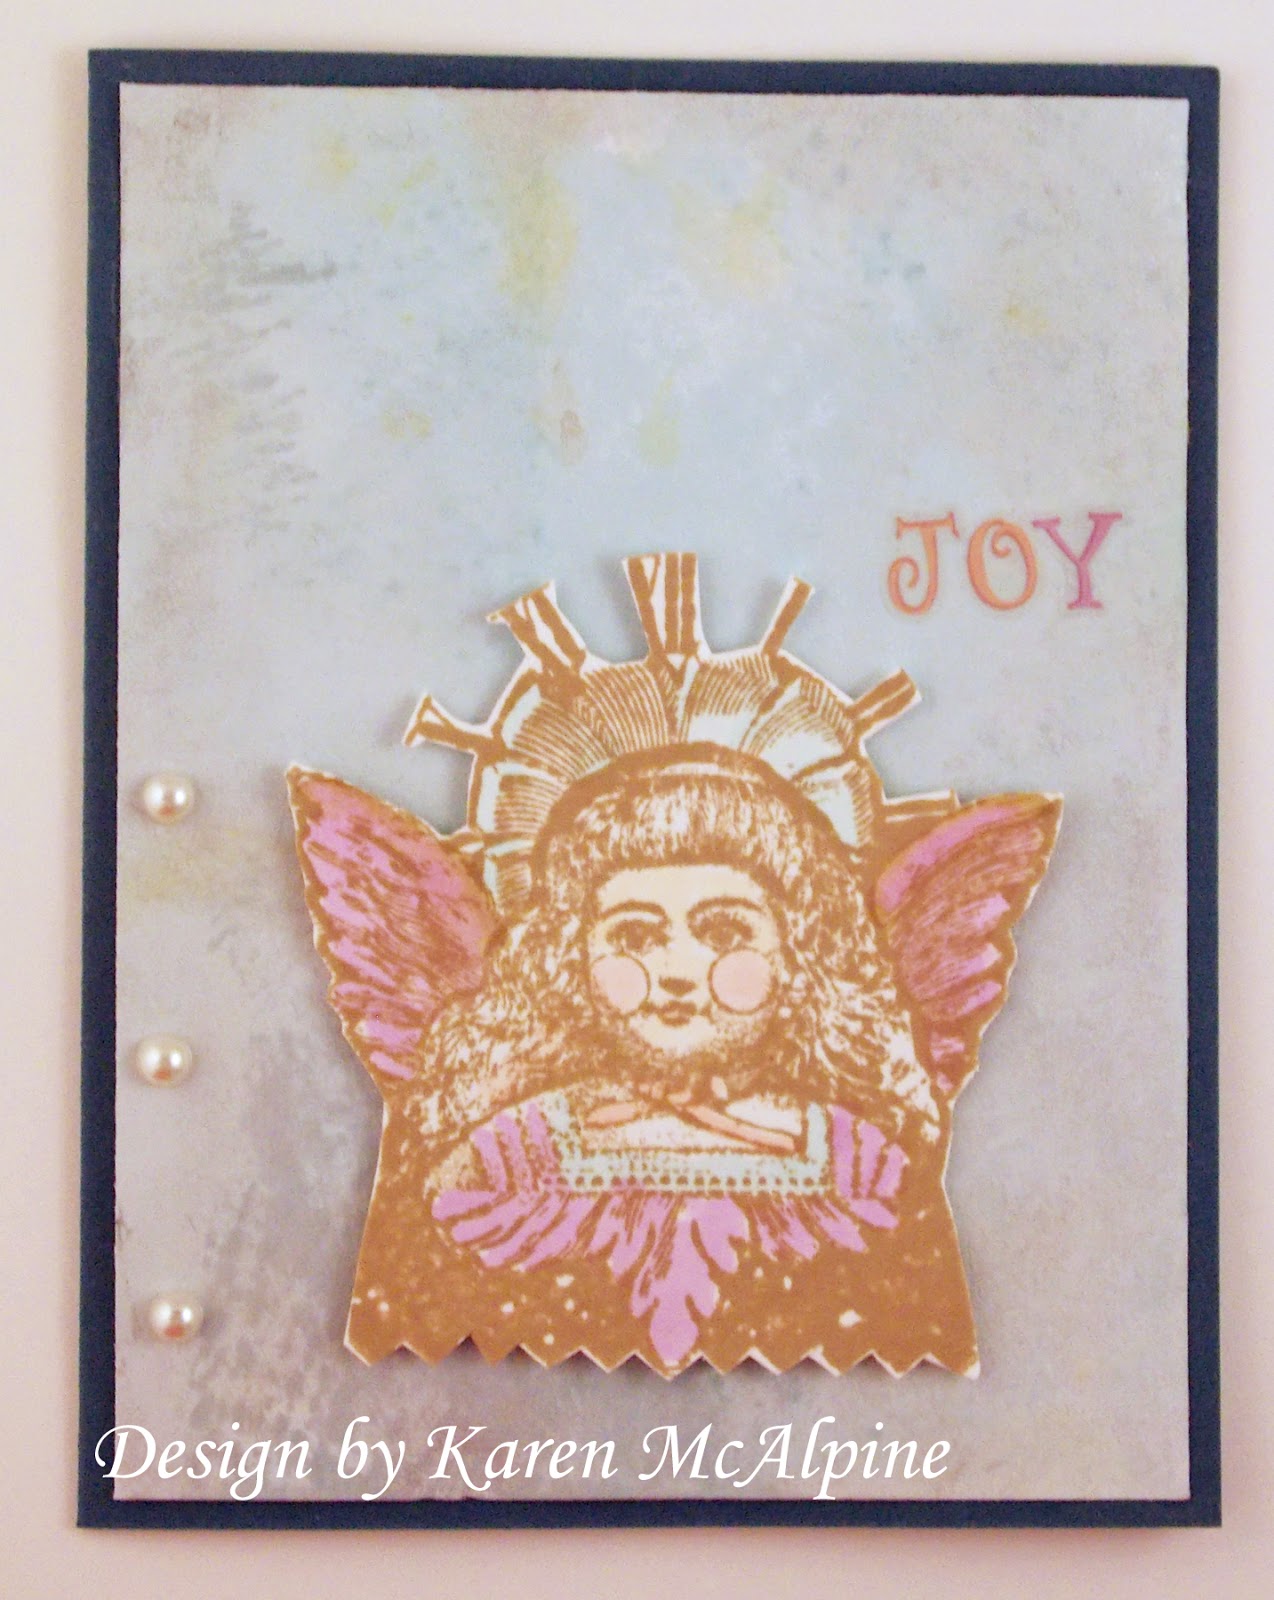
Joyful Blue Angel with Paper Artsy

Hi Dreamers!
I hope you are enjoying all the Christmas projects here in Dreamland.  I am having so much fun making all the projects and thinking about who will get each card.  Today, I have a pretty Joyful Angel card with a silvery background.


Materials List:
Stamps: Holiday Theatre Paper Artsy available from Blockheads Paper Arts
Inks: 
Toffee Crunch Memento
Brushed Pewter Ranger Metallic Stain
Weathered Wood and Tumbled Glass Distress Markers
Copic Markers
Cardstock: Solar White  Neenah, navy
Craft sheet
Pearls
Alphabet Stickers


Instructions:
  • Make the background with the markers and stains.  


  • Stamp the Angel on Solar White cs with Toffee Crunch ink.
  • Color with Copics
  • Cut out Angel


  • Make a card base from the navy CS
  • Add the trimmed background piece
  • Add Angel with dimensionals
  • Spell out Joy with Alphabet stickers


  • Add pearls


Love this image!   This is one of those stamps that I kept stamping and stamping just to see what it looked like in different inks.  I went with this softer ink color for a more vintage muted look.


Challenges for my Joyful Blue Angel:
Mark's Finest: Christmas with no red or green
Challenges 4 everyone: anything goes
2 Sisters: Christmas sparkle
My Sheri Crafts: tis the season
Jingle Belles Rock: Christmas + anything goes
By the Cute and Girly: Red white and blue Christmas

How is your card making going??  Are you making cards for Christmas?  Well, I hope you are having a great day!  Oh, let's see what is on the schedule for tomorrow.  Looks like tomorrow is WOYWW.  I will be showing you photos of my cards that are going into a sale.  More about the sale tomorrow.  See you then.  Love ya.

PS: I will be back later today with a decorated box made with Paper Artsy stamps and tissue paper. 

Karen

Sunday, December 2, 2012

Vintage Santa Celebrates with Character Construction

Hi Dreamers!
I hope you are having a great weekend!  To help Celebrate the Season, I have made a Vintage Santa card.  To make this card with old world charm,  I used stamps from Character Construction's  Vintage Christmas Set #2 


To really get a vintage look, I stamped with Rich Cocoa Memento ink.  Memento inks work great with Copic markers.  I did color the Santa with Copics.  Here is how I got the vintagey look with Copics.
  • I used only one color--a dark red and colored the suit.
  • I came back with the colorless blender and removed most of the red marker. 
I am very pleased with the results.  Sometimes I thought that I really did not want to use my Copics on vintage projects.  But, now I have figured out a way to make them work when I want to go all vintagey.   Here is a closer look.


I layered Santa on a red card base, a red crinkle cs, and a brown CS.  The edges were distressed (not with ink, but with the edge of a broken pair of scissors).  And, I tore one edge of the CS layers.  The Sentiment from the same stamp set was stamped with Rich Cocoa.  And, of course, I added a big bow.


Another Christmas card for my basket.  I have not counted them in a while but, I think I am getting pretty close to being done.  I can make a few quicker cards if I run short.    Now, don't talk to me about Christmas shopping.  I am seriously challenged in that area.  As in not done one little bit.  Well, anyway, I could order everything from Amazon.  LOL  Just bouncing around a few ideas.  My husband hasn't even told me what I am getting him this year.  LOL  Oh, it is just so much easier that way.  He always wants some music thing.    Like for his birthday, a few weeks ago, I got him mouthpieces for his trumpet.  Oh, it is all good!


My Vintage Santa Celebrating is entered in the following challenges:
Dream Valley: non traditional Christmas
Corrosive Challenges: Anything goes
Simon Says Stamp: Anything goes
Stamping Sensations: a tree
Christmas Card challenges:Christmas and optional sketch
Winter Wonderland: Santa


See you on Monday with a sassy Christmas card with Marilyn Monroe !  Have a great day.  Love ya.
Karen

Saturday, December 1, 2012

Angel Faces with Paper Artsy

Hi Dreamers!
Back again  with more Holiday projects.  How about an angelic card made with Lynne Perrella Paper Artsy Stamps--Available in the USA from Blockheads Paper Arts!!  This angelic image is from the set called "Holiday Theatre".


Materials List:
Stamps: Holiday Theatre Paper Artsy from Blockheads Paper Arts
Ink: Toffee Crunch Memento 
Cardstock: White, Green, Red, and Black
Gold ribbon
An Epoxy sticker with Merry Christmas
Square Punch


  • Stamp the Angel on white CS with the Toffee Crunch ink three times
  • Punch or cut out 
  • Layer onto black CS
  • Make card base from red CS and layer with green
  • Add the stamped squares


  • Wrap the ribbon around card and tie in knot.
  • Add the sticker over the knot
This is a  fairly simple  card to make and would be a good design to make in multiples for your Christmas cards.   There is still plenty of time to make a few Christmas cards.

Challenges for Angel Faces:
2 Sisters: Christmas sparkle
Crafty Hazel Nut Christmas: make it girly
Simon Says Stamp: anything goes
Crafty Mess: vintage Christmas
Card Makin Mamas: silver or gold

Hope you are enjoying your weekend.  Consulting the posting schedule (yes, I had to make a schedule again to keep take of all my Christmas projects) I see that tomorrow I will have a Vintage Santa card made with Character Construction stamps.  That does sound fun!  See you then!  Love ya.
Karen

Wednesday, November 28, 2012

Angel Ornaments with Character Construction

Hi Dreamers!
How is your week going?  I am having a great week with lots of creative time!  I  made some pretty Angel Ornaments this weekend with  stamps from the Vintage Christmas set by Character Construction.  Won't they look great on the tree?!


The bases of the ornaments were cut with Spellbinders- Labels four and Labels Eighteen from a dark cherry CS.  The Angels from Set # 4  were stamped on some backgrounds that I made with Distress reinkers and Metallic stains.  See the instructions for the backgrounds here.  Stamp the Angels with Black Soot Distress Ink and distress with Forest Moss DI.

On this tag, I tied a bow in satin ribbon and layered it with a piece of white tulle.  Paper roses were added.


On the second ornament, I added a sheer red ribbon, the tulle and a scrap of lace.  Buttons and stars were added for embellishments.  Isn't this angel just too sweet!??


So that the back looked nice too, I added a die cut piece of gold glittery DP.


Challenges for my Angel Ornaments:

Hooked on Craft challenges: Christmas
Tuesday Alchemy: Anything goes
Craft room door: anything goes
Simon Says stamp: anything goes
Creative Moments: anything goes + buttons and bows
Decorate to Celebrate: Holiday Party decoration--Christmas Party tree ornaments

I will keep all the Christmas craft ideas coming until the big day!  Oh, I have lots and lots of good things to share with you!  See you tomorrow for more Christmas Cheer!  Love ya.
Karen

Monday, November 26, 2012

Glamorous Christmas card with The Stampsmith

Hi Dreamers!
Count down to Christmas!!  I will be sharing lots of Christmas cards over the next few weeks.  I hope I can inspire you to make a few Christmas cards.  It really is so fun!  You don't have to have traditional Christmas stamps to make Christmas cards.  On today's card, I used a glam girl stamp called "Bling" from The Stampsmith.


Stamp the image with black dye ink on glossy white CS.  Layer onto gray CS. 


The trees and sentiment are stickers that I had in my stash.  I added some Holiday DP and instant Christmas card!  Add a red/green ribbon and some rhinestones to complete.  Very Jolly.


And, why not a few challenges for my glamorous Christmas card.

Corrosive Challenge: Anything goes
Dream Valley: non traditional Christmas
Eclectic Ellapu: celebrate with sparkle
Allsorts: bling--the stamp is called Bling and I added bling.
ABC Challenges: anything goes
Cards For Men: Christmas

Tomorrow, I will be back with a quick gift idea.  Just a little something to tuck in a stocking or hostess gift.  So, see you then!!  Love ya.
Karen

Saturday, November 24, 2012

Dreamy Madonna Christmas Card with Paper Artsy

Hi Dreamers!
I am back again today with a dreamy Christmas card!  I used non-traditional colors and the mind blowing stamps designed by Lynne Perrella-Paper Artsy.  The Paper  Artsy Stamps are available in the USA at Blockheads Paper Arts!  I used markers and stains to make the background for my card.


 size: 4 1/4" x 5 1/2"


Materials need to make the background and the card:
Stamps: Babushka Balloon Paper Artsy from Blockheads Paper Arts
Inks:
Black Soot Distress Ink Pad
Markers:
Weathered Wood and Tumbled Glass Distress Markers-Ranger
Summer Sky and Pear Tart Memento Markers
Stains: Brushed Pewter Distress Stain
Cardstock:
White, Cream, and Aqua
Green Ribbon
Rhinestones


Click here for instructions on making the Background Paper.


  • Make background following Tutorial.  Instead of using the reinkers, scribble the Distress Markers onto the craft sheet. 
  • Add a bit of water.
  • Proceed per tutorial instructions.
  • When background is dry stamp the buildings with Black Soot ink


  • Stamp the Madonna on a separate piece of White CS and cut out.
  • Color the halo with the Memento Markers.
  • Run a Metallic pen around the edges of the halo.
  • Glue Madonna to background
  • Make slits in this piece at the halo edges.  Feed the ribbon through the slits
  • Add this piece to a Aqua Card base
  • Add rhinestones

How about a few fun Challenges for my Dreamy Madonna Christmas Card?!!
Bloggers Challenge: Christmas
Sparkles Forum Christmas: Contemporary color Combo
Allsorts: bling
One Stop Craft Challenge: vintage Christmas
Sugar Creek Hollow:vintage Christmas

Have a super weekend!  Love ya.
Karen

Christmas Whimsy with Paper Artsy Stamps

Hello Dreamers!

Back after a few days off to celebrate Thanksgiving.  Had a nice  dinner and quality time with my family.  Back and ready to rock in the Christmas season with this fun, whimsical card made with Lynne Perrella Paper Artsy stamps available in the USA from Blockheads Paper Arts.


 Size: 4 1/2 x 7 1/2"


Materials need to make the background and the card:
Stamps: Babushka Balloon Paper Artsy from Blockheads Paper Arts
Inks:
Jet Black Stazon
Shabby Shutters and Forest Moss Distress Ink Re-inkers
Black Soot Distress Ink Pad
Stains: Antique Bronze Distress Stain
Cardstock:
White Glossy, Black, and Green
Green Ribbon, Black Lace, Gold Rick Rack, Green Rhinestones
Craft Sheet

To make the Background Paper, see my Tutorial here.


After the background paper is dry:
  • Stamp the Believe Balloon with Stazon ink.
  • Layer onto black CS and a Green card base.


  • Cut a length of the Green ribbon in half lengthwise and glue to the right side of the card leaving an open space between the ribbon halves.
  • Add a scrap of black lace over the ribbon covering the open space.  I split the ribbon because I felt the original width was too narrow for the card design.
  • Glue a piece of gold rick rack over the lace.
  • Add the rhinestones
  • Tie the green ribbon into a bow and glue to the top of the balloon.


Hope you are enjoying your weekend and have lots of time to be creative and make some fun projects.  Love  ya.
Karen

Wednesday, November 21, 2012

WOYWW 181---Making a few Christmas Cards

Hi Dreamers!
Happy Wednesday!  And, Wednesday in Blog land means it is time for What's On Your Workdesk Wednesday hosted by Julia on her blog, Stamping Ground.  Here is your chance to take a sneak peek at workdesks all over the world.  Ain't the world wide web great!?  On my desk, I am working on some more Christmas cards.  The samples here are made with Character Construction stamps.


I will post the finished projects on the weekend.  In the USA, we will be celebrating Thanksgiving on Thursday and most people also have Friday off.  So, a nice holiday weekend here.   Have to run to the grocery store this morning to pick up a few things for dinner tomorrow.  My brother is hosting and doing most of the cooking.  I will be bringing a green veg, rolls, and homemade pecan pie.  So, I better get going.  Hope you enjoy taking a peek at all the workdesks.  Happy WOYWW!!  Love ya.
Karen

PS: Julia, there are three pairs of scissors here too.  We need that many.  LOL

Tuesday, November 20, 2012

Christmas Madonna With Paper Artsy

Hi Dreamers,
Back again, just could not stay away.  Had to share this pretty Christmas card with you that I made with Paper Artsy Stamps available in the USA from Blockhead Stamps!


Materials need to make the background and the card:
Stamps: Babushka Balloon Paper Artsy from Blockheads Paper Arts
Inks:
Spun Sugar and Victorian Velvet  Distress Ink Re-inkers
Black Soot Distress Ink Pad
Stains: Tarnished Brass Distress Stain
Cardstock:
White and Pink
Red Sheer Ribbon
Pink Tulle
Craft Sheet


Instructions:
  • Follow the instructions to make the background on my Tutorial here.
  • When the background is dry, stamp the Madonna with Black Soot ink.
  • Trim the background


  • Wrap a piece of the Red Sheer ribbon around the stamped piece and tie it in a bow.
  • Wrap a piece of Pink Tulle around the bow knot and tie in a single knot
  • Layer onto a Pink card base.


On the inside, I stamped a Christmas sentiment.  Who says you can't have a pink Christmas card?  Not me!

I would like to enter my Pink Madonna in the following challenges:
365 Cards: Day 264  Ravishing Ribbons
Loves Rubber Stamps: fun with ribbon
Through the craft room door: Anything goes


 Hope you are having a great week!  Tomorrow, I will be back with some mini cards for the last day of the Blockheads CAS Challenge.   Love ya.
Karen

Monday, November 19, 2012

Shimmery Christmas Cards with Character Constructions

Hello Dreamers,
I am continuing the Christmas theme here on in Dreamland.  I hope you are getting lots of ideas for your own Christmas cards.  My little basket of cards is getting fuller, but I still have a ways to go.  I have two cards today that feature stamps from Character Construction's Vintage Christmas Set #1.   One in blue and one in Green/Gold.


  • The cards are made with some of my handmade background papers.  See how I make the backgrounds here.
  • To make this card follow the tutorial and add the inks: Broken China reinker and Brushed Pewter Stain (Ranger) onto the craft sheet. 


  • When the background is dry, stamp the image with Black Soot Distress Ink. 
  • Color dress with a red watercolor crayon.  
  •  Add some glitter glue for even more shimmer.   
  • Tie a bow in a piece of snowflake ribbon to finish off the card.  


  • The second card color uses Shabby Shutters Distress ink reinker and Tarnished Brass Metallic Stain (both Ranger).   
  • When dry, stamp with Black Soot ink.


  • Add some color with a  red watercolor crayon to the peace on earth label.  
  • Embellish with Red rhinestones, red sheer ribbon, and gold ribbon.  


I am hoping that you can see the shimmer of the Metallic Stain in this photo. (Click on the photo for a larger image.)


See my Christmas Tea Party Place Card using this same stamp here.

I am entering my Shimmery Christmas cards in the following challenges:
Fussy and Fancy: blue
365 Cards: day 260 Gold
Robyn's Fetish: Vintage
Sir stampalot: Christmas
Victorine Stamps: Christmas


Check back tomorrow for a set of CAS All Occasion cards and a pretty pink Christmas Card.  Hope you are having a great day.  Love ya.
Karen
Sunday, November 18, 2012

Hark the Sweetest Angels Sing

Hi Dreamers!
I am back today with some Christmas Cheer.  Today's card is made with one of the stamps from The Stampsmith's full sheet  called "Thank Heaven for Little Girls #1".  This image is so adorable and makes great Christmas cards.


I stamped this photo stamp with black dye ink on glossy white CS.  It was layered with red and black CS.  the card base is made from dark green CS and layered with a piece of Holiday DP from K & Company.


I stamped a Christmas Sentiment from My Sentiments Exactly with red ink, cut into a banner shape, and added to the card front with dimensionals.    A bow tied  in  pretty ribbon  finishes off the card.   Isn't this stamp so, so, so sweet??!  Well, another card for my Christmas basket.  This card will be sent out to a friend.
Hope you are having a great day and enjoying your travels around Blogland.  So happy you  stopped by to say hi!  Love ya.
Karen

Thursday, November 15, 2012

Gold Christmas Angel

Hi Dreamers!
Welcome to Dreamland!  And, look at this dreamy Christmas card.  I choose  shades of yellowy creams--from soft yellow to goldy yellow for a monochromatic look.  This card was made  for the Flourishes Be Progressive Challenge. I thought the challenge seemed like a really fun idea.  Each day another element was added.

  1. Sketch
  2. Monochromatic
  3. Decorative Papers
  4. Bling
Here is my take on the Challenge:


The stamp is Alleluia Angel from Flourishes.  The Music DP is from Websters Pages, the floral from Anna Griffin.  I distressed the second layer of the scallop circle and the dry embossed floral DP with Frayed Burlap Distress ink.


Added some bling with Gold Stickles and a big gold bow.  


I am going to make several more of this design to add to my Christmas card basket.   I may down size them to make them easier to mail.  I will be back tomorrow with a Thanksgiving Card.  See you then.  Love ya.
Karen