Thursday, April 28, 2011

Getting Geographical Challenge

Hi Friends,
Today is the start of a new theme for the Getting Geographical Challenge at the Stamping Vacation Blog. This month the theme is:

The Tuscany Region of Italy

Use this location to inspire your project. Check over at SV blog for some fun facts about Tuscany. I thought this was a tough challenge. I ended up using Clip Art from Microsoft for the main image. And, since I was feeling guilty for not stamping, I stamped a medallion stamp (Papertrey Ink) all over the DP in Crushed Curry ink.


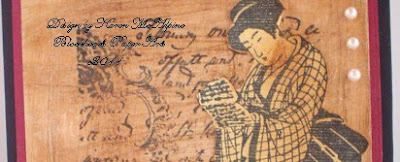
CS: White; Ruby Red and Old Olive from Stampin' Up. Ink: Crushed Curry from SU. The DP is from Momenta and K & Company.

For accents, I added tulle, gem stickers, and a lime green ribbon. I cut the clip art and DP using a Spellbinders die.

For the inside, I added more DP stamped with the same medallion stamp. I also added a cherry sentiment form Impression Obsession stamped in Old Olive ink.

Challenges for my Tuscany Card:


Craft Your Passion: Show your layers

Papercraft Star: Photo inspiration- I used the colors in the photo to insprie my color selection. The colors in the Photo are very Tuscany.

That's it for now. Have a great day.


Karen

Tuesday, April 26, 2011

Clean and Simple Challenge at Stamping Vacation

Hi Everyone,
It is time for a new Clean and Simple (CAS) challenge at The Stamping Vacation Challenge blog. This month's challenge is to use an


Embossed Frame with White and One Other Color


Let's see what you can come up with. Link up over at Stamping Vacation to be entered into the monthly drawing for a $25 gift certificate to the store of YOUR choice. Here is my Design Team challenge card.

To make an embossed frame, I stamped this DeNami frame stamp in Coffee Bean (how appropriate) and heat embossed with clear powder. The coffee cup in the frame is a stamp from Morning Star also stamped in Coffee Bean and embossed. The card base is White CS and layered with Brown and White CS. I added some Chocolate Pearls from KaiserCraft for accents. Here is a peek at the inside.


The sentiment is from Serendipity Stamps. I stamped off once for the coffee cup. So, a very clean and simple card that would be great for sending a nice note to a friend. Hope your day is happy! Love ya.


Karen

Monday, April 25, 2011

Blockheads Stamps with Faux Linen- Part 2 and 3

Hi All,
I hope you were all able to pop over to the Blockheads Blog for the Faux Linen step by step tutorial. As promised, I have another card I made using this technique. And this is the Stamp set I used. It is called ATC-Years Ago.


I started by stamping the script stamp on Glossy White CS with Tuxedo Black ink (Memento). The background color is Vintage Sepia (VersaFine). The woman is stamped with wine pigment ink. The border (from the Japanese Musicians set) is also stamped with Vintage Sepia.


I added a Velvet ribbon and some gold brads for accents. the card base is rose and is layered with caramel and brown CS. Here is a detail photo.


I was going to break this down into three posts, but I think I can get the other card in this post. For the last card, I again stamped the script stamp with Tuxedo Black ink on glossy white CS. I added all the color with wine pigment ink and Coffee Bean Brilliance ink.


The card base is a caramel CS that is layered with red. I used the Spellbinders die Timeless Heritage to cut buttons, a heart lock, and a key. I added a gingham ribbon and some tulle to complete the card. See all the lovely linen texture? I love this technique.


On the inside, I stamped a love sentiment that is available as a single stamp called Love Poem.


I am also entering my Faux Linen Card in the

Simon Says Stamp and Show: show some buttons- I used paper die cut buttons.

That's all for now. Have a great day!

Karen

Blockheads and Faux Linen Technique-Part One of Three

Hi Everyone!
Well, here I am finally. I have been so busy getting some submissions ready. I am back today with some cards using Blockheads stamps. I have been making a bunch of cards using the Faux Linen technique. I made a total of four cards. I was going to put them all in one post but, it just is too much info for one post. Therefore, I will be showing you all the cards over the next few days.

If you would like a step by step tutorial, click over to the Blockheads blog where I am guesting and where I have posted the tutorial. Here is a sneaky peek at the card you will find over there with complete instructions.


Here are the Stamp sets I used for today's card:


So, here we go with the finished card. I used Galaxy Gold, Cosmic Copper, and Rhubarb Stalk inks for this card. (Click on the supplies to take you to the Blockheads Store.) I used Pink and Wine CS's and added two different ribbons. The Dress Dummy (Vintage Travel set) is stamped with black pigment ink and heat embossed directly on top of the Faux Linen background.


And, here are some detail photos. I love this Dress Dummy image.


I used the lace stamp from the Notions set and cut the card along the edge of the stamp. This really gives a neat edge.


And, this is repeated on the inside. There is plenty of room for a stamped sentiment or to write a little note.


Stop back by for Faux Linen Cards Part Two. We sure are having "not so nice" weather here. Rain and cold. Sure doesn't seem much like April, more like March.


Hope it is nice and sunny where ever you are. Have a great day. Love ya,

Karen

Sunday, April 24, 2011

Easter Cards

Hi Everyone,
Today, I am doing a quick post to show you some of the Easter cards I sent out to family and friends. I have been busy in the studio working on some submissions and a tutorial for the Blockheads Blog. The tutorial will be posted some time this week. I will update you to let you know it is up. The tutorial gives step by step instructions for a Faux Linen Technique. Now, back to the Easter cards. I went a little on the CAS side for the cards. The large sentiment stamp is from Victorine Originals.


The flowers in the first two cards are from Stampin' Up. I stamped on an embossed card (wedding invitation cards found at a garage sale-LOL) and added a little glitter.


The tulip stamp is from Rubber Stampede, and was heat embossed.


And here is a detail photo.


And the last, the tulip was heat embossed in brown on a textured cream CS.


Challenges for my Easter Cards:
Craft Your Days Away: Easter
Crazy 4 Challenges: Easter
EPC: Easter
Sweet Stampin: Easter
One Layer Wednesday: Use an old stamp - the tulip
Aud Sentiments: Sentiment and anything goes
Simon Says Stamp: Emboss it

So, as I said just a quick post today. Hope you have a lovely Easter filled with the promises of God. Love ya.

Karen

Friday, April 15, 2011

Stampsmith Spring Theme Challenge

Hi Everyone,

It is Stampsmith Challenge time again. I have decided on a Spring theme for this Challenge. And, as it it the 15th, you will have to use a Stampsmith image to be eligible for the gift certificate drawing. You will have until April 30 to complete and link up your creation. For my Spring card, I used the "Those Were The Days" full sheet which is available in The Stampsmith Shop. Here is a peek at the full sheet. Just image all the fun cards you could make with this set!!


Super fun set. I used one of the images and some very Springy DP from Karen Foster Designs. Take a look.


I stamped the image with black dye ink on glossy white CS. It was layered with Lavender to Dark Purple CS from TPC. The flowers are cut out from the DP. I added them to the card using dimensional squares. The sentiment was stamped with some clear Alphabet stamps (Scrappy Cat). I stamped them twice in two inks: black and Perfect Plumeria (Versa Magic) then embossed with clear powder. Here are some close ups.


Isn't that image the Funnest!!?? I am going to put this in one of my neighbor's mailbox. I think she will like all the bright colors. I will write a little note on the inside. Here is what the inside looks like.


A few other Challenges for "Think Spring":
Art Impressions: Anything goes
Cute Card Thursday: Weather inspired
Pals Paper Arts: Flowers
Paper Romance: paper flowers
Paper Variety: flowers


Well, have to run. My hubby has a doctor's appointment this morning. Thanks for stopping by. Stop over to the Stampsmith Challenge blog and check out all the fabulous DT cards. Love ya.

Karen

Wednesday, April 13, 2011

Blockheads Note Card Gift Set

Hi Everyone!

 I have been working with my new Blockheads Stamps. I love to sew as well as make cards...therefore I love sewing themed stamps! Blockheads has a great set of sewing themed stamps called Notions (HH501).


  I could not decide which stamp to use first, so I decided to use them all. I made a set of Note Cards.


I stamped on a mossy green CS with Vintage Sepia from VersaFine. I was trying to achieve a Clean and Simple feel and at the same time a collagey look. I used 3-6 different stamps on each card. I did a little layering with some brown and Kraft CS. I kept the embellishments to a minimum, because I am going to give this set as a gift. I don't want the cards getting stuck in the Post Office sorting machine. LOL. Here is each card.


Here is a detail photo of one of the cards.


I like the soft vintagey look of the VersaFine ink. I also made a set of matching envelopes for the set. I used the lace edge stamp on each one.


 Have a super day!!  Love ya.

Karen

Sunday, April 10, 2011

DeNami April Blog Hop


Hi Fellow Blog Hoppers!

Today is the DeNami April Blog Hop. The theme for the Hop is Monochromatic. All the ladies are making projects that use DeNami products and that have a monochromatic color scheme.


Here are the nuts and bolts-

When: The blog hop starts on April 10 at 6 AM,PST. However, you have until April 11, 2011, 11:59pm PST, to leave comments on all the blogs (to be eligible for a prize).

Prizes: We are giving away THREE $20 gift certificates to our website! We'll be giving away one gift certificate to a random participant (DT members not eligible) and then we'll also be giving away TWO gift certificates to TWO people who comment along the hop!


The Hop starts at the DeNami Design blog. So if you would like to start at the beginning or got lost click over there.


You should have arrived here from Colleen Dietrich's blog.


So, welcome to my blog. Grab a cup of coffee and get comfy. For my DeNami Hop project, I chose pinky coral as my color scheme and used the Mimi and Maddie stamp.


I stamped the image with black ink and colored it with Water color crayons and Markers. CS: Cameo Coral and Blush Blossom (Stampin' Up). DP: Stampin' Up and K & Company. I used a Sizzix die to cut the scallop oval. I added pearls to the edge of this oval.


I added a great big Sheer ribbon bow. On the inside, I added more of the DP and a friendship sentiment from Uptown Designs. Here is a peek at the inside.


I hope you are enjoying the hop. Now, don't forget to leave a comment to be eligible for the prize. And, after you leave a comment, keep hopping.


Your next stop is Virginia Larsen


Happy Hopping and thanks for stopping by!! Hope to see you again soon.


Karen

Thursday, April 7, 2011

Very Vintage Challenge

Hi Everyone,

It's time for the new Very Vintage Challenge at Stamping Vacation. The theme this month is an interesting one!
Use Pieces of a Map

You have until May 7 to link up your project. All entries will be eligible for the monthly draw of a $25 gift certificate to the store of YOUR choice. What could be nicer than that??!!

Here is what I can up with.


I used a real map. I torn off pieces until it was a shape I liked. I crinkled it and aged it with Vintage Photo ink (Ranger). Can anyone guess what this is a map of?


This stamp is one I picked up at the stamp convention. I am not sure of the manufacturer. It may be Stamp Camp. Does anyone recognize it? I started out with a piece of Barely Banana CS (Stampin' Up) and stamped with Vintage Sepia (VersaFine). I colored in some of the areas with chalks. It was distressed with Vintage Photo.


I layered the map and stamped image on 3 different papers. Went over everything with Vintage Photo. For more interest, I stamped a medallion stamp (Papertrey Ink) with Tea Dye ink (Ranger) randomly over the entire surface. The card base is Cream. I made some small holes in the spine and threaded a strip of fabric through and tied it in a knot.


Here is a peek at the inside. This will be a nice card for a friend or a family member. Not sure yet who will get this one.


A few fun challenges for Vintage Minstrel Card:

The Paper Players: Recycling: I recycled an old map that was just laying around.
A Spoonful of Sugar: tons of texture
Flutterby Wednesdays: butterfly, fairy, or angels and anything goes

Have a great day and get some stamping done. Love ya.

Karen

Wednesday, April 6, 2011

Lavender and Celery Color Combo and Pay It Forward

Hi Crafty Ones,

I have two things to talk to you about today. One is the Color Combo and the other is the idea of Paying It Forward. It is time for the Stamping Vacation Color Combo Challenge. All entries are eligible for the monthly draw of a $25 gift certificate to the store of your choice. Click over and link up your creation. You can enter as many times as you like and as many challenges as you like. A new challenge every day! This month the Color Combo is:

LAVENDER AND CELERY


Well, to me, that sounded like a great color combo for an Easter card. Which I really need to get busy with. So, I will be making several more of this design and then come up with a few others. Here is my project.


I used a new Easter set from My Sentiments Exactly! Both the sentiment on the outside and inside are from this set. CS: Certainly Celery and Pale Plum from Stampin' Up. I stamped the sentiment with Elegant Eggplant pigment ink (SU) and embossed with clear powder. A Spellbinders die cut was used to cut out the sentiment.


The butterflies are made with a Cuttlebug cut and emboss set. These were very fun to make. And, of course I got carried away and made a ton of them. More about that later. I added some silver beads to the butterflies.


And here is a peek of the inside with a lovely sentiment (MSE).


A few challenges for Easter Wishes:
Wee Memories: Favorite colors- lavender and green
Stamps R Us: Easter
A La card Monkey: back to nature
Victorine Originals: purple and green


Now on the the second topic for today. My blogging buddy Corry has started this idea called Pay It Forward.


In Corry's words, "Pay It Forward is the idea of blessing someone with a random act of kindness without expecting anything in return. It’s passing on a kindness, hoping that your recipients will do the same, and forming a never-ending chain of goodwill. But it isn't only kindness, it is also a means to connect and share instead of just keeping it to ourselves." Click over to Corry's blog to see her post.


Here is my story: I was die cutting the butterflies and decided to cut a few more and then a few more. I thought that all the ladies at my Card Ministry Group would really like to have some of these butterflies. I kept cutting and embossing. I used papers I have received in blog candies and papers in my stash. Then I thought they would probably like some tags too. So, more cutting. I ended up with a pretty good sized pile. I took them in to our monthly meeting and every one grabbed to their hearts content. Here is the pile.


I hope you are having a great day! See you tomorrow with the new Very Vintage challenge. Love ya.

Karen