Showing posts with label Perfect Pearls. Show all posts

Tuesday, February 26, 2013

Vintage Dress Forms with Blockheads Stamps

Hi Dreamers!
I am back from a little blogging break.  I had a few days off and now I am ready to blog away.  Today, I would like to show you some vintage cards I have made using one of my favorite themes--the dress form.  The stamps are all from Blockheads Stamps and I added lots of simmer with Perfect Pearls powder.
I made a total of four samples.


Card #1


Materials List for all the Cards:
Stamps: Dress Form from Vintage Light and Form; Notions; Crackle Background
Inks: Rich Cocoa, Espresso Truffle,  and Toffee Crunch Memento;
Butterscotch Adirondack
Gingerbread, Malted Mauve, and Red Birch Versa Magic 
Perfect Pearls Powder
Dimensional Adhesive
Page from a Mixed Media Paper Pad (Strathmore)


Detail Card #1


Instructions:

  • Tear a page from the Mixed Media paper pad.  
  • Stamp the Notions Collage stamp on the paper with Toffee Crunch ink.
  • Tear the paper around the image.
  • On a second piece of paper, stamp the Dress Form with Rich Cocoa ink
  • Tear out the Dress Form


Detail Card #1


  • Distress the edges of both pieces with Gingerbread Versa Magic.  (Gives a nice dark opaque edge to paper)
  • While ink is still wet, sprinkle Perfect Pearls powder onto paper.
  • Brush excess powders off .  This adds lots of shimmer to the edges.
  • Layer onto tobacco colored CS. Add the Dress Form with dimensional adhesive
  • Wrap bakers twine around
  • Mount on Tan CS


Card  #2


Instructions:
Made the same way as Card #1 with these changes:

  • Stamp Notions Collage Stamp with Butterscotch ink and use Red Birch and Gingerbread Versa Magic ink on the edges


Detail Card #2


  • Stamp the button from Notions Stamp set with Rich Cocoa ink; sprinkle Perfect Pearls powder here too.


  • Add a scrap of sheer fabric that has been tied in a knot.


I made two other examples before I made the two above.  I thought it might be nice to put a sealer of some kind over the Perfect Pearls.   I put a coat of Royal Coat Decoupage Finish on them.  Well, it negated the shimmer.   I still like the cards and think they are cool, but you can't really see the shimmer.  So, I would not use the Decoupage finish on Perfect Pearls again, but would on a plain surface that I have not  planned as a  shimmery piece.   Here are the non-shimmery samples.


  •  I used the Crackle Background stamp here and also stamped the Hooks and Eyes (Notions set) with Espresso Truffle ink.
  • Use Malted Mauve and Gingerbread Versa Magic on the edges.


You can see that these two samples have a matte finish.


How about a few Challenges:
Simon Says Stamp and show: a favorite stamp---The Notions Collage
Love to Create: wrap it up-bakers twine
Flourishes Timeless Tuesday: glimmer and shine

We are supposed to get a winter storm here in Michigan later today.  I have all errands for the week done and don't have to worry about going out tomorrow if we get lots of snow.  Good excuse to make a few cards. LOL  I wish you a day full of joy.  Love ya
Karen

Tuesday, February 12, 2013

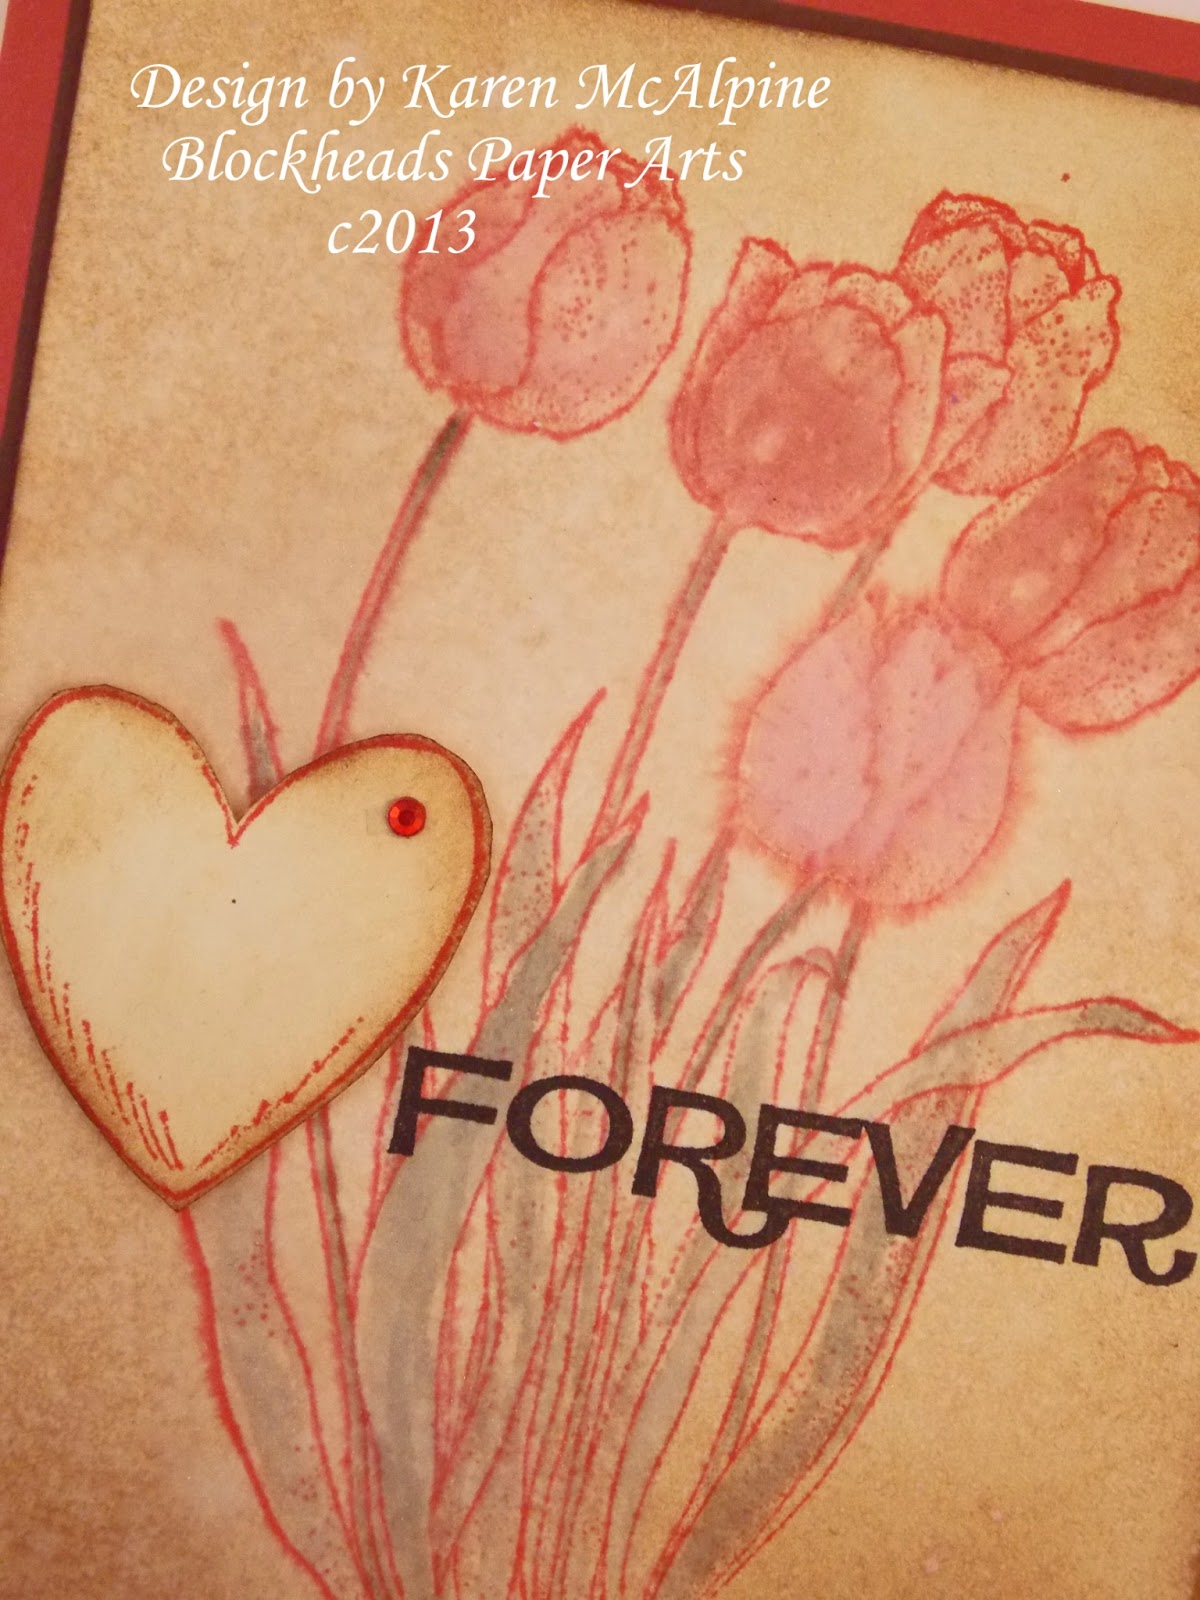
Forever Love with Blockhead Stamps

Hi Dreamers!
Back today with more Valentine's day love.  On this project, I used a floral stamp from Blockheads Stamps for the background, custom made Shimmer Spray, and Distress Markers.


Materials List:
Stamps: Large Tulips,  Love and Romance Half Sheet all from Blockheads
InksOnyx Black Versa Fine, Barn Door and Vintage Photo Distress Ink: Spun Sugar Distress Re-inker
Distress Markers
Sunflower Sparkle Perfect Pearls
Mini Misters
Spray bottle with water
Cardstock: red, brown, white
Red Rhinestone


Instructions:


  • Tip: Make your own Shimmer Spray with Perfect Pearls and Distress reinkers---- In a Mini Mister put a couple pinches of Perfect Pearls, three drops of Spun Sugar re-inker, and water.  Shake
  • Make card base from red CS
  • To make the background: Ink the Large Tulip stamp with Barn Door ink--spray the inked stamp with water --- just a few spritzes.  Now stamp onto the white CS  --gives a nice muted image. 


  • Color the Tulips with Distress Markers
  • Distress the white CS with Vintage Photo ink.  
  • Spray with the Perfect Pearls Shimmer mist spray and let dry or dry with heat tool.
  • Stamp "Forever" with Onyx Black ink
  • Stamp  heart (from Love and Romance Set) with Barn Door ink; cut out and distress with Vintage Photo
  • Add to card with dimensionals.
  • Place Rhinestone on heart


A few Love-ly Challenges for my Forever Love card:
Simon Says Stamp and Show: something messy
Card Mania: Love
Craft Your Passion: My valentine
Papertake Weekly: hearts and flowers
Top Tip Tuesday: Sweetheart and tip


Stay tuned for more Valentine fun the rest of the week!  Hope you are having a great day!  Love ya.
Karen

Tuesday, February 5, 2013

Valentine with Perfect Pearls and Blockheads Stamps

Hi Dreamers!
I am back after a few days off.  Spent Saturday shopping with my buddy, Sharon,.--Very fun.  Relaxed on Sunday and got a few things ready for Card Ministry, which was Monday night.  Hubby is home and not feeling well.  Some kind of bug, we think.  I made a big pot of chicken soup for him yesterday.  That always makes him feel better.

For the month of February, the Blockheads Design Team will be showing a few ways to use Perfect Pearls.  Blockheads is now carrying Perfect Pearls in the individual pots in some pretty new colors.  I used Sunflower Sparkle to make a shimmery spray!  And, since Valentines's day is next week, I went with a Valentine's/Love theme.


Materials List:
Stamps: Large Damask single (also available on the Feeling Regal Set),  Love and Romance Half Sheet all from Blockheads
Inks: Onyx Black Versa Fine, Barn Door and Frayed Burlap Distress Ink: Spun Sugar Distress Re-inker
Sunflower Sparkle Perfect Pearls
Mini Misters
Spray bottle with water
Cardstock: red, black, white


Instructions:

  • Make the Perfect Pearls Shimmer Spray: In a Mini Mister put a couple pinches of Perfect Pearls, three drops of Spun Sugar re-inker, and water.  Shake
  • Make card base from red CS
  • To make the background: Ink the Large Damask stamp with Barn Door ink--spray the inked stamp with water --- just a few spritzes.  Now stamp onto the white CS  --gives a nice muted image. 


  • Distress the white CS with Frayed Burlap ink.  
  • Spray with the Perfect Pearls Shimmer mist and let dry or dry with heat tool.
  • Stamp "Valentine" with Onyx Black ink
  • Stamp  heart (from Love and Romance Set) with Barn Door ink; cut out and distress with Frayed Burlap
  • Add to card with dimensionals.


Can you see the lovely shimmer the spray makes??!!  By making my own spray, I can have any color and intensity I like!  How fun is that??!!

And why not a few challenges!!
Pause, Dream, Enjoy: mostly red
Simon Says stamp: anything goes
Cheerful Stamp pad: Heart

Hope you are having a great day!  I will be back tomorrow with more Valentine's day inspiration!!
Love ya.
Karen