I am back today after a nice day of R & R with my good bud, Reem. We had pedicures, went to lunch, and did a little shopping. I feel all relaxed and ready to get back to work. I was in my studio all weekend creating several Christmas beauties.
I was working with one of the new Christmas sets from Paper Artsy available in the USA from Blockheads Paper Arts. This is one of those stamp sets that you just want to stamp, and stamp, and stamp. The detail is amazing.
I made a total of four cards....so far. I will be sharing them all with you through out the Holiday season.
And as an added bonus, I have a tutorial for you showing how I made the backgrounds. Here is the first card.

5 x 6 1/4"
Materials need to make the background and the card:
Stamps: Babushka Balloon Paper Artsy from Blockheads Paper Arts
Inks:
Onyx Black Versa Fine
Shabby Shutters and Forest Moss Distress Ink Re-inkers
Black Soot Distress Ink Pad
Stains: Tarnished Brass Distress Stain
Cardstock:
White, Cream, Red, and Green
Gold Ribbon
Craft Sheet
To Make the Background:
- Start with white CS and a Craft Sheet (a plastic bag would work too).
- Drop some of the reinkers onto the Craft Sheet
- Rub some of the Metallic Stain onto the Craft Sheet

I used Stormy Sky reinker in the photo and have finished cards made with that for later!
- Spray some water onto the inks
- Start pressing the cardstock into inks
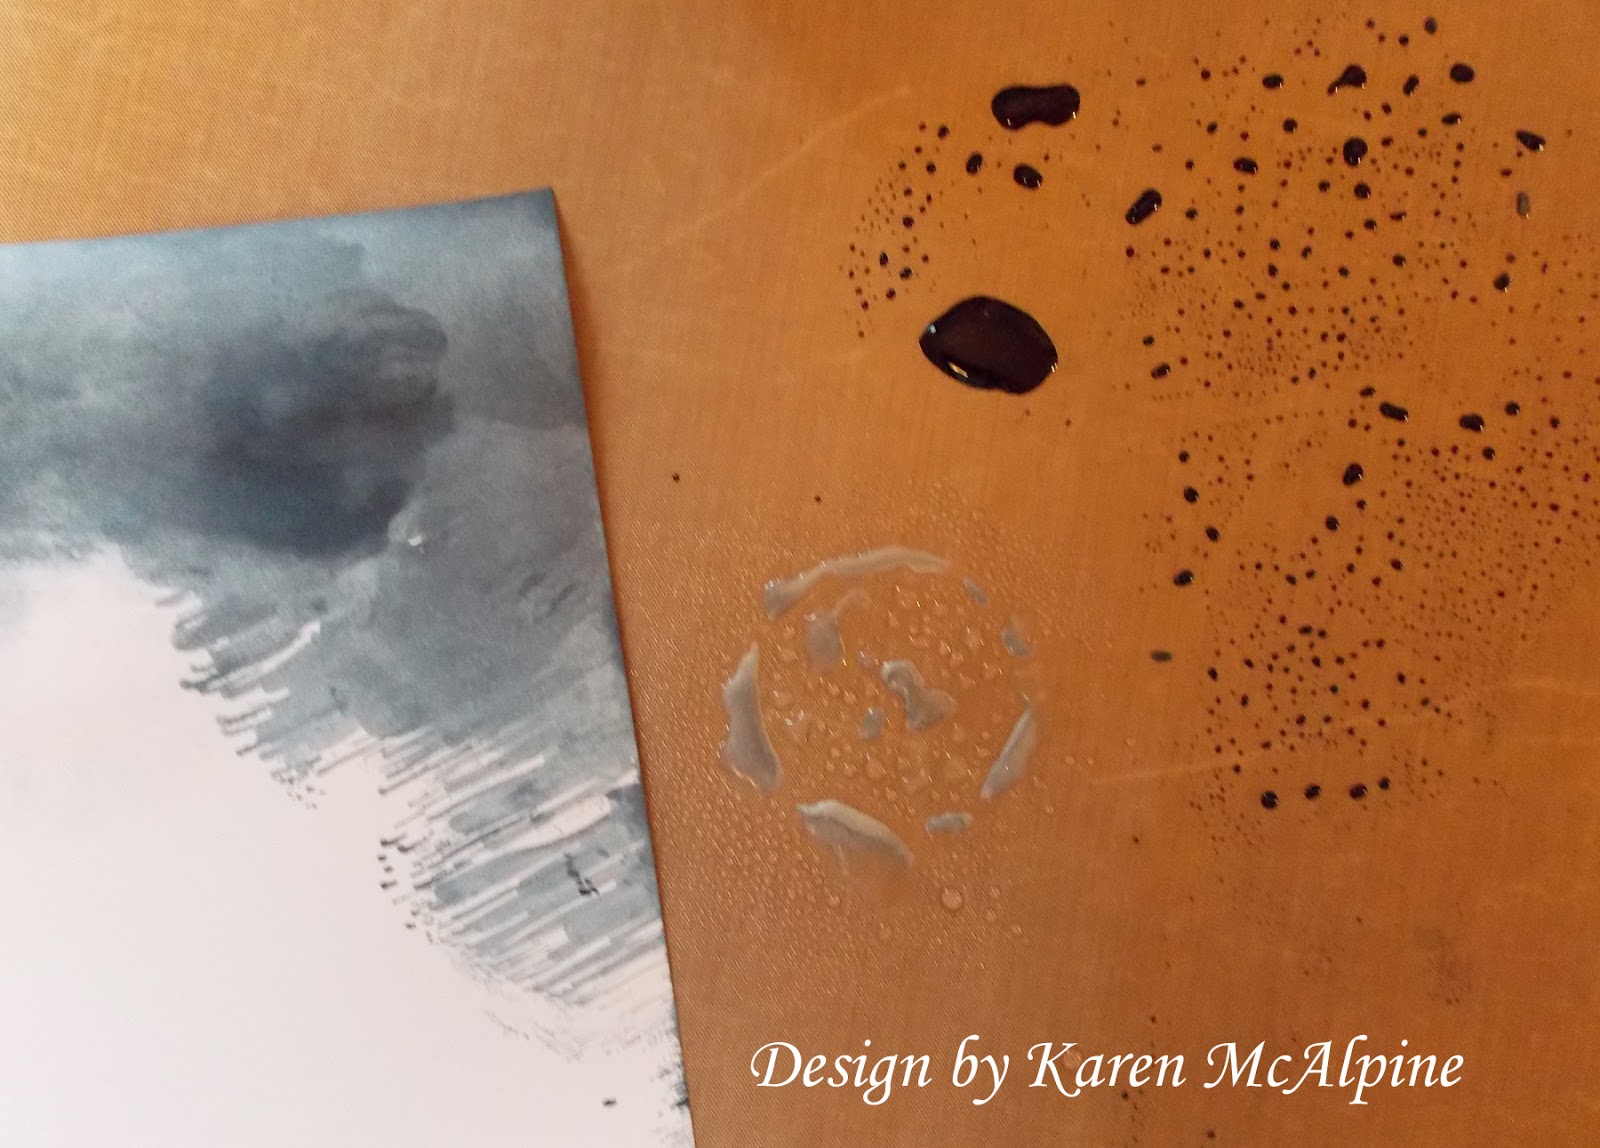
- You can blot the CS with a paper towel if the ink is too wet.

- Distress Markers also work for this Technique.

Close up of one of the backgrounds made with Weather Wood and Tumbled Glass Distress Markers, Broken China reinker, and Brushed Pewter Metallic Stain on Glossy CS.

Look how versatile this technique is. I made all these background by changing out the ink colors.

Now, back to our card:
- I choose the background made with the green inks and Tarnished Brass Stain
- Stamp the Balloon and Buildings stamps with Onyx Black Versa Fine onto the background.
- Trim to size and add to a green card base

- Stamp The Madonna on Cream CS with Black Soot.
- Layer onto Red CS
- Add to card front with dimensional adhesive

- Tie a bow in the gold ribbon and leave long tails
- Make several (LOL)
Challenges for my Magic Christmas Card:
Robyns Fetish: Anything goes
Crafty bloggers network: Christmas
Christmas Stampin: anything goes with Christmas
Just Keep on Creating: Christmas
Pennys challenge: lots of layers
Through the craft room door: anything goes #44
Stayed tuned for more of the Paper Artsy Christmas Cards and lots of other good things. Have a great day! Love ya
Karen
This is a beautiful card. I love how you did all the detailing. Thank You for sharing at Robyn's Fetish Challenge Blog.
ReplyDeleteMichelle (Design Team)
Gosh the end result is gorgeous Karen x
ReplyDeleteA lovely card and great tutorial too. Thanks for sharing with us at Penny's Paper-Crafty Challenges.
ReplyDeleteMags
x
Glorious card, and a great tutorial - clear and detailed - thank you, Karen! Easy to see you're feeling refreshed!
ReplyDeleteAlison x
hello, what a sweet and gorgeous christmas card, thanks to play with us at CSAYL, hope to see you next time, biz
ReplyDeleteVery nice tutorial! Beautiful papers.
ReplyDeleteThanks for the great tutorial for you lovely card, and thanks for sharing it on TTCRD!
ReplyDeleteBeautiful love your colours & great tutorial :D
ReplyDeleteThanx for joining us over at Crafty Bloggers Network Challenge
luv Ger x
CBN DT
We have a design team call please check out the page :D
Very nice Card and a lovely tutorial!!!Thanks for sharing with us at Penny's Paper-Crafty Challenges
ReplyDeleteThis is a beautiful card and a great tutorial. Thanks for joing Robyns Fetish challenge this week. Marlene DT
ReplyDeletePhenomenal! I really love this! The metallic distress stains are part of my DT allotment of goodies this time! I'm so excited!
ReplyDeleteHugs,
Leslie
Fab card! Great inking. Thankyou for joining us at Crafty Bloggers Network.
ReplyDeleteGeraldine M
CBN DT