Showing posts with label Paper Artsy. Show all posts

Saturday, November 23, 2013

Paper Artsy Stamps on Stenciled Background

Hi Dreamers!
Cold here today in Michigan.  We has a little dusting of snow this morning.  It is all melted now, but still cold.  So, let's warm things up a bit with a vintage style card.  I used Paper Artsy stamps on a background that I made with a Stencil/template and spray inks.


Materials List:
Stamps: Lynne Perrella set "Nina" from Paper Artsy
Inks: Ginger Adirondack, Perfect Plum - Stampin' Up
Distress Ink: Antique Linen
Spray inks in brown and purple ( Walnut ink and Tattered Angels)
CS: Kraft, cream, scrap of dark brown and purple
Template: Mini Harlequin - Crafters Workshop Templates
Fibers: Brown Twill - Jo Ann Fabrics; Purple Scalloped edged ribbon - Stampin' Up


Instructions:

  • Start by making the background --lay the template over the CS and spray with one color of ink
  • The way to get the depth and almost reverse image look to the background is to flip the template over onto a clean piece of CS without cleaning the template and spraying more ink.  
  • Let backgrounds dry


  •  Make a card base from Kraft CS
  • Stamp keys and  circle with Ginger and Perfect Plum inks
  • Add background to card base


  • Stamp the lady  on cream CS with Ginger ink
  • Tear out image and layer onto torn pieces of purple and brown CS


  • Add a piece of scallop edged ribbon and a tied piece of brown twill ribbon
  • Use some of the scraps to decorate the inside


Inside


********Challenges for my Paper Artsy Vintage Card:
Simon's Monday: mystery Technique
Paper Artsy: inspired by Liz's collage stamping
4 Krafty Girlz: anything goes


I have something special planned for the month of December.  Not going to tell you yet what it is!!  I want to surprise you.  LOL.  I have been working on "this" all month and am still working.  So, stayed tuned for that.  To finish out the month of November, I have one more vintage card with Paper Artsy stamps.  That project will be posted soon.  I hope you are having a great weekend.  Love ya.
Karen

Wednesday, November 20, 2013

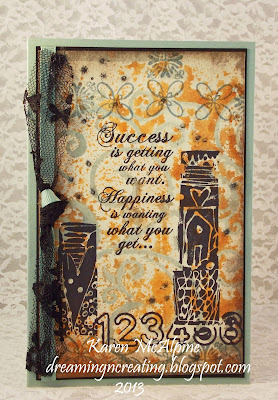
Making Backgrounds and Collage Style Stamping

Hi Dreamers!
As you know, I love to make my own backgrounds.  I have been at it again..... My project fits in perfectly with the Simon's Monday Challenge---A Mystery Technique.  Can you guess how I made the backgrounds???   I was also inspired by the guest designer over on the Paper Artsy blog to use stamps to create a collage effect.  


Have you guessed how I made the background?  Oh, I will tell you now.  Check out the list of materials and that will give you a clue.


Materials:
Stamps: Lynne Perrella's Pacific Queen and Hot Pick 1102--both from Paper Artsy Stamps
Ink: Jet Black Archival; Bordering Blue - Stampin' Up
Distress Ink: Pumice Stone
Spray inks and Glimmer Mists
CS: Cream, black, Sage Shadow _Stampin' Up (retired)
Crafters Workshop Template- Mini Capricious


Instructions:

  • Start by making the background --lay the template over the CS and spray with one color of ink
  • The way to get the depth and almost reverse image look to the background is to flip the template over onto a clean piece of CS without cleaning the template and spraying more ink.  
  • Let backgrounds dry


  • Stamp with black and Bordering Blue inks
  • Distress edges with Pumice Stone DI
  • Layer onto Black CS and a card base of Sage Shadow
  • Add ribbon and black lace


Inside


  • Add one of the pieces left over from trimming to the inside.  Still lots of room to write a note.


A few fun Challenges for my Paper Artsy Quote Card:
Simon's Monday: Mystery technique
Paper Artsy: be inspired by guest designer + PA stamp--I was inspired to create a project with a collage style stamping like the sample that Liz made on Tuesday.

I have two more Paper Artsy cards to share!  So, check back in a bit!!  See you soon.  Love ya.
Karen

Tuesday, April 16, 2013

Dreamy Blue Lady with Lynne Perrella and Blockhead Stamps

Hi Dreamers!
Missed you!  I was a bit busy over the weekend.  Spent a great day with my dear friend, Laurie.  Spent the day catching up and having a nice day!  So, now I am back and ready to get some blogging done.  Let's get all dreamy here in Dreamland today.  I have used a Lynne Perrella (Paper Artsy) stamp set that is available in the USA from Blockheads Paper Arts!


Materials List:
Stamps:
Pacific Queen Paper Artsy
Dream Sentiment-Verses Full Sheet from Blockheads
Ink:
Tuxedo Black Memento; Faded Denim  and Spun Sugar Distress; Blue Pigment
Distress Stains: Faded Denim 
Clear Embossing Powder
Black Bakers Twine
CS: blue, white and black


Instructions:

  • Make a card  from blue CS and layer with black CS
  • On white CS, stamp the Lady with blue pigment ink and heat emboss with clear powder
  • Swipe the Distress Stain along the edges of the stamped piece
  • Add a little Spun Sugar Distress ink to the cheeks.  I just used my finger to apply the ink.


  • On White CS, stamp the banner from the Pacific Queen set with Tuxedo Black ink
  • Cut out the border
  • Stamp the word Dream with Faded Denim Distress ink on white CS and cut out in the shape of a banner flag; distress with the same ink
  • Add the banner to the card with dimensional adhesive
  • Glue a piece of bakers twine onto the banner
  • Stamp sun with Tuxedo Black ink and add with dimensional adhesive


I went a bit crazy on the inside of the card!  I think I can still write a short note if I use a black pen.  LOL


  • Stamp the Lady with Faded Denim stamping off once;  apply the Faded Denim to the edges.  
  • Stamp the suns with Tuxedo Black ink stamping off once
  • Layer with Black CS

Inside


Love these Lynne Perrella images!!  Check out the rest of the stamps on the set!  Just so cool!

I would like to enter my Dreamy Banner Lady in the Paper Artsy Blog Challenge!!
Paper Artsy: use Paper Artsy Stamps, Fresco Paints, Wood or Paper Mache 
Take a Word: vintage Beauty
Tomorrow I will be back with something fun from Lost Coast Designs!  See you then. Love ya.
Karen


Tuesday, March 12, 2013

Dreaming of Far-a-way Places with Paper Artsy

Hi Dreamers!
I am back after a few days off.   We had a really nice weekend here in Michigan, weather wise.  Temps in the 60's.  So, took advantage of that and spent some time outside.  Back in the 30's with snow flurries today! Crazy.
 This month, the Blockheads' design team has picked the theme---Travel.  We all wanted to show you fun ways to use your travel themed stamps.  The project for the today, makes me think of far-a-way places.  I used some dreamy stamps from Paper Artsy (available in the US from Blockheads).


Materials List:
Stamps: Paper Artsy-LPC010 ( Nina) and LPC013 (Maria);
Blockheads stamps- Willow single or on the  Japanese Musicians half sheet
Inks: Onyx Black VersaFine, Cottage Ivy Memento, Forest Moss and Tumbled Glass Distress Ink.
Spray Inks: yellow, blues and blue greens
Mini Splats Crafters Workshop Template
Mint Green Wide Satin Ribbon
Pearls
Needle and thread


Instructions: 
  • Begin by making the background with the Crafters Workshop Template and spray inks.  (For more info on making this type of background see my tutorial here.)  
  • Stamp the lady with Onyx black ink.  Make a mask and stamp the Willow stamp with Cottage Ivy ink on the edge.
  • Stamp the circular stamp with Cottage Ivy and Onyx Black using the mask over the lady image.  
  • Distress the edges with Distress ink.
  • Layer with Teal, aqua, and black CS


  • Make the poofy ribbon arch on top of the card.
  • Run a few hand stitches on the ribbon starting and ending stitches a few inches from the ends.
  • Pull up the thread to gather.
  • Glue ungathered ends to underside of card front.


  • Tie a knot in another piece of the ribbon and add to lower edge.
  • Add Pearls


Let's Travel around blog land and enter a few challenges!!
Simon Says stamp and Show: shabby chic
Flourishes: add some green
Really Reasonable Ribbon: ribbon and green
Paper Artsy: use PA stamps, or wood, or paints

Thanks for taking the journey to far-a-way places!  Stay tuned this week for more fun projects!  I am going to try and get a few Easter cards made this week too.  See you soon.  Love ya.
Karen

Tuesday, March 5, 2013

Dreamy Tags with Paper Artsy Stamps

Hi Dreamers!
This month the Designers for Blockheads stamps will be showing fun ways to use your travel themed stamps.   That would include stamps with transportation images, far away places, luggage, tickets, that sort of thing.  I have named my projects for today Dream Travel.  I used stamps by Paper Artsy available in the USA from Blockheads Stamps.


Materials List:
Stamps: Paper Artsy by Lynne Perrella LPC013-Maria and LPC010-Nina from Blockheads Stamps
Inks: Onyx Black Versa Fine; Pistachio Memento; Forest Moss Distress Ink Ranger
Inks for the Background: Shabby Shutters and Forest Moss Reinkers; Antique Bronze Metallic Distress Stain from Ranger
White CS 
Ribbon, Lace, pearls


Instructions:

  • Make the background by placing the reinkers and metallic stain on a Craft sheet.  
  • Spray a little water onto the inks
  • Press White CS into the inks
  • When dry cut into a tag--5 1/2" x 2 1/2"


  • Stamp the Paper Artsy images onto the tags with Onyx Black ink
  • Stamp the circle stamp with Pistachio ink


I wanted some kind of a border on the edge of the tags.  So, I partially stamped the keys from LPC010-Nina stamp set along the edges.  Here is the second tag.


Love the dreamy images!  When I look at the images, I think that the person is dreaming of being in this far away exotic place.  Hence the title "Dream Travel"


A few Super fun Challenges for my Dream Travel tags

Quirky Crafts: no dp, make your own backgrounds
Sandy's Crafty Creations: green
Really Reasonable Ribbon: ribbon + green
Simon Says stamp: anything goes
Loves Rubber Stamps: anything goes

Stayed tuned this week for some projects made with Lost Coast Design Stamps , The Stampsmith, and lots more fun!!  LOL.  I hope you have a great day!  Love ya
Karen

Saturday, December 8, 2012

Holiday Wrapping Paper and Card with Paper Artsy Stamps

Hi Dreamers!
Well, since I pretty much have all my Christmas cards done.....(still not mailed.....Eek!) I have turned my attention to some gift oriented projects.  I don't always use a gift bag and sometimes like to wrap a package.   And, that means I need some really cool vintagey paper.  "But, you can't buy any really cool vintagey wrapping paper", you say.  When does that ever stop me!  So, I made some vintagey wrapping paper using a large sheet of brown packing paper and Paper Artsy Stamps.  You know, the kind of paper that comes stuffed into the boxes of my mail orders.  Don't throw that paper away!  It has lots of uses besides being a comfy cushion for orders.


Card and Wrapped Package


This is what I started with:
The Brown Packing paper

Materials List:
Stamps
Babushka Balloon Paper Artsy available from Blockheads Paper Arts
Ink
Rich Cocoa, Northern Pine, and Espresso Truffle - Memento
Vintage Photo Distress - Ranger
Brown Packing Paper
Green Cardstock
Ribbons

Instructions:
  • Ink the Balloon stamp with all three of the Memento inks in this order: Rich Cocoa, Northern Pine, Espresso Truffle---then stamp on the paper.
  • Repeat several times to cover the paper.  
  • Ink the Tree part of the Madonna stamp with Northern Pine.    
  • Place a piece of scrap paper down to mask the area and stamp the trees in a row-top and bottom


  • You can continue stamping your paper to cover as much of it as needed to wrap the package.  
  • Distress the paper with Vintage Photo ink


Now wrap the package


Close up of package


 And, while you are stamping, you might as well stamp a smaller piece for a matching card.  This card measures 4 3/4 x 7 1/2 inches.


  • Layer the stamped piece with Cardstock and add to a Kraft CS base


  • Wrap some green sheer ribbon around card and tie in a knot
  • Tie gold ribbon around green sheer ribbon
  • Add some red bling


See how muted the inks look on the brown paper??  You Like??  I like this look for vintagey projects.  Now you can wrap your packages with this very affordable wrapping paper.

Challenges For my wrapping paper and card:
Card Crafters Circle: Christmas Celebrations
Crafty Mess: Vintage Christmas
Fat Pages with attitude: anything goes
Jingle Bells rock: Christmas
Just add ink: balloons
Mark's Finest: red and green
Sugar Creek Hollow: stencils or masks

Let's see, what do I have planned for tomorrow?  Oh, how about a Christmas Postcard with Character Construction!!  It's pretty cute.  See you then!  Love ya.
Karen

Friday, December 7, 2012

Vintage Joy Holiday Card with Paper Artsy

Hi Dreamers!
I am back today with a vintagey Holiday card made with Paper Artsy stamps....available in the USA from Blockheads Paper Arts!  I added lost of texture  and layers on the card to showcase this fab image.


Materials List:
Stamps: Holiday Theatre Paper Artsy from Blockheads Paper Arts
Ink:
Tuxedo Black Memento
Vintage Photo Distress -Ranger
Spray Inks:
Java Walnut Antiquing Solution
Gold
Chicken Wire Crafters Workshop Template
5 x 7 Embossing Folder
Cardstock: Dark Green, Cream
Red Rhinestones
Ribbons


Instructions:

  • Make a card base from dark green CS 
  • Lay the Crafters Workshop Template on the card and spray on the inks
  • Distress with Vintage Photo
  • Run a rectangle of the same dark green CS through the Cuttlebug with the 5 x7 folder
  • Run the Vintage Photo ink pad over the dry embossing and add to the card base


  • Stamp the image with Tuxedo Black ink on cream CS and distress heavily with Vintage Photo
  • On cream CS, use the template again with the spray inks--stamp the image again on this piece
  • Cut a rectangle from this piece and place over the other stamped piece.  
  • Distress with Vintage Photo some more and add to card front


  • Tie a bow in the gold sheer ribbon--tie a  piece of red ribbon around the knot
  • Add the red rhinestones


How about a few Challenges for my Vintage Joy Card??!!
Fussy and Fancy: I love Christmas
Aud Sentiments: anything goes
Dutch Dare: non traditional colors
Craft us Crazy: Christmas or fav embellishment

I will be back tomorrow with another Paper Artsy Holiday  project and on Sunday you will find more Christmas inspiration with a Holiday Postcard with Character Construction.  Have a great Friday!  Love ya.
Karen

Tuesday, December 4, 2012

Vintage Christmas Box with Paper Artsy

Hi Dreamers!


A happy hello to my new followers!!  And an extra hello and thanks to visitors and regulars.  Love all your comments...some are quite funny and really make me chuckle.  LOL  Blogging is so entertaining!  LOL  So, hello all and today we have a pretty vintage box.  The stamps are from Paper Artsy available in the USA from Blockhead Paper Arts.  Can you guess what the box is covered with??  Take a look.


Top


Front


Materials List:
Stamps:
Holiday Theatre -Paper Artsy
Grunge It Up - Blockheads Paper Arts
Inks: 
Pearlescent Poppy and Cosmic Copper - Brilliance
Vintage Photo Distress - Ranger
Pioneer Glue Stick
White Tissue Paper
Paper Mache Box
Large Beads
Large Gems
Sealer - Plaid Royal Coat


Top Detail


Instructions:
  • Smooth out a piece of White Tissue Paper
  • Stamp the Angel/chicken Joy image on the tissue paper with Pearlescent Poppy ink.
  • Stamp once for the top
  • Stamp multiple times in a horizontal row for the sides
  • Stamp the Mandolins from the Holiday Theatre set and the Swirl from the Grunge It Up set with Cosmic Copper in the empty areas around the main image


 Top Detail


  • Heat set the inks
  • Apply Pioneer Glue stick to box
  • Place the tissue paper over the box top
  • Trim tissue leaving enough to wrap to inside
  • Repeat for sides


  • Pat some of the Cosmic Copper ink onto the corners
  • Apply Vintage Photo Distress ink to all areas

Bottom


  • On bottom of box, glue a piece of white CS
  • Add four large beads for feet
  • Paint box with one layer of the sealer
  • When sealer is dry, glue ribbon around box lid and add the large gems


Detail of front 


Did you guess that the box was covered with Tissue Paper??  How fun is that.  You could use any color tissue you wanted.  I will fill this with something sweet and will have a nice little gift for someone.  I really should make a whole bunch of these.  Oh, wouldn't it be cute to put some truffles in the box and lay a gift card on top.  I think I will do that.  LOL

Some fun Challenges for My Vintage Christmas Box:
Stampin for the Weekend: Texture
Totally Papercrafts: anything but a card
Pile it On: embellishments
Anything But a Card: anything goes-no cards
Live and Love Crafts: anything but a card
Sugar Creek Hollow: vintage + distressing
Artistic Inspirations: anything goes
Flourishes: an altered item

See you tomorrow for WOYWW  and some photos of my cards for the sale on Friday.  Love ya.
Karen