Saturday, March 29, 2014

Die cut Leaves Variations-

Hi Dreamers!
I hope you checked out the Lost Coast Design/Stencil Girl Blog Hop!!  You still have time to leave comments for a chance at the prize (Until March 30) !!  See my post here for the Blog Hop.  Lots of awesome projects by all the team members.

Today I am changing things up a bit with some all occasion cards.  I have been mentioning how I am making all those charity cards...Well today I am going to share a few of those with you.  I kept  a couple for myself too.  It is pretty easy to just make one more card when you are making multiples.

I started out by die cutting and die cutting.....I kept cutting all these leaves in different colors.
Then, I cut lots of slices of decorative papers in these aqua green/blue colors

The four cards below are going to Operation Write Home and Card Care Connection. I made multiples of these that I did not photograph because they were very similar.


I layered the leaves onto decorative paper backgrounds.  I made lots of variations with different sentiments. I tailored the sentiments to the specific charity.


Detail


I got tired of making those, so I decided that a doily would look good with the die cut leaves.  I still had a big pile of the leaves and wanted to used them.  So, here is where the design went......


This sentiment is from My Sentiment Exactly (MSE! is back in business now with new owners.)  I am so glad they are back.  I love their sentiments!!


Detail


And, then the design changed into this card below.  I had some leftover die cut ovals too.  Don't throw those out.  They always come in handy.   I added a bird frame from Stampin' Up. 


A few fun Challenges for my Die Cut Leaves Cards
Allsorts: use those dies
Alphabet Challenge: D is for Diecuts
Crafty Catz Weekly: anything goes
Cut It Up: anything goes + die cuts
Sister Act: anything goes
Creative Moments: anything goes with optional --wings


I hope you are having a great weekend!!  I will be posting more of the Charity cards so come on back and take a look!  Love ya.
Karen

Monday, March 24, 2014

Blog Hop--Lost Coast Design Teams Up with Stencil Girl!!

April 2 update: The Blog Hop Winner is PK SEWS!  

Congrats, PK!!!!


Hello Everyone,
You have arrived at Karen's blog:

Welcome to the Lost Coast Design/Stencil Girl Blog Hop!!


The Design Teams of Lost Coast Design and Stencil Girl have joined forces to bring you lots of inspiration and project ideas!  
We have all made projects using Stamps from Lost Coast Designs and Stencils from Stencil Girl.
Visit all the blogs along the hop and leave a comment!  All commenters will be entered in a drawing and one lucky commenter will win: 


Two  9 x 12" Stencils from Stencil Girl And  $25 Gift Certificate from Lost Coast Designs


Hoppers will have one week to leave comments (Until Sunday, March 30).  The more comments--the better the chances of winning the prize package.  The winner will be announced April 2


*****For my project, I used a Stencil (Gigi D150) and a Gelli Plate to make backgrounds.  I then used the paper to make a cover for an accordion book which I decorated with lots of Lost Coast stamps.   I also made a tag incase I want to give this as a gift.  Take a look at the finished projects.


Materials List:
Stamps: All from Lost Coast Designs--
Stencil Girl Stencil --Gigi S150
Inks: Memento Rich Cocoa, Rhubarb Stalk, Toffee Crunch, Espresso Truffle
Archival Jet Black and Coffee
Acrylic Paints
CS: Cream and white
Other Tools:
Score Pad
mono printing Plate
Brayer
Martha Stewart Edge Punch
Ribbons, lace, bakers twine, gold elastic cording

Instructions:
I will start by showing how I made the background papers with the Gig Stencil and mono printing Plate
  • Brayer acrylic paints onto the mono printing Plate--I used red, white, and brown


  • Press the Stencil into the paint


  • Press a full sheet of White CS onto the mono printing Plate.  Run your hand across the entire surface to pick up all the paint


  • Lift the paper from the mono printing Plate


Look at the gorgeous papers!!  I usually make a stack since I have a big  mess anyway.  Be sure to wash the paint off the stencils!!


Select your favorite piece of the paper.   I found this book pattern in the, "Mini Books".  I changed the size a bit.  Here are the measurements I used.

  • Cut the paper 5.5" x 10"
  • Score the piece at 3",   3.25",   6.75",  7"


  • Cut the corners off one end


  • On the opposite end, cut a slit in the paper about 1.5" from the edge and  .75" from the top and bottom


  •  Fold on the score lines and it will look like this


  • When closed the cut end will slip inside the slit


  • Make the pages from Cream CS: Cut Two at 5.25" x 9.75"
  • Score each at 3.25"  and   6.5"
  • Fold like an accordion


  • Over lap the ends and glue securely


  • Decorate the cover and pages with stamping: use the Archival ink on the paint surfaces. 
  • Stamp The Divas with dye ink on Cream CS and cut out the images
  • Use smaller pieces of the background papers to decorate the pages
  • Let you imagination go!!


Cover
  

  • To keep a unified look use stamps with the same theme--like the Divas here
  • I stamped the same Mums border in the same color ink on all the pages to tie everything together


Pages


  • Add bits of ribbon and lace, some bakers twine too

Page


Page


  • When pages are all decorated, glue to the center of the cover and fold in the pages
  • Add some colored paper to inside of the cover if desired--Make sure to cut the slit in the colored paper too.


  • Fold the cover closed tucking in the flap.  I added a piece of gold elastic cord.

Now, continue on the hop by visiting Leslie Tucker Jenison's Blog  and checking out her great project!!

Don't forget to leave a comment!


Blog Hop Roll


  • StencilGirl Talk
  • LeighSBDesigns
  • Mary Beth Shaw
  • Mary Nasser
  • Cherri Robb
  • Judy Shea
  • Bibiana Martinez-Ziegler
  • Linda Kittmer
  • Carolyn Dube
  • Leslie Turner
  • Janet Joehlin
  • Karen McAlpine ---YOU ARE HERE
  • Leslie Tucker Jenison
  • DominoARTblog
  • Lindsay Weirich
  • Maria McGuire


  • Thanks for visiting!!  Hope you have fun looking at all the other fab projects!!!
    Karen

    Thursday, March 20, 2014

    Lavender Angel Mini Card


    Hi Dreamers!
    I have had  a busy week!  I am still making the cards  for Operation Write Home and Card Care Connections.  I have not photographed any of the cards yet, but will share pics with you when I have them.  I have over 100 cards now!!  

    *******Upcoming Event:
    Lost Coast Design is partnering with Stencil Girl for an exciting blog hop on March 24!!!!  There will be lots of projects by the Design Teams from Lost Coast Designs and Stencil Girl!!  And Prizes!!  Stayed tuned for that on Monday!!


    I do have a card for you today too!  I made a mini card using a pretty silhouette stamp from Lost Coast Designs.  I wanted something that would attach to a gift bag.  So I made this long and narrow card --about 2.5 x 5 inches.  Take a look.


    Materials:
    Stamps: Silhouette Angel and Iron Work Border from Lost Coast Designs
    Ink: Rhubarb Stalk Memento
    Distress Stains: Picket Fence, Worn Lipstick, and Tarnished Brass
    CS: Almost Amethyst, Barely Banana, Perfect Plum - Stampin' Up
    Liquid Pearls: Pale pink
    Corner Rounder punch
    Hole Punch
    Ribbon
    Pale Purple Tulle


    Instructions:

    • Make a long narrow card from Barely Banana textured CS
    • Round corners of each layer
    • Distress the edges with Worn Lipstick Stain
    • Stamp the Silhouette Angel with Rhubarb Stalk ink on Amethyst CS
    • Stamp the Iron Work Border stamp with Worn Lipstick Stain.  
                 TIP:  To stamp with Distress Stains -- put the stain on a craft sheet.  Pat the stamp into the Stain to "ink" up the stamp.  Stamp onto  background


    • Add smudges of Picket Fence and Tarnished Brass Distress Stains
    • Layer stamped piece with Perfect Plum CS
    • Add to card base
    • Punch a hole in upper corner
    • Tie the ribbon through the hole
    • Add a line of glue to the back of the card and press a strip of tulle into the glue pleating as you go
    • Add a piece of scrap CS to the back of card to cover the glue and tulle edges
    • Apply the Perfect Pearls to the edges of each layer
    • Add a few drops of Perfect Pearls in the corners--Let the Perfect Pearls dry.


    A few fun challenges for my Angel Mini Card:
    The Shabby Tea Room: anything goes
    Crafting for all Seasons: no Designer Papers
    Crafting by Design: use a ribbon
    Aurora Wings: anything goes
    Created with Love: girly
    4 Krafty Girlz: anything goes


    Happy first Day of Spring!!  We are getting some Spring-like weather...it is not snowing!  LOL!  Well, it was 49 degrees  (F) yesterday. I can see the ground now too as a lot of the snow has melted.  Can't wait for the plants to start growing!  I hope you are having a lovely Spring day!!
    Karen

    Wednesday, March 12, 2014

    Card Drive for Emma!!

    IMG_0385


    Hi Dreamers!
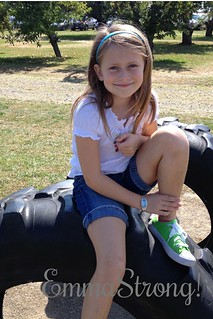
    Today I will be sharing the 6 cards I made for Emma.  Kelly Bertram is hosting this card drive for 7 year old Emma who has Leukemia and will be going through treatment over the next two years.  Kelly would like to collect enough cards to give Emma a card each week throughout her treatment.  Check out all the details on Kelly's Blog here.  

    Let's look at the cards!


    I used a variety of cute stamps to make these cheerful cards.  Emma's favorite colors are green, purple, and blue.  I stuck with those colors for the most part.  But, how could I make cards for a little girl without using pink??!  I could not.  LOL   All the images are  colored with Copic Markers.


    • Penny Black stamp and Debbie Mum DP


    • Stampavie Stamp and Debbie Mum DP


    • My Favorite Things stamp and Debbie Mum DP


    • My Favorite Things stamp and Debbie Mum DP


    • My Favorite Things stamp and My Mind's Eye DP


    • Stamps Happen stamp and Debbie Mum DP

    The cards will go out in the mail on Friday.  Kelly will collect the cards and hand deliver them to Emma's family.  I could go with lots of layers and ribbons since I didn't have to worry about them going through the mail individually.  That's the way I like it!  LOL  Sometimes you really have to rein in the bumpiness for mailing considerations.   Check out Kelly's blog if you would like to make a few cards for Emma!!
    Kelly and a bunch of her friends are having a blog hop to spread the word about this card drive.  The first stop is Amy's blog.
     
    ************Challenges for Emma's Cards:
    Crafty Hazelnuts Pattern Paper: use patterned paper
    My Craft Spot: cute critters
    Papertake Weekly: bingo--I used Ribbon, Free, and punched shapes
    Tip Top Tuesday: use 3, 5, or 7 of something----I used 3 main colors on each of my cards
    Crafty Dee bowz: a handmade bow and anything goes
    Use Your Stuff: animals
    7 Kids College Fund: anything goes + die cuts and a stamp they sell---I used My Favorite Things
    Simon's Wednesday: Mom or special girl


    Up next in Dreamland:  I will have a pretty silhouette angel mini card up next with Lost Coast Design stamps.  And more charity cards!!!  I have a bunch ready for Operation Write Home and Card Care Connection.  Stay tuned for those!!  See you soon.  Love ya
    Karen

    Tuesday, March 11, 2014

    Vintage Apron White on White Card

    Hi Dreamers!
    I am still busy making cards for cards drives and charities.  Tomorrow I will share 6 cards I made for a card drive...check back tomorrow for those.  I have made about 50 cards so far!

    For today, let's look at my vintage apron White on White card.  I stamped the Misses' Apron stamp from Pink Persimmon  and layered and layered in different shades of white and cream with  lots of textures.


    Materials:
    Stamp: Misses' Apron from Pink Persimmon
    CS: Whites and Cream - smooth and textured; Wrinkled Paper from Snickerdoodle Scarps
    DP: Cream Patterned from SEI
    Ink: Espresso Truffle Memento
    Embossing Folder: Eiffel Tower Tim Holtz
    Leaf die cut: Sizzix
    Edge Punch
    Paper flowers
    Pearls


    Instructions:

    • From the Patterned Paper make a large card base--mine is 5.75 x 6.75 inches
    • Cut four layers from various cream and white CS
    • Dry emboss one of the layers
    • Edge punch a strip of white CS


    • Assemble all the layers
    • Stamp the Aprons on White CS and add to the card front
    • Die cut the leaves from white and cream CS and add to card
    • Add the flowers and pearls


    **************How about a few fun challenges for my White on White Vintage card:
    Papertake Weekly: bingo----I used Gems, Die cuts, Flowers.
    Cheerful Stamp pad: anything goes
    Card Mania:something new---I used my new stamp-Misses' Apron
    Love to Create: anything goes
    Crafty Hazel nut Patterned paper: use patterned paper
    Emergency Crafters: flowers


    I just love this stamp!!  Check out the other card I made with Misses' Apron here.  Really a versatile stamps!! And, you know me and vintage stamps---major love affair!!  LOL

    Okay, so next time I will show you the cards for Emma's Card Drive.   I have 6 cute cards fit for a sweet little girl!!  I will have details on the card drive too.  See you then!!  Love ya.
    Karen

    Wednesday, March 5, 2014

    Shabby Chic Apron

    Hi Dreamers!
    Let's get shabby today--Shabby Chic that is!  I picked up some new stamps the other day from Pink Persimmon.  Some of them are vintage in nature---are you suprised??!!   This stamp is called Misses' Apron.  I could not wait to ink up this lovely vintage apron image.  I already made two cards  with the stamp.  I will share the second card later in the week.  So, let's look at today's  card.


    Materials:
    CS: White, Kraft -TPC, Textured Brown -Bazzill
    Ink: Mushroom - Adirondak to stamp with
    Distress Inks: Anitque Linen, Frayed Burlap
    Distress Markers: Antique Linen, Old Paper
    Fabri-Tac Glue
    Ribbon: Black- Stampin' Up
    Black Bakers Twine
    Lace
    Buttons


    Instructions:

    • Make a 4.25 x 4.75" card from Kraft CS
    • Stamp the Aprons on White CS
    • Color Aprons with Distress Markers
    • Tear out and distress the edges with Distress inks
    • Layer onto a torn piece of textured Brown CS


    • Glue two peices of Lace to the edge of the card base--I used Farbri-Tac glue for the fibers
    • Glue  the stamped piece down onto the card base
    • Add the Black ribbon covering the edges of the laces
    • Wrap twine around card and tie in knot
    • Add the buttons


    Great image!  I can use this card for a note to a friend, thinking of you, or a just saying Hello kind of card.


    *************How about a few challenges??!
    Challenges:
    Crafting by Design: anything goes
    House of Cards: cute or Shabby Chic + buttons
    Perfectly Rustic: shades of one color
    Challenges 4 Everybody: Anything goes
    Dream Valley: vintage
    Eceltic Ellapu: vintage
    Fashionable Stampers: anything goes

    Next up in Dreamland:  I will have the second Card made with the Apron Stamp.  It is a white on white with lots of textures and layers.  So, stay tuned for that!  I hope your day is going well!  I better get a move on and make a bit of dinner!  See you soon.  Love ya.
    Karen

    Tuesday, March 4, 2014

    Masculine Sympathy Card and a Bonus Card

    Hi Dreamers!
    I have been busy in the craft studio making cards all week.  I have decided to make some more charity cards.  I am making cards for two charities this month---More on that in later posts.

    Last week I, unfortunately, needed a sympathy card for a good friend whose mother passed away.  I wanted it to be masculine,of course.  I picked some dark decorative paper and did a little stamping on it.  And, added a die cut with sentiment.    I made a second card with my working sample.  I thought I wanted a tree on this card, but I did not like the tree.  The piece with a tree, however did make a nice smaller card (at the bottom of this post).


    Materials:
    CS: Gray
    Decorative Paper: Brown (K&Company), Stripe, textured medium and light gray (the solids were on the reverse of the stripe)
    Stamps: all from Stampin' Up


    Instructuions:

    • Make a 5 x7 inch card from gray CS
    • Add a strip of the striped DP
    • On dark brown DP stamped the diamond background stamp with a dark brown ink


    • Die cut two labels from the textured DP
    • Stamp the sentiment on the light gray label
    • Layer the labels on top of each other and add to the card front


    Bonus Card:
    This is the card I made with my sample.  I added a tree stamp as well as the diamond background stamping.
    CS used: teal -Bazzill; Chocolate Chip and Black - Stampin' Up.  So, a nice litttle bonus card from the left overs.


    Challenges:
    613 Avenue: anythign goes + use your stash
    Fashionalbe Stamping: anything goes
    That Craft Place: anything goes
    Cards 4 Guyz: nature
    Bloggers challenge: sympathy


    Next time I will have a shabby chic card for you!!  Stayed tuned for that.  Hope you are having a great day.  See you soon.  Love ya.
    Karen