Showing posts with label Angels. Show all posts

Monday, June 23, 2014

Pretty Angel Cards

Hi Dreamers!
Crazy busy week --again.  Trying to catch up all the things that were put on hold while planning the bridal shower.  So, I am getting caught up now.  I did the weed whacking and trimmed the shrubs on Saturday.   Cleaned the house during the week.  And, had time to go to a stamp camp with Suzanne Everett to check out the new Stampin' Up catalog.  That was fun!  Stopped at the mall on the way to Suzanne's and did my makeup shopping for the year.  LOL  I don't get to the mall that often.  Wanted to try the new Bare Minerals liquid makeup.
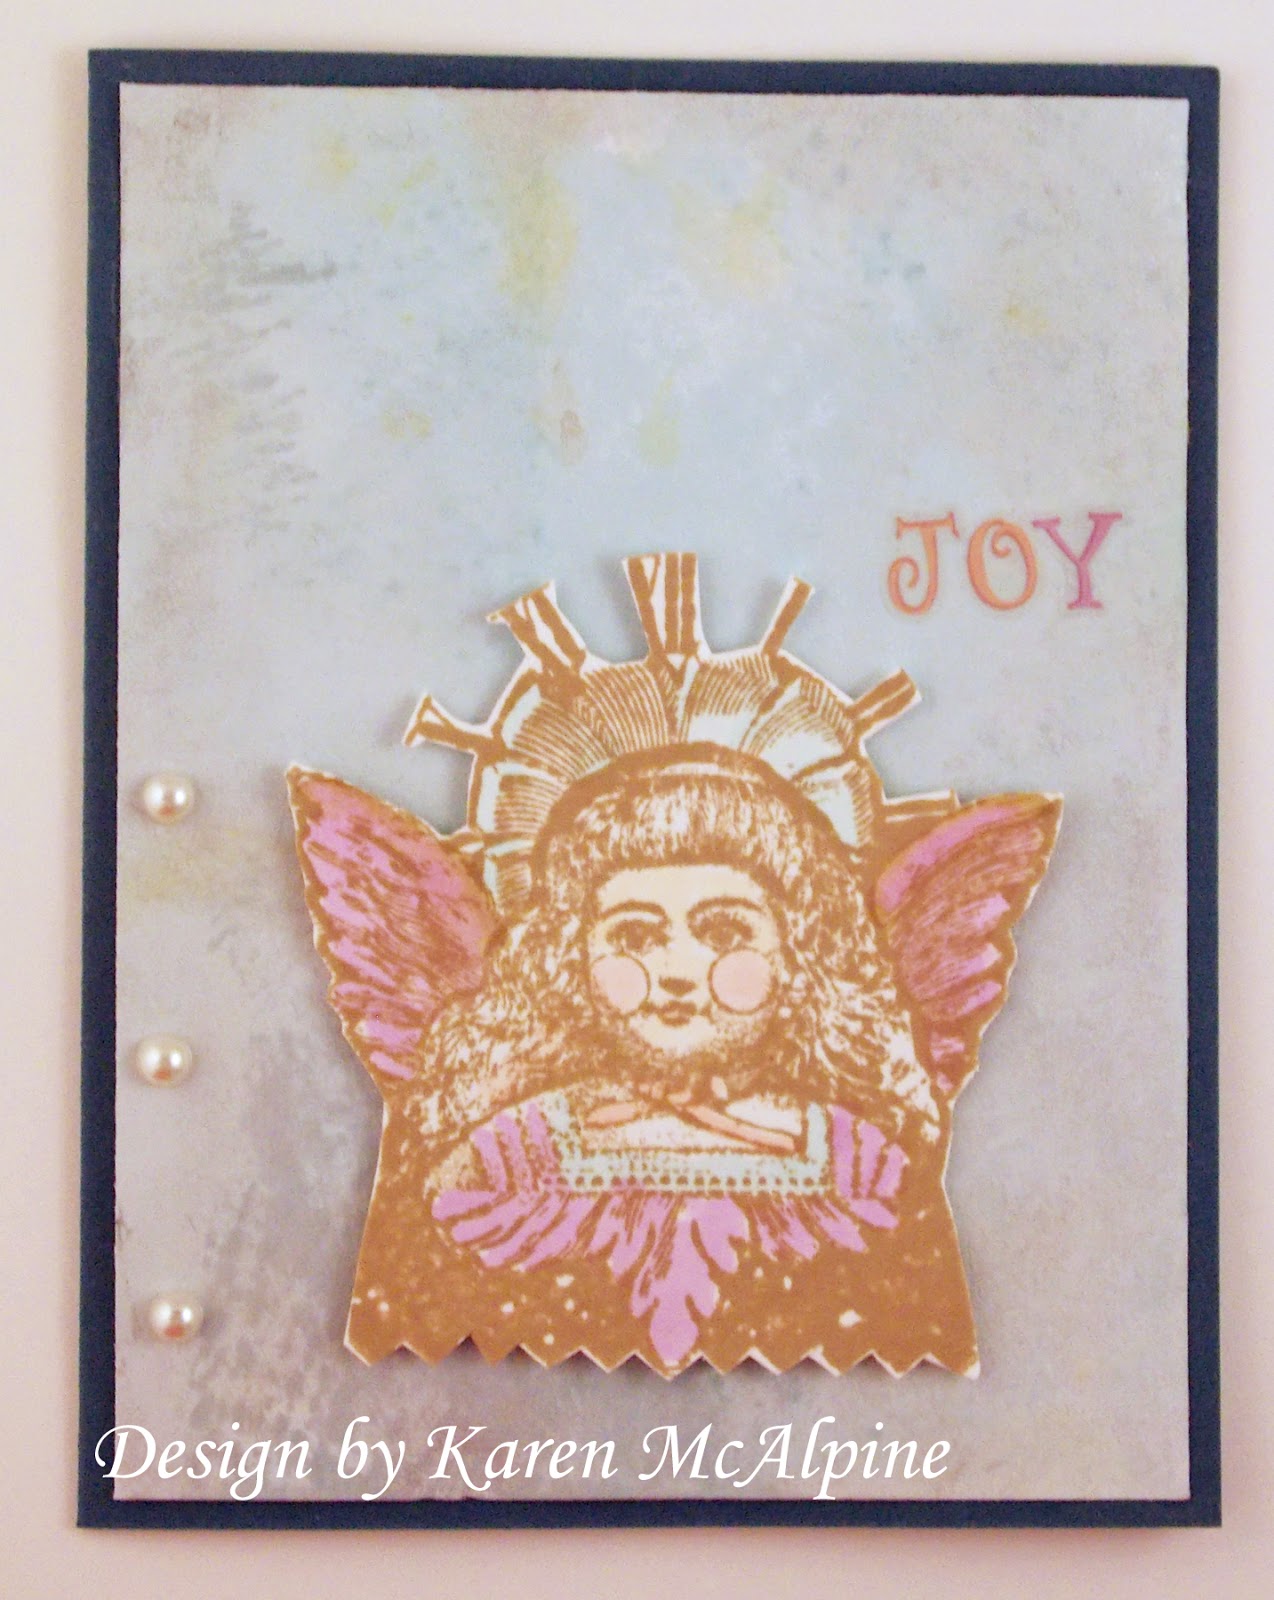
Okay, Okay, enough of my chatter.  On to the cards for the day.  I made these pretty angel cards for Operation Write Home.


Materials List:
Stamp: angel from Stampavie; sentiment from Stampin' Up
CS: White; Blue Gingham and Green Polka Dot - Amuse Studios
DP: green printed
Copic Markers
Love Die Cut: AMuse Sudios


Instructions:

  • Make two A2 cards from the patterned CS
  • On White CS, stamp the angle with brown dye ink
  • Color with Copic Markers
  • Add to the card base
  • Stamp the sentiment


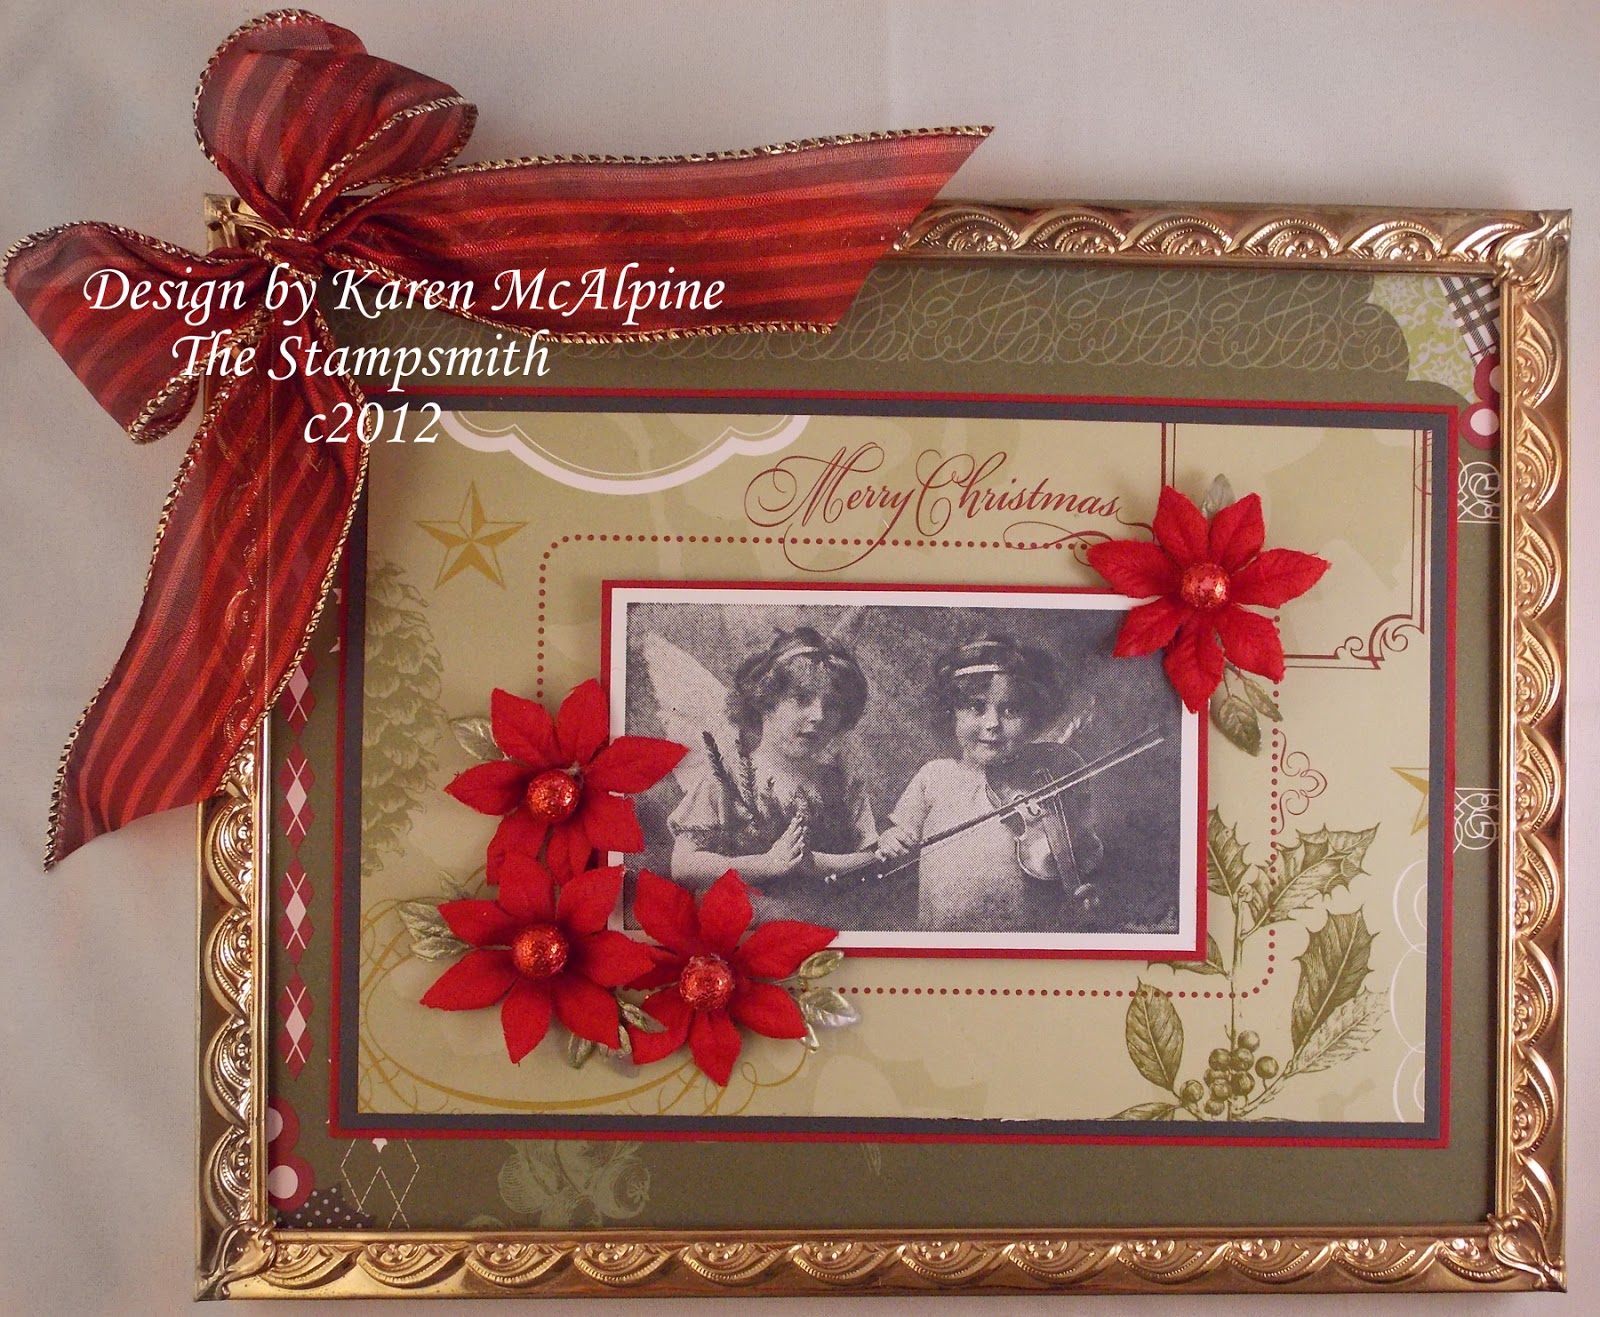
  • On the second card, stamp the angel on the DP with a dark rust dye ink
  • Color with Copics
  • Die cut LOVE and add to card
  • Punch a heart from red CS and add to card


***************How about a few fun Challenges for my Angel Cards?!!!
Crafting from the Heart: anything goes
Dragonfly Dreams: things with wings
Corrosive Challenge: fav color medium---I used Copics
Brown Sugar: dots and/or stripes -----both on card #2

Well, I better get moving.  I want to make a big pot of vegetable soup for dinner tonight.  Yum.  See you next time.  Love ya
Karen

Sunday, December 22, 2013

The Twenty-Five Days of Christmas Day Twenty-Two

Hello Everyone!!

Welcome to Day Twenty-Two of The Twenty Five Days of Christmas!!
And Blog Candy!!

I will be sharing a different Christmas card every day from December 1st through December 25th.  On today's card, I used an angel embossing folder.  After dry embossing cream CS, I rubbed on some Metallic Rub-Ons with my finger.  This is another card that is good for multiples as it goes together very quickly.   


Materials:
CS: Cream; Rich Razzleberry from Stampin' Up
Ink: Rich Razzleberry from Stampin' Up (for the sentiment)
Burgundy  Ribbon
Angel with Integument Embossing Folder-Darice
Metallic Rub-Ons from Craf-T Products
Circle Punch and a Spellbinders to cut out the sentiment label


And, don't forget the blog candy!!!! 


Ways to Win the Blog Candy:

  1. Leave a comment on any of the 25 Days of Christmas posts--each time you leave a comment your name goes in the drawing.  So the more you comment, the more chances of winning.
  2. Become a Follower--Leave a comment to let me know!
  3. Post about the 25 Days of Christmas on your Blog--Leave a comment to let me know!
  4. Post about the 25 Days of Christmas on Facebook--Leave a comment to let me know!
See all the details about the Blog Candy on Day One post here.


See again tomorrow for day Twenty-Three!!!!  Getting close to the end of the 25 days of Christmas!!!   Only three days left.  I hope you have been enjoying all the Christmas and Holiday cards!!!  Don't forget to leave a comment for the blog candy!!!   Love ya.
Karen

Thursday, December 19, 2013

The Twenty-Five Days of Christmas Day Nineteen

Hello Everyone!!

Welcome to Day Nineteen of The Twenty Five Days of Christmas!!
And Blog Candy!!

I will be sharing a different Christmas card every day from December 1st through December 25th.  On today's card, I stamped a pretty angel with red ink on Kraft CS and layered with a torn piece of textured CS.  


Materials:
Stamps: Alleluia Angel from Flourishes; Joy Sentiment from Sweet N Sassy.  
Card Stock: Cream; Kraft; Red Textured from Rustic Wrinkles Collection from Snickerdoodles Scraps.  
Ink: Real Red (103133) Stampin’ Up.
Embellishments: Gold Pearl.
Other: Labels Two Die (S4-162) Spellbinders.


And, don't forget the blog candy!!!! 


Ways to Win the Blog Candy:

  1. Leave a comment on any of the 25 Days of Christmas posts--each time you leave a comment your name goes in the drawing.  So the more you comment, the more chances of winning.
  2. Become a Follower--Leave a comment to let me know!
  3. Post about the 25 Days of Christmas on your Blog--Leave a comment to let me know!
  4. Post about the 25 Days of Christmas on Facebook--Leave a comment to let me know!
See all the details about the Blog Candy on Day One post here.


See again tomorrow for day Twenty!!!!  Getting close to the end of the 25 days of Christmas!!!   Don't forget to leave a comment for the blog candy!!! Hope all your Holiday preparations are going well!  Love ya.
Karen

Sunday, February 17, 2013

Colorful Angels with Lost Coast Designs

Hi Dreamers!
How is your weekend going!  We are getting a little snow here in Michigan.  Not sure how much we will get though.  Good excuse to stay inside and make a few cards.  LOL.  Today, I would like to share two colorful cards I made with a stamp from Lost Coast Designs:  Hope Angel.  On the first card, I also used the background stamp called Yourba Adire.


The background is stamped with Lettuce Adirondack ink.  The angel is colored with Twinkling H 2 O's.


Tie a sheer green ribbon around card.


The second card is made with a watercolored background. 


The image is colored with Distress Markers.  


 I strung a few beads on twine for the embellishment.  Knot the twine to hold the beads in place. Add some ribbon and lace.


Great happy image!  Love it!


Challenges for my Hope Angel cards.
Stampin for the weekend: distressing
Allsorts: things with wings
Sweet Stampin: stars and stripes
Catered Crop: stars

Have a great weekend!  Love ya.
Karen

Tuesday, December 4, 2012

Joyful Blue Angel with Paper Artsy

Hi Dreamers!
I hope you are enjoying all the Christmas projects here in Dreamland.  I am having so much fun making all the projects and thinking about who will get each card.  Today, I have a pretty Joyful Angel card with a silvery background.


Materials List:
Stamps: Holiday Theatre Paper Artsy available from Blockheads Paper Arts
Inks: 
Toffee Crunch Memento
Brushed Pewter Ranger Metallic Stain
Weathered Wood and Tumbled Glass Distress Markers
Copic Markers
Cardstock: Solar White  Neenah, navy
Craft sheet
Pearls
Alphabet Stickers


Instructions:
  • Make the background with the markers and stains.  


  • Stamp the Angel on Solar White cs with Toffee Crunch ink.
  • Color with Copics
  • Cut out Angel


  • Make a card base from the navy CS
  • Add the trimmed background piece
  • Add Angel with dimensionals
  • Spell out Joy with Alphabet stickers


  • Add pearls


Love this image!   This is one of those stamps that I kept stamping and stamping just to see what it looked like in different inks.  I went with this softer ink color for a more vintage muted look.


Challenges for my Joyful Blue Angel:
Mark's Finest: Christmas with no red or green
Challenges 4 everyone: anything goes
2 Sisters: Christmas sparkle
My Sheri Crafts: tis the season
Jingle Belles Rock: Christmas + anything goes
By the Cute and Girly: Red white and blue Christmas

How is your card making going??  Are you making cards for Christmas?  Well, I hope you are having a great day!  Oh, let's see what is on the schedule for tomorrow.  Looks like tomorrow is WOYWW.  I will be showing you photos of my cards that are going into a sale.  More about the sale tomorrow.  See you then.  Love ya.

PS: I will be back later today with a decorated box made with Paper Artsy stamps and tissue paper. 

Karen

Saturday, December 1, 2012

Angel Faces with Paper Artsy

Hi Dreamers!
Back again  with more Holiday projects.  How about an angelic card made with Lynne Perrella Paper Artsy Stamps--Available in the USA from Blockheads Paper Arts!!  This angelic image is from the set called "Holiday Theatre".


Materials List:
Stamps: Holiday Theatre Paper Artsy from Blockheads Paper Arts
Ink: Toffee Crunch Memento 
Cardstock: White, Green, Red, and Black
Gold ribbon
An Epoxy sticker with Merry Christmas
Square Punch


  • Stamp the Angel on white CS with the Toffee Crunch ink three times
  • Punch or cut out 
  • Layer onto black CS
  • Make card base from red CS and layer with green
  • Add the stamped squares


  • Wrap the ribbon around card and tie in knot.
  • Add the sticker over the knot
This is a  fairly simple  card to make and would be a good design to make in multiples for your Christmas cards.   There is still plenty of time to make a few Christmas cards.

Challenges for Angel Faces:
2 Sisters: Christmas sparkle
Crafty Hazel Nut Christmas: make it girly
Simon Says Stamp: anything goes
Crafty Mess: vintage Christmas
Card Makin Mamas: silver or gold

Hope you are enjoying your weekend.  Consulting the posting schedule (yes, I had to make a schedule again to keep take of all my Christmas projects) I see that tomorrow I will have a Vintage Santa card made with Character Construction stamps.  That does sound fun!  See you then!  Love ya.
Karen

Holiday Gift and December Stampsmith Challenge

Hi Dreamers!
Happy December 1!! Twenty four days and counting until Christmas.  I have not done any shopping yet.  Eeek!  May end up being a gift card year.  LOL.   As it is the first of the month, that means a new challenge at The Stampsmith Challenge blog.  Click over and see all the DT projects, the winner of the gift certificate, and the top picks for the November Challenge.   The December Challenge theme is:

Handmade Holiday

You can make a gift, card, decoration, or anything with a Holiday theme.  Please also use one Stampsmith stamp.  One random entry will receive a $21 gift certificate to The Stampsmith!! 

I decided to make a home decor piece for my DT Handmade Holiday project.  This framed piece could hang on the wall, sit on an easel, on the mantel, or it may end up in a gift bag for someone. LOL


My Framed Christmas picture is made with the Two Angels image from the Stampsmith Full Sheet called
Thank Heaven for Little Girls #1


  • The image is stamped on white glossy CS with black dye ink.
  • Layer onto Red CS


  • The image is mounted onto a piece of Christmas DP from Me and My Big Ideas (in my stash).
  • The base is made of heavy mat board and covered with the DP.
  • Place the picture into the frame (remove the glass from frame)
  • Now add  the Poinsettias and glue the glitter balls in the center.


  • Tie a bow in a wide wired ribbon and leave long tails.
  • The bow is attached to the frame with large glue dot.
Let's see what you can come up with for the Stampsmith Handmade Holiday Challenge!!  I need some ideas for gifts...so get crafting!!  Hope you are having a great weekend!  Love ya.
Karen

Wednesday, November 28, 2012

Angel Ornaments with Character Construction

Hi Dreamers!
How is your week going?  I am having a great week with lots of creative time!  I  made some pretty Angel Ornaments this weekend with  stamps from the Vintage Christmas set by Character Construction.  Won't they look great on the tree?!


The bases of the ornaments were cut with Spellbinders- Labels four and Labels Eighteen from a dark cherry CS.  The Angels from Set # 4  were stamped on some backgrounds that I made with Distress reinkers and Metallic stains.  See the instructions for the backgrounds here.  Stamp the Angels with Black Soot Distress Ink and distress with Forest Moss DI.

On this tag, I tied a bow in satin ribbon and layered it with a piece of white tulle.  Paper roses were added.


On the second ornament, I added a sheer red ribbon, the tulle and a scrap of lace.  Buttons and stars were added for embellishments.  Isn't this angel just too sweet!??


So that the back looked nice too, I added a die cut piece of gold glittery DP.


Challenges for my Angel Ornaments:

Hooked on Craft challenges: Christmas
Tuesday Alchemy: Anything goes
Craft room door: anything goes
Simon Says stamp: anything goes
Creative Moments: anything goes + buttons and bows
Decorate to Celebrate: Holiday Party decoration--Christmas Party tree ornaments

I will keep all the Christmas craft ideas coming until the big day!  Oh, I have lots and lots of good things to share with you!  See you tomorrow for more Christmas Cheer!  Love ya.
Karen

Sunday, November 18, 2012

Hark the Sweetest Angels Sing

Hi Dreamers!
I am back today with some Christmas Cheer.  Today's card is made with one of the stamps from The Stampsmith's full sheet  called "Thank Heaven for Little Girls #1".  This image is so adorable and makes great Christmas cards.


I stamped this photo stamp with black dye ink on glossy white CS.  It was layered with red and black CS.  the card base is made from dark green CS and layered with a piece of Holiday DP from K & Company.


I stamped a Christmas Sentiment from My Sentiments Exactly with red ink, cut into a banner shape, and added to the card front with dimensionals.    A bow tied  in  pretty ribbon  finishes off the card.   Isn't this stamp so, so, so sweet??!  Well, another card for my Christmas basket.  This card will be sent out to a friend.
Hope you are having a great day and enjoying your travels around Blogland.  So happy you  stopped by to say hi!  Love ya.
Karen

Thursday, November 15, 2012

Gold Christmas Angel

Hi Dreamers!
Welcome to Dreamland!  And, look at this dreamy Christmas card.  I choose  shades of yellowy creams--from soft yellow to goldy yellow for a monochromatic look.  This card was made  for the Flourishes Be Progressive Challenge. I thought the challenge seemed like a really fun idea.  Each day another element was added.

  1. Sketch
  2. Monochromatic
  3. Decorative Papers
  4. Bling
Here is my take on the Challenge:


The stamp is Alleluia Angel from Flourishes.  The Music DP is from Websters Pages, the floral from Anna Griffin.  I distressed the second layer of the scallop circle and the dry embossed floral DP with Frayed Burlap Distress ink.


Added some bling with Gold Stickles and a big gold bow.  


I am going to make several more of this design to add to my Christmas card basket.   I may down size them to make them easier to mail.  I will be back tomorrow with a Thanksgiving Card.  See you then.  Love ya.
Karen