Saturday, August 31, 2013

Garage Sale Finds!

Hi Dreamers!
I thought it would be fun to share photos of my garage sale finds.  I had a blast running around to a bunch of sales on two different days.  I found lots of books and china.  Here are a few photos.


Norman Rockwell Plates


Hand Painted jar with lid


Crystal Vase and Pitcher


The plates and Creamer below were all painted by a local artist, Helen Damian.  Her family was sharing some of her work.  I was happy to take home all these pieces.  They are so gorgeous.  


I also picked up some great craft books, a set of everyday dishes, a vintage mini stove called an Oven Queen.  I think that is from  the 1930's.  They were used to set over an open fire.  I did not photograph the stove  yet.  I wanted to clean it up a bit first.   I was hoping to find some craft supplies, but no luck there.  I had fun and picked up some great china pieces.  Hope you enjoyed!  See you tomorrow for the new Stampsmith September Challenge.  Love ya.
Karen

Publishing Update: Just Steampunk and Take Ten

Hi Dreamers!
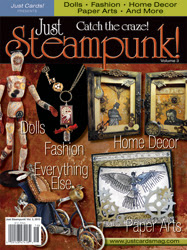
I am back after a busy week.  I spent two days cleaning my house--I really had lots to catch up on!!  Then I went for a relaxing massage too.  I have been working on the card order for my friend and have thirteen cards finished.  Today, I would like to do a Publishing Update!   My work appears in the new Just Cards special edition Just Steampunk Volume 3 (on shelves now) and the fall issue of Take Ten ( out Sept 1).  I will be giving you a few sneak peeks as well!

Just Steampunk Volume 3:


You will find eight of my projects in this issue.  Of course, the projects are all Steampunk style.  Here are a few sneak peeks for you------


 Stamps: Artistic Outpost; Background: Crafter's Workshop Template


Stamps: Blockheads Paper Arts; Paper Artsy; Stampland (sentiment)
Background: Gelli Plate


Take Ten Fall 2013:


I have four projects in this issue.  I made quick and easy cards by stamping on Stampington decorative papers.   And, some sneak peeks----


 Stamp: Stamp Camp


Stamps: Stamp Camp


So, just a few sneak peeks to tantalize you.  LOL  I will be back later with my garage sale finds!  Hope you had a great week and have a great weekend!  Love ya.
Karen

Monday, August 26, 2013

Butterfly Digi with Distress Inks

Hello Everyone!
Hope your weekend was great.  Mine was good.  I am now working on a card order for a friend.  I keep her supplied with all kinds of  cards.  I usually send her about 30 at a time.  She is getting low on cards, so I thought this would be a good time to make a stack for her.  You know, before I start thinking about Christmas cards and Thanksgiving and Halloween, etc.............
Today's card is made with two digis from A Day For Daisies.


Materials:
Digi Butterfly images : A Day For Daisies
Sentiment: My Favorite Things
CS: white; Pool Party (Stampin' Up)
Distress Inks: Picked Raspberries, Mowed Lawn, Bundled Sage, Victorian Velvet, and Tumbled Glass
Dye ink: Melon Mambo (Stampin' Up)
Ruffled lace, narrow satin ribbon, rick rack, rhinestones


  • Print out the two digi images on white CS
  • Let the printer ink dry before working with the images
  • Make a card base from Pool Party CS


  • Apply Victorian Velvet and then Picked Raspberries Distress ink to the Butterfly outline image
  • Add to the card base
  • Apply Tumbled Glass, Mowed Lawn and Bundled Sage Distress inks to the detailed butterfly
  • Fussy cut the butterfly
  • Layer onto the outlined butterfly with dimensional adhesive


  • Add a piece of ruffled lace to the bottom edge (secure to the underside of the card front)
  • Add rick rack, a small bow, and rhinestones


  • On the inside distress a square of white CS with Victorian Velvet and Picked Raspberries ( as you did on the front)
  • Stamp Sentiment with Melon Mambo ink


A Few Fun Challenges:
A Day For Daisies: ruffle and a ADFD image
2 Sisters: a square card
Sister Act Card Challenge: anything goes
Stampin for the weekend: butterflies

On my next post, I will show you all the fun items I picked up from Garage Sales last week!  I found some pretty neat stuff!  See you then!  Love ya.
Karen

Friday, August 23, 2013

Lovely Audrey Hepburn Photo Stampsmith Stamp

Hello Dreamers!
Let's have a bit a of glamour today.  Who is more glamorous than Audrey Hepburn?  I used this Audrey Hepburn photo stamp from the Stampsmith to may this many layered card.  


Materials:
Stamp: Audrey Hepburn full sheet from The Stampsmith
Ink: Vintage Sepia Versafine
CS: Chocolate Chip (Stampin' Up); med brown (Bazzill); glossy white
DP: Basic Grey
Dies: Marvelous Squares (Spellbinders)
Bling and Ribbon (A Muse Studios)


Instructions:

  • Stamp the photo stamp with Vintage Sepia Versafine ink on white glossy CS.  
  • Cut out with die


  • Make card from medium brown CS and layer with Chocolate Chip CS
  • Add decorative papers.


  • Die cut two more squares for layering with the stamped piece
  • Cut the corner pieces with the die set from the brown DP with leaves


  • Cut a long piece of ribbon and run a hand gathering stitch down one long edge
  • Adjust the gathers and knot thread
  • Glue to corner of card
  • Add Rhinestones


Inside


I will use this as a birthday card for a special someone!  All I have to do is stamp the sentiment on the inside and write a little note.

**********Challenges for my Lovely Audrey Card:

Crafty Creations: shabby chic
Lady Anne's: anything goes
Little Red Wagon: layers
Love to Scrap: bingo---Flowers (on the DP)-Die Cuts-Bling-Embossing-Ribbon
ABC Challenges: at least 5 layers
A Random thursday Challenge: anything goes
Paper Crafting Journey: anything goes


Well, that's about it for me today.  I think I will go out and hit a few garage sales---Just for fun!  See you next time!  Love ya.
Karen

Tuesday, August 20, 2013

Part Two Dress Form Gift Tag Set

Hi Dreamers!
Welcome back to Dreamland!  Today, we will look at Part Two of the group of Gift tags with the Tim Holtz Dress Form Stamp.  I used lots of browns and yellows on this group.   Here is the photo of the entire set and you can see the Part One post here.  Take a look at the group photo.


Materials:
Stamps: Seamless Experience - Tim Holtz Stampers Anonymous
Happy Birthday -Lost Coast Designs
Hooks and Eyes - Blockheads Stamps
Sanded Background stamp - Stampin' Up
Inks: Black Archival,  Crushed Curry - Stampin' Up, Rich Cocoa and Espresso Truffle Memento,  Mushroom Adirondack, Antique Linen and Vintage Photo Distress Ink
Picket Fence Distress Marker
Various CS's
Sizzix Tag Die Cut
Corner rounder
Hole Punch
Glue Pen

Embellishments: Ribbons, fabric scraps, glitter, buttons, and rick rack


 Tag #1-Brown

  • Stamp the Dress form with Black Archival ink on Kraft CS
  • Distress with Distress inks
  • Cut the top into the shape of a tag
  • Layer with Black and Kraft
  • Color in some of the open spaces with the Picket Fence Distress Marker
  • Apply a small amount of glue with a glue pen to the white areas and sprinkle some glitter over the glue


  • Punch a hole in side of tag
  • Tie fabric and ribbon through hole
  • Stamp sentiment with Rich Cocoa ink


Tag #2- Yellow


  • Stamp Sanded Background stamp with Crushed Curry ink
  • Stamp Dress form and ruler with Rich Cocoa ink
  • Stamp hook and eyes with black
  • Glue a rectangle of Kraft CS to top of tag and punch hole in center
  • Tie fabric scrap through hole
  • Distress edges with Antique Linen DI


Tag #3-Yellow with buttons


  • Stamp the background elements with Crushed Curry and Mushroom inks
  • Stamp Dress form with Espresso Truffle ink
  • Distress with distress inks
  • Round corners
  • die cut a tag from dark brown CS and cut off the top
  • Glue the top of the die cut tag to top of dress form piece


  • Add rick rack, ribbon, and buttons


*******Challenges and Linky Parties for my Dress form Gift Tag set:
An Inky Situation Linky Party: brown and/or orange
Craft Room: something new---This stamp set is new to me
Cuttin and Stampin: monochromatic card

So, let me think.  What will I have next??  I have been working on some Stampsmith projects......  Hmmm.  I am trying to use my new stamps that I haven't gotten a chance to play with yet.  Well, maybe something in that category.  Stayed tuned!  I will have Something fun for you!   See you soon.  Love ya.
Karen

Monday, August 19, 2013

Dress Form Tag Set

Hi Dreamers!
Happy Monday!  I picked up a set of Tim Holtz stamps the other day and had time over  the weekend to get some stamping done.  I made a set of gift tags with a sewing theme.  I made five in total and will be showing you two today and the other three in the next post.

 I started with one of the backgrounds I made the other day and just started stamping.  ( See how versatile the stamped backgrounds are!?  I always like to keep a stack of them handy.  Click here to see the whole stack.)

I used cream, kraft, and white CS for all the tags. Here is a photo of the whole group after the stamping part, but before any trimming or cutting into tag shape.


Here is the group all finished with lots of ribbons, fabric scraps, feathers, pearls, and rick rack!


We will be taking a closer look at the Red tag with Feathers and the Green tag today.

Materials:
Stamps: Seamless Experience - Tim Holtz Stampers Anonymous
Rose Lace Cover-a-Card-Impression Obsession
Inks: Black Archival,  Pink Pigment, Mushroom Adirondack, Antique Linen Distress Ink
Various CS's 
Embellishments:Ribbons, fabric scraps, feathers, pearls, flower, twine, rick rack


 The first gift tag is on a folded card.  This can be attached to a gift bag or package and the To and From written on the inside.  Size is 3.25"  x 5.34"

  • Stamp the Rose Lace Cover-a-Card with pink pigment ink on cream CS
  • Cut to size
  • Stamp the dress form with black Archival ink


  • To add the cording punch two holes through all layers (see photo below)
  • Tie cording through holes
  • Add the embellishments

 Back of gift tag card


Green Tag


Size: 3.50" x 6.25"


  • Stamp the dress form with Mushroom Adirondack ink on Cream CS
  • Stamp the zig zag stitch and thread spool top with other shades of green inks
  • Distress with Antique Linen DI
  • Layer with two shades of green CS
  • Punch a hole in the upper left corner through all layers


  • Tie a piece of wide striped ribbon through hole leaving some slack
  • Tie pieces of fabric and ribbons onto the wide striped ribbon

Think how fun these tags would be on a special gift package!!  Or, you could just write a note on the back and send as a card!  Such fun.  These were so fun to make that I could not stop!!  I will share the other three in detail in my next post.


**********Challenges for my Dress Form tag Set:
Avenue 613:stitching faux or real
That Craft Place: stitching
Pile it On: no DP
Cheerful Stamp pad: Your choice
Paper Playtime: pearls
Simon's Wednesday Challenge: monochromatic---Green tag
Rhedd and Rosies: use red

So, I hope you are having a great Monday.  Had the official inspection on the new air conditioning unit this morning.   See, I told you I am catching up on all those little things that did not get done while my husband was off sick for 10 weeks.  Dentist on Thursday.  Not sure what I will set up for the week after.  Maybe a hair cut.    See you soon with the other tags.  Love ya.
Karen

Sunday, August 18, 2013

Fashionable Friendship

Hi Dreamers!
Seems like I have been away from Dreamland for a long time.  I have been busy running around getting a mammogram, a massage, and going to the chiropractor.  Like I said the other day, trying to catch up on things.  Dentist and a few other things next week.
Today, I have a card for you that is all about fashion and friendship.  I was inspired by several challenges for this card.  I used the sketch from Crazy 4 Challenges and the fashion theme from Rogue Redhead Designs.


Materials:
Stamps: Rogue Redhead
Ink: Black Pigment; black dye
Clear Embossing Powder
CS: Blushing Bride and Sage Shadow - SU; white; med green - Bazzill
DP: K & Company, Cosmo Cricket
Spellbinder's dies, circle punch, edge punch
Copic Markers
Buttons
Sheer ribbon


Instructions:

  • Make a square card from the med green CS and layer with Sage Shadow.
  • Cut the scallop circles from Blushing Bride CS
  • Follow the sketch for placement


  • Cut a rectangle from the K & Co DP and punch the edge
  • Stamp the lovely lady on the same DP with black pigment ink and heat emboss
  • Cut out the hat and coat


  •  Stamp the lady again on white CS with black dye ink and color with Copic Markers
  • Paper piece the hat and coat


  • Assemble all the elements
  • Cut a strip of Cosmo Cricket DP and notch the end
  • Add buttons and ribbon


  • Stamp Sentiment on the inside.


  • ********Challenges for my Fashionable Friendship card:
    Rogue Redhead: fashionista
    Crazy 4 challenges: sketch
    Card a day: embossing
    Allsorts: use new stash--I used my New Spellbinder
    Creative Corner: anything goes

    I have a few things planned for the coming week.  I made a group of tags with sewing theme.  I used one of the backgrounds I stamped to make one of the tags.   So, I will share those with you.  And, I made a CAS bird card and that will be posted later in the week.  So, lots of fun here in Dreamland.  See you soon.  Love ya.
    Karen