Showing posts with label Altered items. Show all posts

Thursday, June 6, 2013

Ribbon Dragonfly Storage Jar

Hi Dreamers!
Today, I have a fun storage idea to share!   I found some gigantic glass jars (the kind used for canning) at my local  craft store last week.  I saw lots of scope in them.  LOL  I knew they would be perfect for storing loose items.  Here are the 9 1/2" tall jars:


Materials List:
Glass Jars with screw top lids (I found these at Michaels Craft Store)
Bordered Orange Sheer Ribbon from May Arts (356-15-28)
Peach Satin Ribbon
Scraps of CS
Dragonfly die cut from Sizzix


I decorated the jar with ribbon dragonflies!  I used a Sizzix die to cut out the dragonflies.  Let's get started making our decorated storage jar.

Instructions:

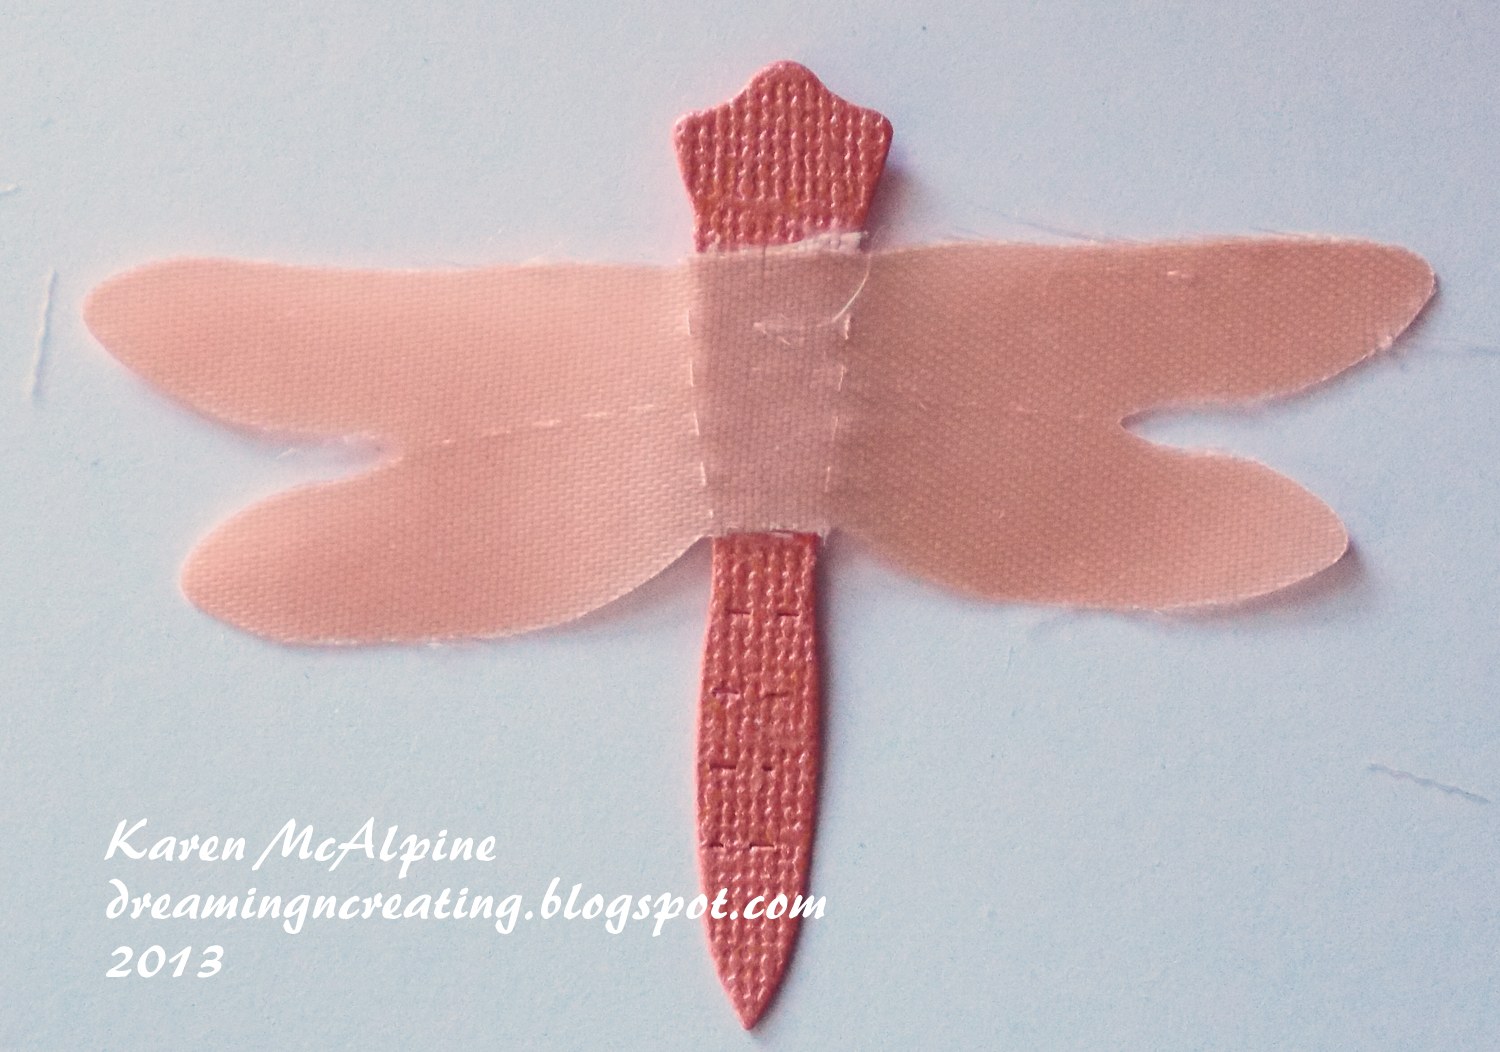
  • Place ribbon on top of the die and cut.  I covered the die with a scrap piece of CS before running through my Cuttlebug just to hold the ribbon in place


  • Cut about 12 dragonflies from the ribbons.  Cut the same amount from cardstock


  • Cut off the heads from the ribbon dragonflies.  You can leave the body on some or cut it off
  • Cut the wings off the CS dragonflies
  • Glue the ribbon wings to the CS bodies


  • Attach the dragonflies to the jar with dimensional adhesive all around the jar
  • Tie ribbon around the neck of the jar


  • Decorate the top of the jar with a circle cut from yellow CS, a big bow and another dragonfly---for this dragonfly I did not cut away the CS wings, but left them to make the dragonfly more stable


Now, I have a super pretty storage jar!  And, guess what I decided to store in my Dragonfly Jar!!  You guessed it!  My ribbon scraps!  How Fun!!


I think this jar would look great with spools of thread or buttons.  You could use any size jar as well.  Smaller ones would be great to store Markers and pens.

*******A Few Fun Challenges for my Dragonfly Storage Jar**
Make My Monday: ribbon or lace
Paper Playtime: 2 or more ribbons
DL. Art: anything goes
CRAFT challenge: anything but a card
********


Well, I guess that is it for me today.  See you next time!  Love ya.
Karen

Tuesday, January 1, 2013

January Stampsmith Challenge

Update January 3, 2013:The Stampsmith Challenge is looking for a few Guest Designers!!!  Please add TSCGD after your name when you link up!!


Hi Dreamers!
I am back after a little holiday break.  Happy New Year.  I hope this new year brings you lots of joy.  And, plenty of time to craft!  It is time for a new challenge on the Stampsmith Challenge Blog.  This month were are challenging you to:

 use one recycled item and at least one Stampsmith Stamp on your project.  


I used the lovely Ophelia (Large, Facing Right) stamp on my project.  My recycled item is a White CD/DVD Sleeve ( made by Memorex).  


Instructions:

  • Distress the edges of the CD Sleeve with Shabby Shutters and Black Soot Distress Ink.
  • Cut two pieces of Certainly Celery CS (Stampin' up) 4 3/4 inches square
  • Stamp Ophelia on one with Black Soot Distress Ink
  • Slip inside the CD Sleeve.


  •  Flip the CD Sleeve over and Distress the back


  • Gather lengths of Hem Tape (Wrights Trims) by stitching long hand stitches down the middle
  • Pull the gathers tight and secure thread with a knot
  • Glue to front and add a Prima Flower


  •  Tie a bow in another long length of the Hem Tape and leave long tails
  • Gather the tails of the Hem Tape bow as above and glue to front of Sleeve
  • Add pearls


Isn't this a fun transformation!!??  I am going to make a bunch of these!  Don't even need an envelope!

And how about a few other really cool Challenges for my Recycled Sleeve!
Simon Says Stamp: anything goes
Fat Pages with Attitude: anything goes
Charisma Cards: anything goes
In the pink: pink and pearly
365 Cards: tuck it in your pocket
Card Crafters Circle: anything goes
Simon Says Stamp and Show: anything goes
Fashionable Stampers: Surprise Us (anything goes)
OOzak.com: anything goes + pink and bling


Would love to see what items you recycle!  Join in the fun and link your project up at The Stampsmith Challenge blog. Hope you have a great day this first day of a new year!  Love ya.
Karen

Friday, December 7, 2012

Domino Snowmen Ornaments

Hi Dreamers!
I have something a little different today.  My good buddy, Leigh, inspired me to try my hand at altering dominoes.  Check out all the Christmas Domino projects on Leigh's Domino Art blog.  Here are my Snowmen Ornaments.


Materials List:
Dominoes
Stamps: Snow Kisses - My Sentiments Exactly
Set Black Stazon Ink
Copic Marker - Process Blue B05
Metallic Silver Marker - American Crafts
Glossy Accents - Ranger
Silver Wire
14” Glass Seed Bead Strands - Michaels Craft Store
Assorted Beads
Cord Trim - Jo Anns
Fabri-Tac Glue


Instructions:
Stamp the snowman onto the dominoes with the Stazon ink.  When the ink is dry, color around the snowmen with the Blue Copic Marker.  Draw around edge of domino with a Metallic marker.  Apply glue around the side edges of the dominoes.  Wrap the wire and bead strand around one of the dominoes.  Twist the wire to hold the bead strand together.  Wrap the cord around the other domino.  For the first ornament, add more beads to the ends of the wire.   Curl the ends of the wire and trim.  For the second ornament, add large beads to the ends of the cord and tie cord in a knot.  


Some fun challenges for my Snowman:

Alota rubber stamps: ornaments
Christmas at Sweet Stampin: Christmas
Crafts and Me: ornament
For Fun Challenges: Snowman
Going Grey with Scrap Creations: anything but a card

Pretty fun project.  I did have some trouble finding a stamp that look good on the domino.  I am so glad I had this MSE! snowman set!   Now, let me see, what does the schedule say is coming up tomorrow?  Oh, I think you will like this...a very vintagey Holiday card with Paper Artsy.  See you then!  Love ya.
Karen