Monday, November 7, 2011

More Mischievous Mice

Hi Everyone,
Well, Sandra said she wanted a Christmasy card.  So, Christmasy it is!  I have used  another of the images from the Figgy Pudding Mice set- Blockheads Stamps for this project.

Materials List:
Solar White CS Neenah Classic Crest
Tuxedo Black Dye Ink- Memento
Copic Markers
Green and Brown CS
Bright Green Ribbon
Metal Dot Stickers

I stamped the image in Tuxedo Black Ink on Solar White CS.  The image was colored with Copic Markers


Aren't these little mice a scream??!!   They really get into trouble.  I finished out the card with brown and green CS layers, green ribbon, and metal dot stickers.   I will put a Christmas sentiment on the inside and, this is going in my Christmas card box.  I sure have a lot more to do.  I am almost finished with my Thanksgiving cards.....so next I will have to really get busy on Christmas Cards.


I would also like to enter my Figgy Pudding Mice in:
Marks Finest Challenge: Fall or winter theme

How are your Christmas cards coming?  Is everyone making cards this year?  I usually make about 70.  Every year I say I am going to scale it back.....and don't!  LOL.  Hope you are having a great Monday!  Love ya.
Karen

Saturday, November 5, 2011

Check out Lynn's Blog-aversary

Hi Everyone!
Check out Lynn's blog Trash to Treasures.  She is celebrating her 3rd Blog-aversary with some fun blog candy.  

This  celebration runs thru November 18.  

Friday, November 4, 2011

Playful Squirrels Winter Scene with Third Coast Rubber Stamps

Hi Everyone,
Today's project is a fun wintry scene card.  For this Design Team project, I used a stamp from Third Coast Rubber Stamps called Snowy Scenes - Winter Visitor FA-361-O.    I made this card for something nice to send during the winter; maybe after the Christmas rush is over.  Check out these frolicking, cute little guys.


Card Size: 5” x 6 ¼”


 Materials:
  1. Stamps: Snow Scenes- Winter Visitor – Third Coast Rubber Stamps.  
  2. Card Stock: Green, mustard-Bazzill; Glossy White- Kromekote.
  3. Decorative Paper: Fanciful (966) Fancy Pants Designs.   
  4. Ink: Black Soot Distress Ink (TIM19541) Ranger.
  5. Embellishments: Brown Polka Dot Ribbon; Gem Stickers-Darice.
  6. Other: Copic Markers; Dimensional Adhesive Squares.


Instructions:
Make card from Green CS and layer with DP.  Wrap the ribbon around card and tie it in a knot.  Stamp image on Glossy White CS with Black Soot ink (let dry!).   Color the pine needles, squirrels, and tree with Copic Markers.  Layer the stamped piece with green and mustard CS; add to the card front.   Add the Gem stickers to the lower left corner of card.   On the inside, I stamped a sentiment and used more of the CS and DP.


Okay, that's about it for today. What would you like to see next? A cute and  girly Birthday card or something Christmasy?  Hope you have a great day!!  Love ya.
Karen

Wednesday, November 2, 2011

Mischievous Mice From Blockheads Stamps

HI Everyone,
I am feeling Christmasy today.  I used  a so, so, so, cute image from Blockheads Stamps.  The set is called Figgy Pudding Mice.  Here is what the set looks like.

Pretty cute, isn't it?!  I used a non-traditional color pallet for my Christmas card.  I like to change it up now and then with some fun colors.  Here is my project with the mischievous mice reeking havoc on the Christmas tree.


Materials List:
Figgy Pudding Mice
Tuxedo Black ink - Memento
Copic Markers
Solar White Neenah CS
CS: Berry, Green , Pink
Ribbon
Rhinestones
Metal Stickers
Paper Clip rhinestones

The image was stamped on Neenah CS (the best when using Copics markers) with Tuxedo black dye ink.  I colored with Copic Markers.  Here is a close up of the colored image.


I layered the image with Berry, green, and pink CS. Accents: a paper clip rhinestone, green rhinestones, pink metal sticker dots, and a wide plaid ribbon.


This was such a fun card to make.  I will have another of the Figgy Pudding Mice images for you later in the week.  The mice are eating up all the Christmas Pudding in the next card.   LOL so cute!


Have a great evening.  Love ya.
Karen

Tuesday, November 1, 2011

Blog Hop with The Stampsmith


Hi Everyone!
Today is a bit special!  It is the first of the month and that always means a new Stampsmith Challenge.   But, we are really celebrating over at the Stampsmith Challenge blog.  As you may remember, last month we celebrated the grand opening of the new Stampsmith Online Store.  


This month we are celebrating The Stampsmith Challenge Blog's one year anniversary and we couldn't be more excited to give you some extra chances to win Stampsmith Stamps!!!  

The members of the Design Team have put together a fun Blog Hop. Each DT member has created a project based on the November theme

Ribbons and Lace

Suggested by the Lovely  Lynne.  The extra bit is to hop along and check out all the DT projects and leave a comment for a chance to win  a Stampsmith full sheet of stamps ($21 value). PS: the more blogs you comment on, the more chances you have to win.  Oh, how fun!  The hop runs all month and you have until Nov 30th to leave a comment.  

For a second opportunity to score another Stampsmith Full Sheet of stamps, create a project that includes some Ribbon and Lace and at least one Stampsmith stamp.  The just link it up on the Stampsmith Challenge Blog.  

You should have arrived here from Melanie's blog.  And if not, you can click back to the beginning at the Stampsmith Challenge Blog.  


For my Ribbons and Lace project, I decided to make a Christmas card.  (I have not gotten very many Christmas cards done yet this year and need to get busy on that.)   I used the Stampsmith image Christmas Angels.  A sweet, nostalgic image indeed.  


My LACE component is actually faux lace.  I stamped the doily (Stampin' Up) on Glossy White CS with a clear resist ink (Ranger) and then heat set.  You have to heat set the resist ink to get the results.  Then just come in with Fired Brick Distress ink and add it to the glossy CS.  I also sprayed on some Glimmer Mist.  


Stamp the Christmas Angels on Glossy White CS with black dye ink.  I added some Vintage Photo Distress  ink to age it a bit.  Layer with a khaki green color.  And, of course, my Ribbon component:  A wide peach ribbon tied in a bow.  I added a Christmas sentiment.


Now, to continue on the Blog Hop, click over to the  Lovely Lynne's Blog.  


Don't forget to leave a comment here before you hop off!!  Have fun!!!  Love ya.
Karen

Friday, October 28, 2011

Vintage Framed Santa

Hi Everyone,
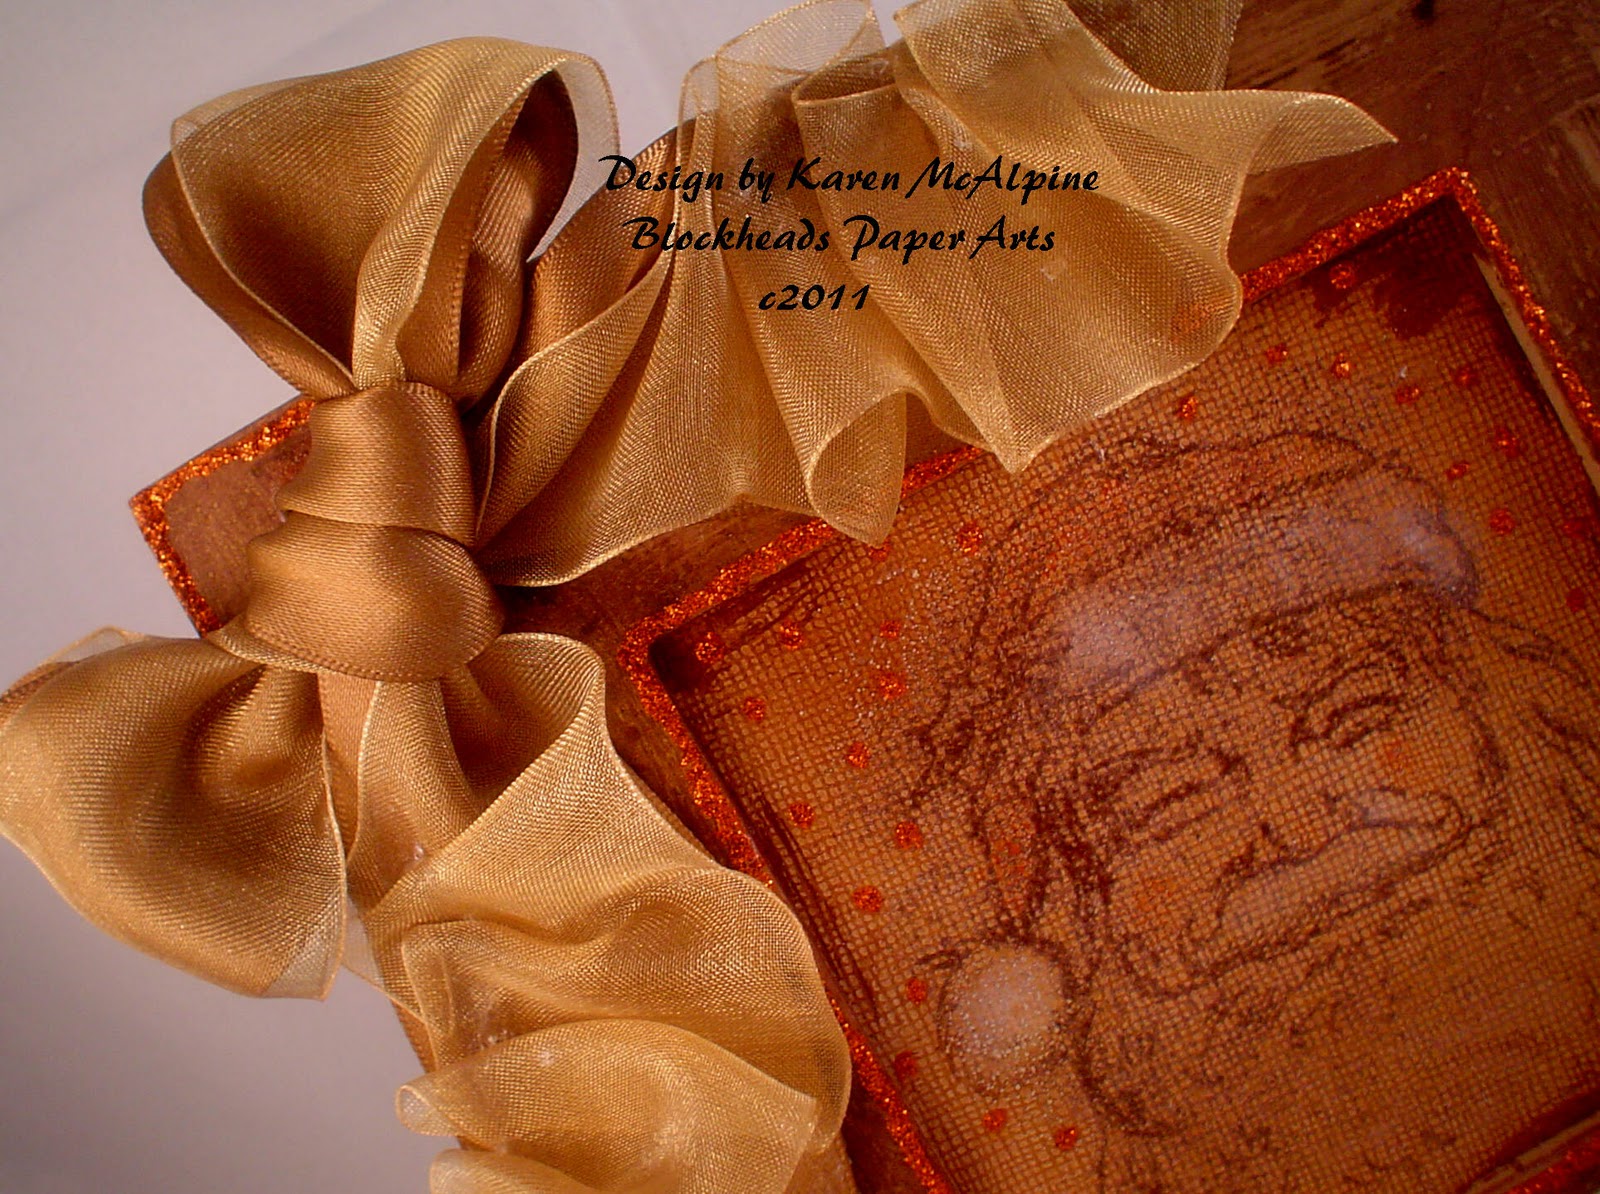
Changing things up a bit today.  I have a Christmas project to share.  I made a Vintage Framed Santa piece.  I will either put this up in my house or I may give it as a gift.  HMMM.  Who would like this?  I will have to think about this.  I used a plain frame I bought somewhere and jazzed it up a bit with paints, glimmer sprays,and glitter glue.


Here is a photo of the frame before alteration.  It is just a plain frame.    


For the "picture" inside the frame, I used a Santa Stamp from the newly released set: An Illustrated Christmas from Blockhead Stamps.  This is the whole set.


Materials List:
Santa Stamp from An Illustrated Christmas
Canvas Paper
Vintage Photo Distress Ink
Distress Tool
Cream Pigment Ink
Brown Embossing Powder
Acrylic Paints: Tan and Brown
Paint Brushes
Sand Paper
Satin and Sheer Ribbon
Glitter Glue
Glimmer Sprays
Smooch Spray

Paint the frame with Tan Acrylic paint.  Set with a heat gun or let dry.  Go over the Tan paint with Brown paint.  Set with a heat gun or let dry.  Sand off most of the Brown Paint to look aged.  Get it nice and scratchy looking.  Add lots of gold glimmer spray and Smooch Spray.  Let this dry.  And then add the Glitter Glue the the edges.  While the glitter glue is drying, make the Santa Picture.  


To make the Santa picture, stamp Santa on canvas paper with Vintage Photo ink and heat emboss with brown embossing powder.  Cover the paper with Vintage Photo ink using a distress tool.  Add a little white pigment ink to the hat with a Q-Tip and smudge it in with your finger. (Very technical, LOL)   Add some random dots of the glitter glue in the background.   Let dry.  When the glitter glue is dry, add the picture to the frame.  To make the bow, I layered a satin and a sheer ribbon.  Hold them together and tie in a bow and leave long tails - Do Not trim the ends yet.    Glue the bow to the frame.  Lay the satin ends flat (Satin ends should be under the sheer ribbon ends) and secure with some glue on their underside.  Trim the satin ribbon ends to about 4 inches.  Now, to gather the sheer ribbon, place a small line of glue on the right side of the satin ribbon on its top edge.  Gather the sheer ribbon and press it into the line of glue.  Trim the sheer ribbon ends.   Here is a close up of the ribbon.  Isn't that a fun ribbon treatment?!!  I love it.  


We have really got the Holiday feeling going on over on the Blockheads blog this weekend.  Stacie has a dazzling dimensional ornament using Spellbinders and Blockheads Stamps.  And Leigh continues to amaze us with her Halloween treats!


Now, I feel in the mood for a few fun challenges too.
I am entering Vintage Framed Santa in the following Challenges:
Fashionable Stampers: Colors- coffee to cream
Simon Says Stamp and Show: use one color- I used different shades of brown
Mark's Finest: Make an Altered image that has been showcased in their 12 days of Christmas- Altered frame
ABC Christmas: V is for Vintage

Okay, Phewww.  Lots of info.   I have been working like a busy bee all week and have tons of stuff to show you in the upcoming weeks.  I still have all the Operation Write Home Cards to show you too.  I will be back  with lots more fun.  Oh, and have a happy Friday!  Love ya.
Karen

Tuesday, October 25, 2011

Thanksgiving Digis from Blockheads Stamps

Hi Everyone!
Having a great day here!  I need to run out to the grocery store but, wanted to get some Thanksgiving cards posted first.  Now, these are nice and CAS (clean and simple).   Blockheads Stamps has decided to add digital stamps to their store.  And, today I have used three of the new images to create some fun Thanksgiving cards.  The digis come in sets.  There is a regular image and an image that has been Zentangled.  They Are Awesome.
Images used: Pumpkin Digi, Turkey Digi, and Thanksgiving Words.  Here is the first card.


Materials:
Blockheads Digi Images
Neenah Solar White
Copics
Orange, Green, Brown, and Cream CS

The  images were printed out from the computer using Neenah Solar White CS (works best with the Copic Markers).  I let the ink dry before coloring.  I used Copic Markers to color.  I adjusted the size of the sentiment to fit the card and colored with Copics.


The second card is made in the same way.  The colored image was layered with Fall colored CS's.


And, here a few close up views.  The cards are pretty quick and the process of coloring is relaxing.  Like coloring when you were a kid.  Remember how fun that was??


Again, I re-sized the Sentiment to fit the card.  It was added to the card with dimensional squares. 


I would like to enter my Thanksgiving cards in the following Challenges:
Victorine Originals: Fall
My Time To Craft: Quite white
Wee Memories: Free For all
Melgens Challenge: Red and Gold

Well, that's two Thanksgiving cards done.  Only 20 more to go.  LOL.  Have a super day!  Love ya.
Karen