Sunday, September 7, 2014

Guest Designing at Blessings Ink -with A Muse Studios

Hello Everyone!!
Fabulous news:  I am Guest Designing with Chris over on the Blessings Ink blog!!!  Chris is an A Muse Studios Demonstrator and hosts weekly challenges with  weekly winners and top picks.  The weekly winners are eligible for the monthly prize.   So, I will be hanging out with Chris all during the month of September.

The Theme of the current challenge is:

Use Ribbon or Twine

An easy one for me, right??!!   It ain't done until it has ribbon.  LOL

****Just a few Guidelines for entering  the Challenges:
 2 entry limit and no digis please!
Link your creation to your paper crafts blog, gallery (SCS or Flickr) before midnight of the following Sunday.
Use any product but please follow the challenge criteria.

Double your chances to win by using A Muse Studio products (just leave Chris a reminder in the comments please)


Now, I went a bit crazy stamping, again!  Are you surprised??   I ended up making three cards--each a little different using the same stamps.  I just can't stop myself!!   Here we go!


Materials List:
Stamps: Springtime Day set from A Muse Studios
Ink: Mushroom, Nutmeg pigment from A Muse Studios
CS: Cream, Peach; White; Corals; Rusts
Clear Embossing Powder
White Pearls
Ribbon: Poppy and Moss Satin Ribbon from A Muse Studios
French Roast/White Bakers Twine from A Muse Studios
Pink Twine
Distress Markers (to color)
Tulle
Tag Punch
Gold Stickles


Instructions:

  • Make an A2 card
  • Stamp the Bee Hive on white or cream CS with pigment ink
  • Heat emboss with clear embossing powder
  • Color some of the flowers and leaves with Distress Markers
  • Layer and add to card


  • Stamp the sentiment and punch out
  • Punch hole in tag and add twine
  • Tie ribbon or tulle around card
  • Add the tags 
  • Add a few pearls


*********


*********
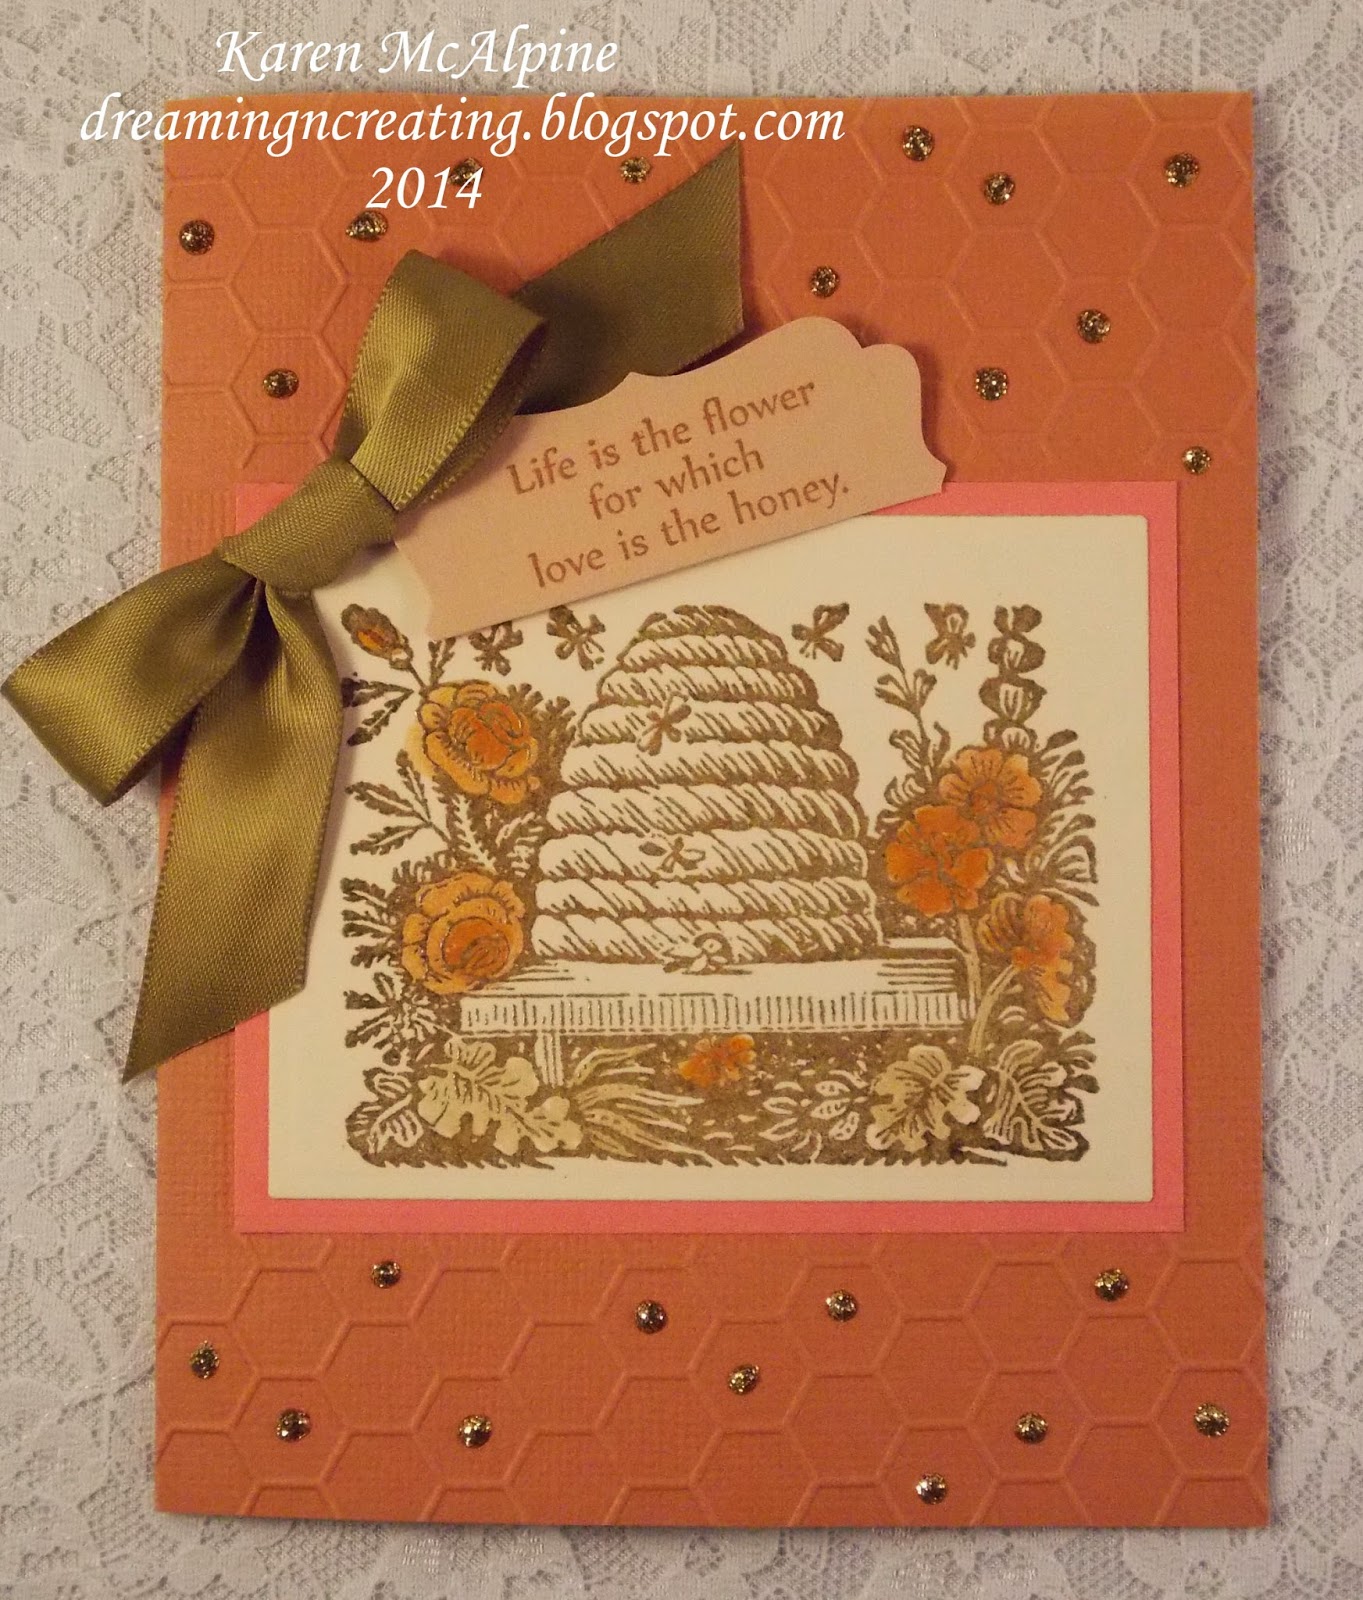


  • Dry emboss the top and bottom edge on this card
  • Tie ribbon in a bow and add to card
  • Add gold Stickles


**********A Few Challenges for my Bee Hive cards:
Simon's Wednesday: stamps/no digis
Sister act: anything goes
Vintage Stamping: anything goes
Crafting at the weekend: anything goes
613 Avenue: anything goes
Come and get it: autumn in the garden


Thanks for stopping by!!   I will have more projects for Blessings Ink throughout the month!!  And lots of other fun stuff!!  See you soon.  Love ya
Karen

Friday, September 5, 2014

Lily Flourish With a Flourish--Lost Coast Designs

Hi Dreamers!
Happy Friday.  Always a reason to celebrate.  What's up for your weekend?  My husband's band has a concert on Sunday.  Probably try to get some yard work done today and tomorrow.

I am continuing with my Lily Flourish  series of cards today.   There are two more cards in the series and I will share both of them today.  See the other Card here.    All stamps are from Lost Coast Designs.

The first card features the Lily Flourish used as a background stamp with a Lovely butterfly.


Materials List (for both cards):
Stamps: Lily Flourish, Butterfly Face, Dragonfly Border all from Lost Coast Designs
Inks: Black, Pacific Point - Stampin' Up; Red Pepper- Adirondack
Distress Ink: Vintage Photo
CS: White; Cream;Baja Breeze, Pacific Point, and Soft Suede - Stampin' Up// Cameo Coral, Ruby Red, Poppy Parade, and Blush Blossom- Stampin' Up
Pearls
Grommet Tag Die - Spellbinders
Washi Tape: Ruby - My Mind's Eye
Ribbons


Instructions:

  • Make a card from Baja Breeze CS and layer with Pacific Point
  • On the Soft Suede CS stamp the Lily Flourish repeatedly with black dye ink
  • Distress with Vintage Photo ink and add to card 
  • Stamp Butterfly face on cream CS and cut out
  • Add to card with dimensional adhesive


The Lily Flourish is used at the focal point on the second card.

  • Make a card from Ruby Red CS and layer with Poppy Parade
  • On Cameo Coral cs stamp the Lily Flourish with Red Pepper ink
  • Add to card 
  • Add one strip of Washi tape and two ribbons


  • Stamp the Dragonfly Border on white CS with Red Pepper ink
  • Cut out with the tag die
  • Add a pearl to each end of the tag
  • Add the tag using dimensional adhesive

I had a blast with this Lily Flourish stamp!  The possibilities are endless!  LOL
I will add a sentiment to the inside when I want to send the cards.  I can used the cards for any occasion--like just a hello, birthday, thinking of you, etc....

******************A few fun Challenges for my Flourish with a Flourish cards:
DL Art Linky: anything Goes
4 Krafty Girls: anything goes
Crafting by Design: anything goes
Crafting with Dragonflies: girly and lacey
Penny's Challenge: anything goes
Simon's Wednesday: stamps-no digis
*******************************

Glad you stopped by!  Next up in Dreamland---cute birthday cards for children.  See you then.  Love ya.
Karen

Monday, September 1, 2014

Love To Scrap Challenge--Let's Fly Away

Hello Dreamers!
Hope you had a great weekend!  Very nice weekend here.  Just picked my nephew and his new bride up from the airport.  They had a great honeymoon in Florida.

Time for a new Challenge on the Love to Scrap Challenge Blog!!!
The theme for the next two weeks is:

Let's Fly Away

Make a project that features something that flies: insects, birds, fairies, planes or something that inspires you to take flight.  Your project must have some stamping on it.

There are two lovely sponsors for the challenge:

Prize: 7 images of choice to winner
TEAM A

Bugaboo Digi Stamps

Prize: 3 images to winner

TEAM B


For my design team project, I made a cute, bright card with the digi Flower Bird from Bugaboo Stamps.


Materials List:
CS: White; Pale Green -  Bazzill; 
Almost Amethyst and Barely Banana - Stampin' Up
Copic Markers
Large Octagons die - Spellbinders
Bloom Dots Embossing Folder - Cuttlebug
Certainly Celery Ribbon - Stampin' Up
Pearls


Instructions:
  • Print  digi on white CS and let dry before coloring
  • Make a card from the Pale Green CS
  • Cit a rectangle from Barely Banana CS and dry emboss
  • Add to left side of card base


  • Color the Flower Bird digi with Copic Markers
  • Cut the image and Almost Amethyst CS with the dies
  • Add to card with dimensional adhesive
  • Tie ribbon in bow and glue to card front
  • Add pearls to card base and to center of each flower


*********How about a few fun challenges for my Happy Flower Bird???
Come and Get It: things with wings
That Craft Place: summer colors
Just Us Girls: anything other than A2 size card
Brown Sugar: anything goes
Fussy and Fancy: pet or favorite animals
CRAFT: pet or animal
Creative Knockouts: whimsical wings
Simon's Wednesday: anything goes
********************************************

Coming up in Dreamland

  • a vintage card with Lost Coast Designs stamps
  • Cute children's birthday cards
See you again soon!!  love ya
Karen

Tuesday, August 26, 2014

Dry Embossing Takes the Spotlight

Hello Dreamers!
How is your week going?  Keeping busy here.   Making a few cards.  Mowed the lawn today too.   Now that I have that out of the way, I have more time to make cards.....
The projects today, feature dry embossing.  The embossing really sets the tone for the card.  On the first card, I added some paper flowers and a little bee.  The second card is all dry embossing with a little bee.  


Materials:
Stamps: DRS Designs Sentiment on inside of card One-Not Some Junk
Inks: Vintage Photo, Forest Moss, and Mustard Seed Distress inks
CS: Cream, white, tan, brown,and yellow
Paper Flowers
3-D Bee stickers: K & Company
Ribbon
Embossing folders: Paisley - Cuttlebug; Flower - Darice


Instructions:

  • Make two A2 cards from tan and yellow CS
  • Layer the tan card with brown CS
  • Dry emboss  cream and white CS
  • Highlight the dry embossing with Distress ink
  • Add layers of paper flowers to the Paisley card and a bee to both cards
  • Stamp this fun sentiment on the inside of the cards


Inside


Card Two:


*********** Challenges for "Dry embossing take the spotlight":

DRS Designs: color challenge
Craft-Dee Bow: anything goes with a bow
Dream Valley Challenge: flowers
Through the purple haze: anything goes
Allsorts: bright sun shiny colors
Aloha Friday: in the garden

Well, I should go and finish up the soup I am making for dinner.   I have to add a few more things.   Enjoy your evening!!   See you next time.  Love ya.
Karen

Sunday, August 24, 2014

Flourish and Perfume Label from Lost Coast Designs

Hello Dreamers,
My nephew's wedding was Saturday and what a beautiful wedding it was.  Lovey service.  The bride was gorgeous and the groom handsome.  The reception was really fun too.  I made the airport run this morning, dropping the new couple off for a flight on their honeymoon to Florida.  Very exciting to watch them embark on their new life together.

Now, back to business.  Today, I have a vintagey card with stamps from Lost Coast Designs.  I made this for the current challenge, which is:

Words or Letters

You still have time to enter the challenge---One more day!!

On my project, I used the Lily Flourish, which  is such a versatile stamp.  I will be showcasing this stamp over the next few weeks to give you several ideas on how to use this gorgeous stamp.


Materials List:
Stamps: Lily Flourish, Loopy Calligraphy, and Labels Set from Lost Coast Designs
Inks: Tuxedo Black, Toffee Crunch, and Rich Cocoa - Memento
Distress Ink: Vintage Photo
CS:Cream, Soft Suede - Stampin' Up, and Dark Maroon
Pearls
French Roast Twill Ribbon - A Muse Studios
Dimensional adhesive


Instructions:

  • Make a 5.25" square card from maroon CS
  • On the Soft Suede CS, stamp the Lily Flourish with Tuxedo Black ink; stamp the Loopy Calligraphy with Toffee Crunch ink
  • Distress this piece with Vintage Photo ink
  • Glue to card base


  • Stamp the Violette Flor label on cream CS with Rich Cocoa ink and and fussy cut
  • Add to card base with dimensional adhesive
  • Tie a bow in ribbon and glue to  card
  • Add pearls


  • On the inside, stamp Lily Flourish and add some of the CS


I will just add a sentiment to the inside when I send the card out to a special someone.  

***********A few fun Challenges for my Vintage Flourish and Label Card:
Artistic Stamper: anything goes
Memas Craft:anything goes
Tando Creative: lovely layers
Simpy Create Too: monochromatic
Sister Act: anything goes
*************


I will be back soon with another Lily Flourish project!!!  And, a few other things in between too.  Hope you are having a lovely weekend!!!  Love ya.
Karen


Thursday, August 21, 2014

Decorative Comb for the Reception

Hi Dreamers,
No card today!  I was occupied making this decorated comb for my future niece to wear at the reception.  The wedding is Saturday.   The colors are Red and Purple.   Take a look.


I started by making  a sleeve from  white satin fabric.  The sleeve slips over the top of the comb.  I gathered a price of lace fabric and shaped it into a fan.  Then stitched it down.  I added the large pearl button.....yes that is a button.  Then glued a string of red pearls.  I added individual pearls too.  Then wrapped a piece of purple tulle around the bottom.

Well, I hope the bride likes it....


A few fun Challenges:
Oldie but a goodie: anything but a card and use something from stash.  I used the lace fabric that I have had in my stash for awhile....
Tip Top Tuesday: use something from your stash....the lace fabric
Crafting from the heart: anything goes


Just a quick post.  Gotta run!  See you soon.  Love ya.
Karen

Monday, August 18, 2014

Love To Scrap Challenge Blog New Challenge- Anything Goes

Hello Friends!
Time for a new challenge on the Love To Scrap Challenge Blog!!  The new theme is always a favorite!


Anything Goes with a Rubber or Clear Stamp


Make any project you like using a rubber or clear stamps.  No digis this time.

We have a lovely sponsor for the Challenge:

$25 Gift Certificate to Heartfelt Creations!!!
Heartfelt Creations


For my design team project, I made a vintagey card with a travel theme.  I stamped on glossy CS and used lots of distress inks.


Materials List:
Stamps: Bicycle Collage and Enchante both from Hero Arts; Sentiments from Blockheads Stamps
CS:Glossy white and white
Ink: Vintage Sepia - Versa Fine; Yellow and Green dye inks
Distress Ink: Forest Moss, Mansard Seed, Vintage Photo- Ranger
Dies: Ticket - A Muse; File Folder Tab -- My Favorite Things
Ribbon
Pearls


Instructions:

  • Make a top fold card from Glossy white CS
  • Stamp the Bicycle Collage with Vintage Sepia
  • On White CS stamp the Enchant stamp three times with three different inks:  Yellow, green and Vintage Sepia
  • Die cut with the ticket die
  • Die cut the File Folder Tab


  • Distress all the die cuts and the card with the distress inks
  • Stamp the sentiment
  • Glue the die cuts pieces to the card


  • Add pearls to the card front along the edge of the collage stamp
  • Tie a knot in ribbon and wrap around card front


******Challenges for My vintage travel card:
Amusing Challenge at Stamped Blessings: die cuts
Corrosive Challenge: B Unique---Things that start with B---I used bike, brown ribbon, brown ink, bon voyage
Crafting from the Heart: anything goes
Incy Wincy: things and wheels
Love to Create: polka dots and pearls
Simon's Monday: anything goes
Vintage stamping Challenge: summer days

*********************************

Would love to see what you make!!  Don't forget that nice prize from Heartfelt Creations....I wish I could enter......LOL

Hope you had a great weekend!  See you next time!!  Love ya.
Karen