Showing posts with label Distress Markers. Show all posts

Saturday, February 22, 2014

Romantic Cameos in shades of Apricot

Hi Dreamers!
How are you doing this fine Saturday??!!  We haven't had any snow for a whole day so that is good!!  And, the sun is actually visible!  Nice change!  Now, on to some crafty fun.  I was inspired by the Simon Monday challenge of Cameos to make today's projects.  I said to myself, "Self, you have a whole set of Cameo stamps!"  Get busy!!  I used one of the six Cameos from the Lost Coast Design set called "Cameos".

Materials List for both cards:
Stamps: Cameo Set and Asmat Bones Border from Lost Coast Design
Inks: 
Stazon Jet Black and Saddle Brown
Black Pigment
Tea Dye and Antique Linen Distress 

Distress Markers
Acrylic Paints
mono printing Plate
Lumiere Paint
CS: Bazzill
Watercolor paper
Blue Pearls


I was making backgrounds with my mono printing Plate the other day (I will show you more pics of those in a later post).  I thought this Apricot colored background would be really cool with the Cameo.

Let's take a look at card #1


  • I used acrylic paints on a mono printing Plate to make this background.  The paint colors used: brown, yellow, white, and red.


  • The Cameo was stamped twice. With Saddle Brown Stazon first and then with Jet Black Stazon directly onto the Acrylic paint background.  
  • Asmat Bones Border Stamp  (only $1.00 on the LCD web site!!) from Lost Coast Designs was stamped with Saddle Brown
  • I added a piece of velvet fabric---I was thinking that often Cameos are worn on velvet ribbon around the neck.


Card two uses the same Cameo Stamp:


  • Stamp the Cameo with Black Pigment ink and heat emboss with black powder on cream CS
  • Color the Camaro with Tea Dye, Shabby Shutters, Tumbled Glass, Worn Lipstick, and Dried Marigold Distress Markers
  • Tear out and distress with Antique Linen and Tea Dye Distress Inks
  • Brush a little bit of Lumiere Acrylic paint on the edges


  • To make the watercolored piece: on a craft sheet scribble the blue maker and spritz with water; press a piece of watercolor paper into ink.  Repeat with Tea Dye Ink refill and other markers
  • Cut a rectangle from the  watercolored paper
  • Layer onto CS and brown wrapping paper
  • Add blue pearls


***************Challenges for my romantic Cameos:
Simon Monday: Cameos
Artistic Stamper: use distress
Country View: use paint
Allsorts: ladies day


Now, go and enjoy your weekend!  Make sure you set aside some time to stamp--it is therapeutic.  See you next time!!  Love ya
Karen

Wednesday, December 4, 2013

The Twenty-Five Days of Christmas Day Four

Hello All,

Welcome to Day Four of The Twenty Five Days of Christmas!!
And Blog Candy!!

I will be sharing a different Christmas card every day from December 1st through December 25th.  On today's card, I used an embossing folder to create texture and also stamped a sweet image that was colored with Distress Markers.  
**********This card is entered in the Simon's Wednesday Challenge-Make your own background.


Materials:
CS: Kraft; Electric Red -My Favorite Things
Coffee Archival ink (to stamp image)
Vintage Photo Distress Ink
Distress Markers- Barn Door, Crushed Olive
Xmas Red  and Chrystal Stickles glitter glue
Silver Ribbon
Ornaments on Side Embossing Folder-Darice


And, don't forget the blog candy.  I purchased some new items and shared some of my stash.  Here it is!!


Ways to Win the Blog Candy:

  1. Leave a comment on any of the 25 Days of Christmas posts--each time you leave a comment your name goes in the drawing.  So the more you comment, the more chances of winning.
  2. Become a Follower--Leave a comment to let me know!
  3. Post about the 25 Days of Christmas on your Blog--Leave a comment to let me know!
  4. Post about the 25 Days of Christmas on Facebook--Leave a comment to let me know!
See all the details about the Blog Candy on Day One post here.

See you next time for DAY FIVE of THE 25 DAYS OF CHRISTMAS.  Hope you are having a great day.  And, that you are finding time to make a few Christmas cards!!  Love ya.
Karen

Friday, January 25, 2013

Steampunk Owl and Distress Embossing with Blockhead Stamps

Hi Dreamers!
Happy Saturday!  Long live the weekend!  I am continuing my new found love for Distress Embossing Powder today.   Today's project has a "not in the real world" kind of theme.  Let's enter the realm of fantasy with this Steampunk Owl.


Materials List:
Stamps: All From Blockheads Stamps
Steampunk Owl - Fringe Folktales
Pen Nib - Victorian Invention
Sexton - Stargazer
Inks:
Embossing Ink
Dusty Concord and Frayed Burlap Distress Inks
Cobalt Archival Ranger
Distress Markers
Distress Embossing Powder
Pre-cut white tag (3 1/8 x 6 1/4")
Black Satin Fabric scraps
Jewelry Findings
Mini Safety Pin


Instructions:
  • On a pre- cut white tag or a tag cut from CS (3 1/8 x 6 1/4") stamp the sexton with embossing ink.
  • Heat emboss with Distress Embossing Powder.
  • Let cool completely and then rub off the granules that don't melt.  Gives a nice distressed looking image.  
  • Distress the entire surface of the tag with Distress inks.


  • Stamp the Steampunk Owl with Cobalt ink
  • Color the owl with Distress Markers
  • Stamp the Pen nibs with Frayed Burlap Distress ink


  • Add a strip of black satin fabric tied in  knot to the bottom of tag
  • Tie another strip in a knot at the top threading the fabric through the hole
  • Pin a clock to the black satin with a mini safety pin

And, how about a few fun challenges for my Other worldly Steampunk Owl??!!
Creative Moments bloggers challenge: neutral colors and anything goes
Corrosive challenge: put a pin in it
Crafts and Me: vintage
Paper Play time: use some brown
Simon Says stamp and show: what are you known for!---always use fibers.

Isn't this owl just the greatest!  I love it.    So totally whimsical!!  Have a great weekend!!  Love ya.
Karen

Tuesday, December 4, 2012

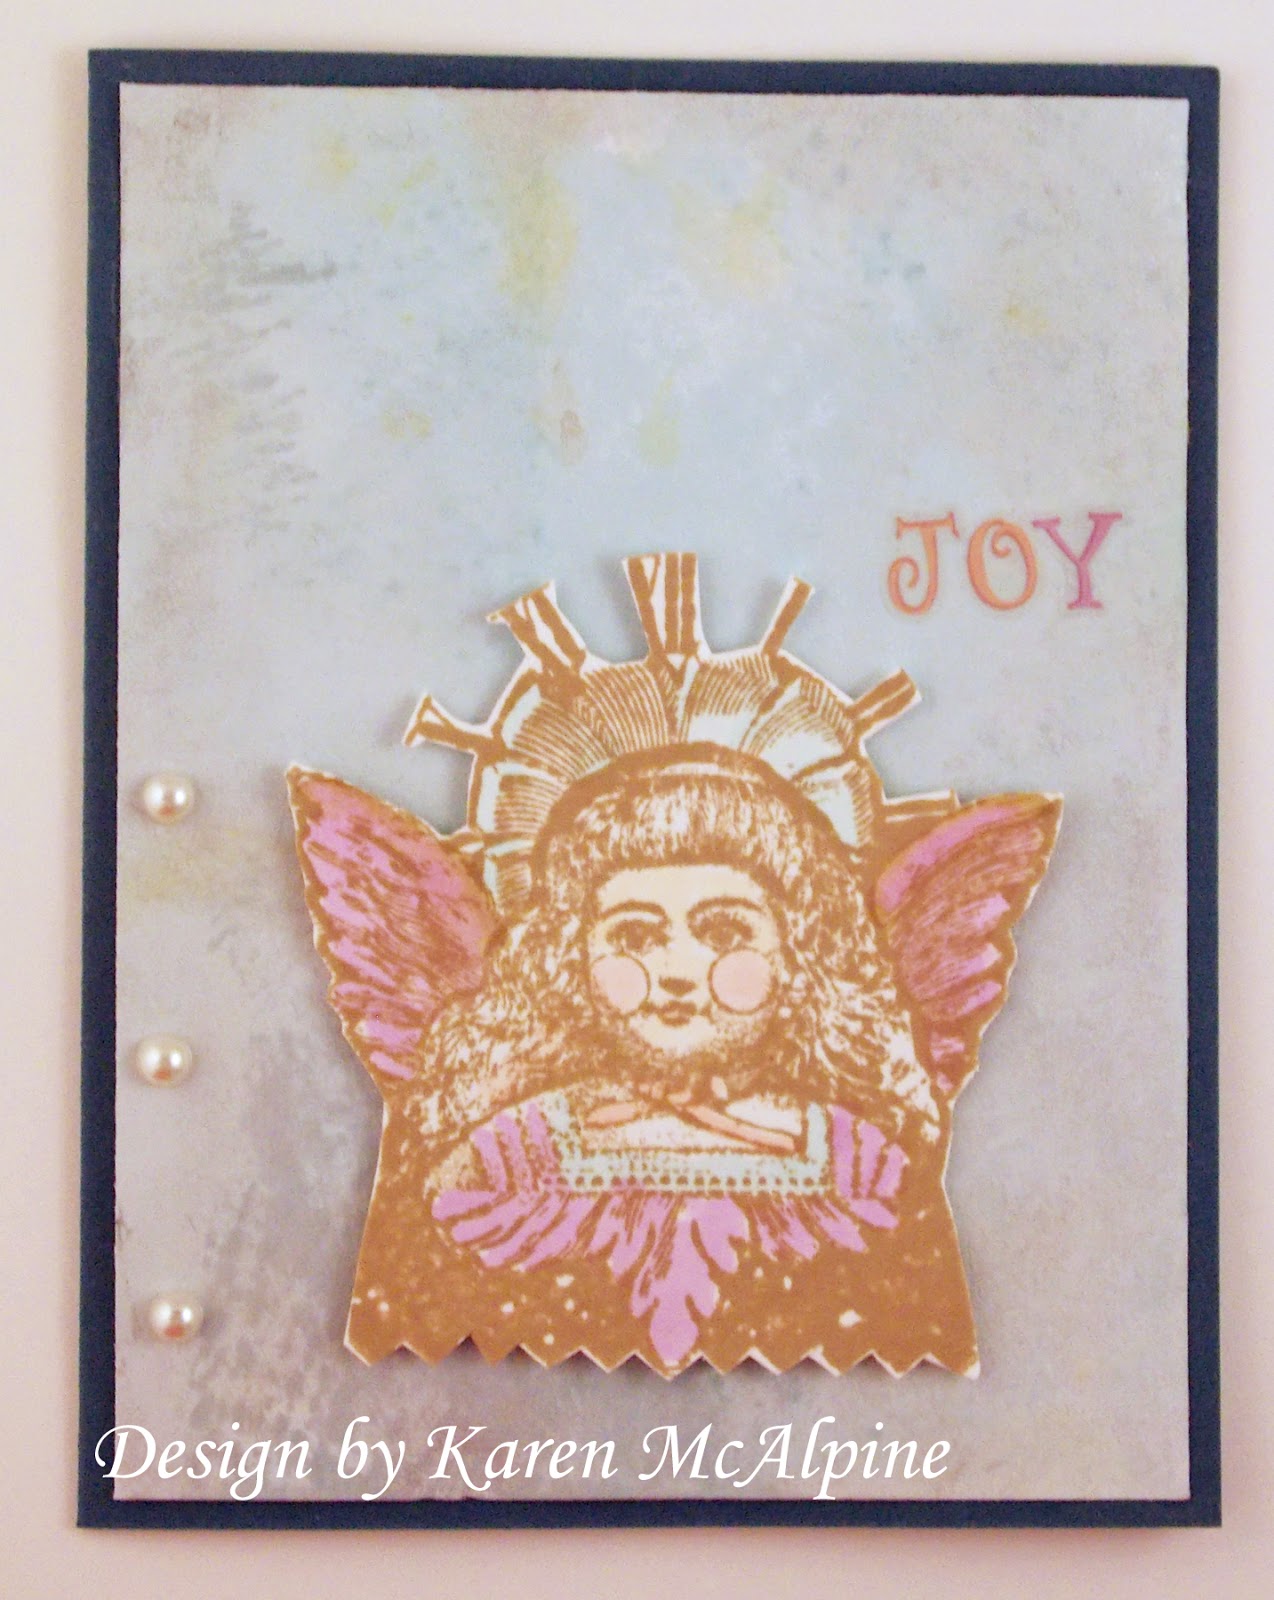
Joyful Blue Angel with Paper Artsy

Hi Dreamers!
I hope you are enjoying all the Christmas projects here in Dreamland.  I am having so much fun making all the projects and thinking about who will get each card.  Today, I have a pretty Joyful Angel card with a silvery background.


Materials List:
Stamps: Holiday Theatre Paper Artsy available from Blockheads Paper Arts
Inks: 
Toffee Crunch Memento
Brushed Pewter Ranger Metallic Stain
Weathered Wood and Tumbled Glass Distress Markers
Copic Markers
Cardstock: Solar White  Neenah, navy
Craft sheet
Pearls
Alphabet Stickers


Instructions:
  • Make the background with the markers and stains.  


  • Stamp the Angel on Solar White cs with Toffee Crunch ink.
  • Color with Copics
  • Cut out Angel


  • Make a card base from the navy CS
  • Add the trimmed background piece
  • Add Angel with dimensionals
  • Spell out Joy with Alphabet stickers


  • Add pearls


Love this image!   This is one of those stamps that I kept stamping and stamping just to see what it looked like in different inks.  I went with this softer ink color for a more vintage muted look.


Challenges for my Joyful Blue Angel:
Mark's Finest: Christmas with no red or green
Challenges 4 everyone: anything goes
2 Sisters: Christmas sparkle
My Sheri Crafts: tis the season
Jingle Belles Rock: Christmas + anything goes
By the Cute and Girly: Red white and blue Christmas

How is your card making going??  Are you making cards for Christmas?  Well, I hope you are having a great day!  Oh, let's see what is on the schedule for tomorrow.  Looks like tomorrow is WOYWW.  I will be showing you photos of my cards that are going into a sale.  More about the sale tomorrow.  See you then.  Love ya.

PS: I will be back later today with a decorated box made with Paper Artsy stamps and tissue paper. 

Karen

Saturday, November 24, 2012

Dreamy Madonna Christmas Card with Paper Artsy

Hi Dreamers!
I am back again today with a dreamy Christmas card!  I used non-traditional colors and the mind blowing stamps designed by Lynne Perrella-Paper Artsy.  The Paper  Artsy Stamps are available in the USA at Blockheads Paper Arts!  I used markers and stains to make the background for my card.


 size: 4 1/4" x 5 1/2"


Materials need to make the background and the card:
Stamps: Babushka Balloon Paper Artsy from Blockheads Paper Arts
Inks:
Black Soot Distress Ink Pad
Markers:
Weathered Wood and Tumbled Glass Distress Markers-Ranger
Summer Sky and Pear Tart Memento Markers
Stains: Brushed Pewter Distress Stain
Cardstock:
White, Cream, and Aqua
Green Ribbon
Rhinestones


Click here for instructions on making the Background Paper.


  • Make background following Tutorial.  Instead of using the reinkers, scribble the Distress Markers onto the craft sheet. 
  • Add a bit of water.
  • Proceed per tutorial instructions.
  • When background is dry stamp the buildings with Black Soot ink


  • Stamp the Madonna on a separate piece of White CS and cut out.
  • Color the halo with the Memento Markers.
  • Run a Metallic pen around the edges of the halo.
  • Glue Madonna to background
  • Make slits in this piece at the halo edges.  Feed the ribbon through the slits
  • Add this piece to a Aqua Card base
  • Add rhinestones

How about a few fun Challenges for my Dreamy Madonna Christmas Card?!!
Bloggers Challenge: Christmas
Sparkles Forum Christmas: Contemporary color Combo
Allsorts: bling
One Stop Craft Challenge: vintage Christmas
Sugar Creek Hollow:vintage Christmas

Have a super weekend!  Love ya.
Karen