Showing posts with label CAS. Show all posts

Sunday, April 21, 2024

More Garden Scenes

 Hello Everyone

Wanted to share more of the cards I have been working on for months.  Most of them went to my BFFs and I kept a few.  This is a collection of cards featuring a garden scene. I used one stamp set and varied how I stamped the images on the cardstock.  I used lots of different colors and just kept stamping and stamping. This set of cards are styled in a more Clean and Simple way.

Stamp and Die set: Grace's Garden from Stampin' Up

All cards are colored with watercolor markers.

Die cut ovals were added to the first card. 


I added a kitten and bird in some of the cards.  So cute.


So just a nice bunch of cards to send out for any occasion.  See you again soon for more cards. They will feature a window scene. 

Hope you have a lovely day.

Karen

Friday, March 13, 2020

Simple Butterfly Card

Hello Everyone,
Today, I wanted to share this collection of  quick to make card.  A pretty butterfly is the focal point.  You could make this card in about 10 minutes.


I stamped a butterfly (this is a retired Stampin' Up but any butterfly would work) and then fussy cut.  Die cut a few circles and you are done.  Super easy.


Here are two more versions.


So happy you stopped by today!  Hope your day is lovely and I will see you next time for another fun card project!

Karen

Thursday, July 7, 2016

CAS Card with Technique Junkies Art Stamp

Hello Dreamers!
Back again today with more fine art inspired stamps.  This whimsical stamp is from Technique Junkies!  It is available in the Spring Stamp Clearance for only $2!! (You will find some real bargains on beautiful stamps in this Clearance!!  I just had to pick up few myself!!)  And, don't forget to check out the July New Releases!! 

Let's check out My fine art inspired CAS card!!


Materials List:
Stamps: Van Gogh's Woman in Checked Dress;  Waves and Dots Panel both from Technique Junkies
Ink: Teal Zeal Memento
CS: White and teal


Very quick card but with really striking results.   When you have such a lovely stamp, you don't need lots of extras.  Great card for a special someone.  So glad you stop in today.  Hope you enjoyed my fine art inspired project.  See you next time.  Love ya
Karen

Tuesday, January 19, 2016

Valentine's - CAS and One Layer

Hello Friends!
I am sharing more of the Valentine's Day Cards I made for the Cards from the Heart Card Drive organized by Winter.  See all the details on her blog.


 I tried it with the card in two orientations.  I like both, portrait is my favorite.  I used this cute heart stamp.  I think I received it in a blog candy.  It sure works great for CAS cards.  The Love is an older Stampin' Up stamp.  Ink: Real Red from Stampin' Up.


Hope you are having a great day.  Doing fine here.  Very cold outside though.  I had to run out to the post office this morning and mail the Valentines to Winter.  I sent 55 cards in.  Hope the kiddies like them!!  Check back next time for Lost Coast designs and Technique Junkies.  Such Fun!  Love ya
Karen

Friday, November 21, 2014

Christmas Card - One layer Made in Under 5 Minutes

Hi Dreamers!
Back today with a Christmas card that is super easy.  I was blogging around and saw a challenge to make a One Layer card in under 5 minutes (Mod Squad Challenge).  I thought I was up to that challenge!!  And, it sounded fun.....  So, I grabbed a few stamps and a piece of white card stock---


***** Christmas Sleigh One Layer Card- Total time to make - 4 minutes
Within the 4 minutes, I even had time to decorate the envelope.


Materials List:
Stamps: Work of Art and Open Sleigh from Stampin' Up; sentiment on inside from The Artful Stamper
CS:white
Ink: Real Red - Stampin' Up; Rich Cocoa - Memento
Ribbons


Instructions:

  • Make card from White CS
  • Ink the brush stroke stamp with Real Red ink and stamp 3 times without reinking
  • Stamp the sleigh and Merry Christmas with Rich Cocoa
  • Tie the ribbons in bow around card


  • Stamp sentiment on inside
  • Ink Sleigh stamp and stamp off once and then stamp on inside
  • Stamp one brush stroke and sleigh on the envelope
DONE!!!  In 4 Minutes.   
I liked it well enough that I made 3 more!!  LOL  Here are the other three using a green ink (Old Olive Stampin' Up).  I gave one a red card base (because I stamped the sentiment on the inside upside down!!  LOL). It's all good!


 *******Challenges for my One Layer Christmas Card:
Mod Squad: one layer Christmas card in under 5 minutes
Winter Wonderland: Christmas only--sentiment on front of card
Red Rubber Inspiration: repeat yourself
Christmas Cards all year Round: Christmas only- no DP
Crafty Hazelnut Christmas Extra: anything Christmas goes

I think I am done with my Christmas cards now.  I have 55 cards and I think that will be enough.  I will continue to share the cards up until Christmas day.  I also have a pretty vintage Birthday card made with Flonzcraft stamps for the next post.  So, see you then.  Hope you are having a great day!  Love ya.
Karen

Tuesday, October 14, 2014

Love Birds

Hello Everyone!
Hope you had a great weekend.  We got a way for a bit this weekend to the great outdoors.  Visited Hartwick Pines State Park.  Lots of clean, fresh air and beautiful trees.  The leaves are just starting to change and the colors were gorgeous. Here is one picture that I took.   I have a few more photos that I will share in another post.

Hartwick Pines, Michigan


I made two more cards with the Splish Splash stamp and die set from Taylored Expressions.  See the other projects here and here.   I stamped the birds, hearts and flowers to make the love themed cards.  I think I may use them for Valentines.  That is a way off, but I can put them in my "to send" card box and they will be fine until February.  

Reminder: Taylored Expressions is sponsoring the Love To Scrap Challenge right now.  The theme is Anything Goes!!!!   You must stamp something and no digis are allowed for this challenge.

CARD ONE:


Materials:
Stamps:  Splish Splash stamp and die set from Taylored Expressions
Ink: Black die
CS: White;
Card One: Wisteria Wonder and Almost Amethyst from Stampin' UP
Card Two: Real Red and Crisp Cantaloupe from Stampin' UP
Polka dot embossing folder - Cuttlebug
Copic Markers
Red Stickles
Red Bakers Twine
Red and Lavender Ribbons


Instructions:

  • Make a white card 
  • Dry emboss white CS and layer onto the white card
  • Stamp the images and color with Copic Markers
  • Layer image with the two lavender CS's
  • Add to card
  • Tie ribbon in bow and add to card


 CARD TWO:


The second card is made the same way, except that I tied bakers twine around the stamped piece and added some red Stickles the the hearts.


Totally cute stamp set!!  So many ways to use this set.  And, you can make cards for any season.
*******************How about a few challenges for my Love Birds:
Paper Take Weekly: Super Fly-anything with wings
Through the craftroom door: anything goes
Cutie Pie: cute and Perfectly purple
The Paper Girls: use solid Cardstock

I am working a few Halloween cards right now.  These are cards that I will send out to my friends and family.  I will share a few of them as they are finished.  I am using some of my older stamps and a few new things too.  I am doing something with a Halloween napkin too........ Stayed tuned for that!!  Up next: A project from Lost Coast Designs--very owly.  See you then.  Love ya.
Karen

Saturday, July 19, 2014

Funny Little Note Cards

Hi Dreamers!
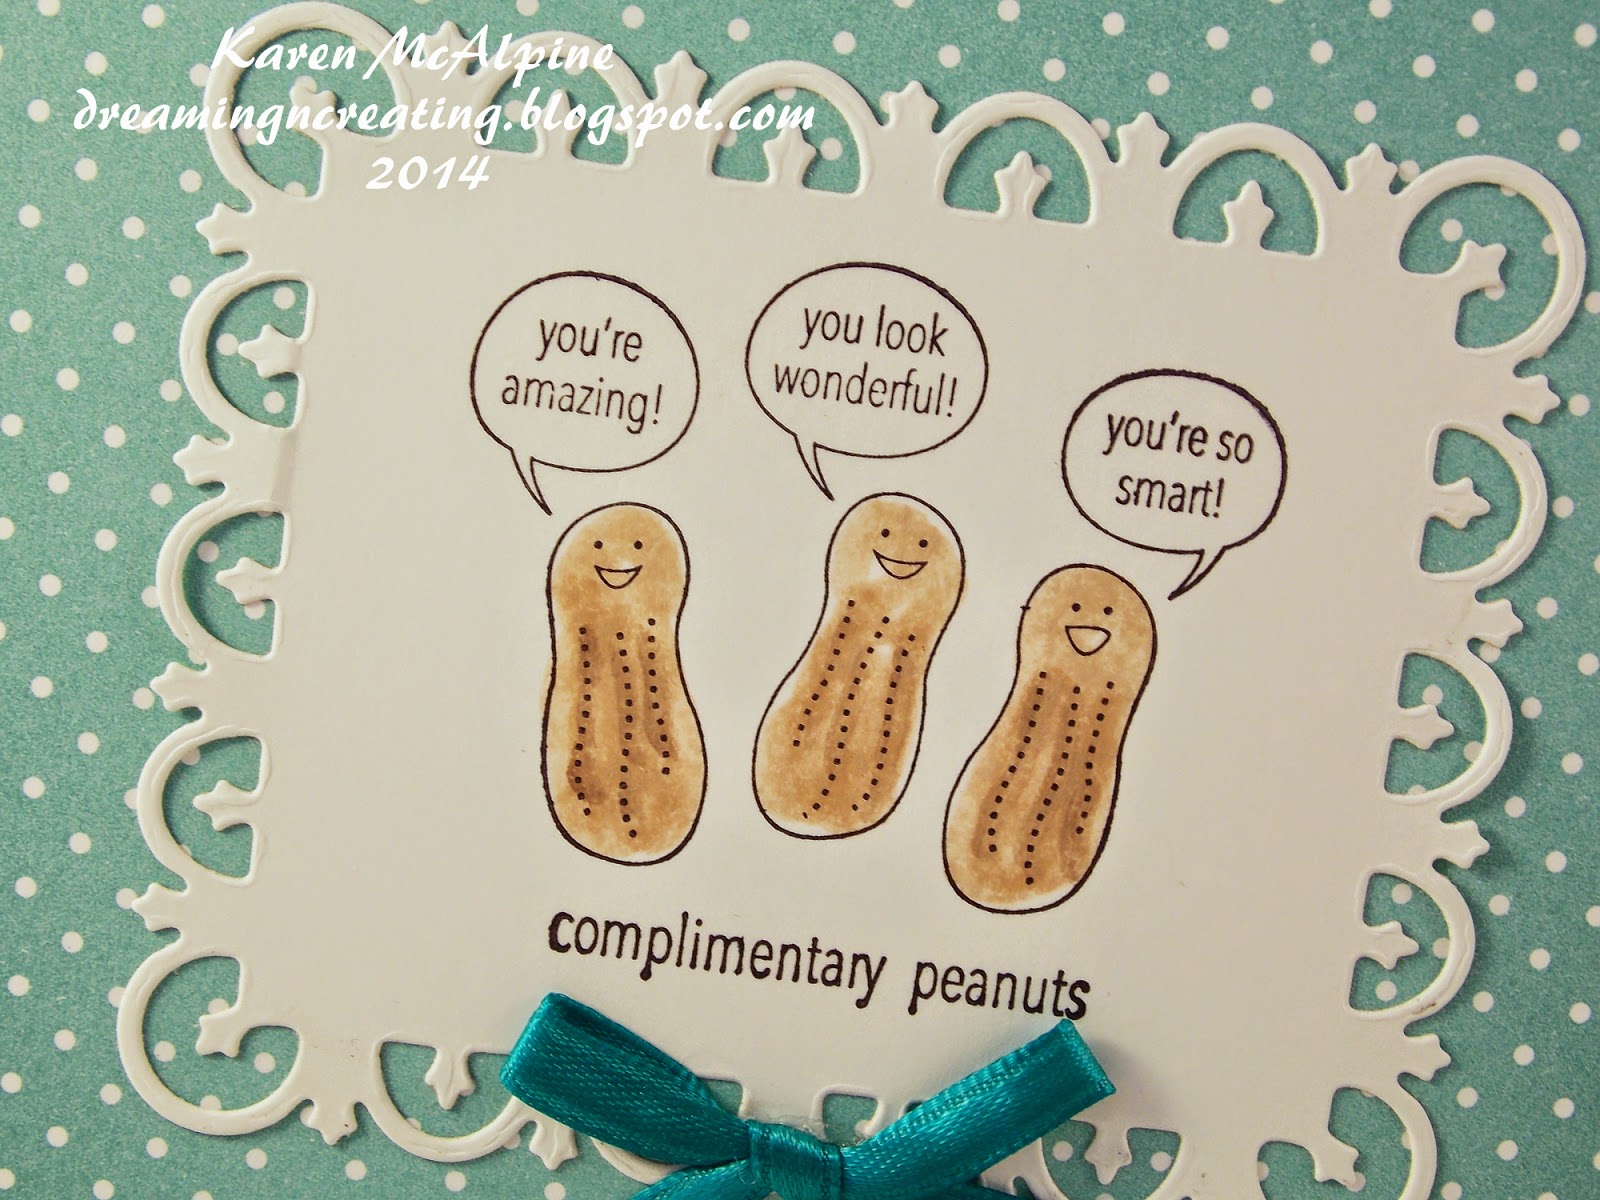
Nice rainy Saturday here in Michigan.  So good for the garden veggies!  Just hanging out around the house today taking it easy.  Thought I would share another set of note cards that I sent to Operation Write Home and Card Care Connection.


Materials List:
Stamp: Stampin' Up
CS: Polka Dot and Gingham - A Muse Studios
Black Stazon Ink
Markers
Spellbinders dies
Ribbons


Instructions:
  • Make four A2 cards
  • On white CS, stamp the image with black Stazon ink
  • Color the peanuts with two or three shades of brown markers
  • Die cut the stamped pieces and add to card base
  • Tie bows and glue to card


Aren't they funny??!!  Too cute.  I think they will cheer some one up and give them a chuckle.

A Few Fun Challenges  for my Complimentary Peanuts cards:
Crafts 4 eternity: lots of laughs
Addicted to stamps and more: CAS
Crafting by Design: use a sentiment
Simon's Wednesday: spots and dots
Keep It Simple: use a bow


Coming up in Dreamland this week:   Monday is new challenge at Love To Scrap. And, I will show you some projects that combine washi tape and Lost Coast Design border stamps.  And maybe a few more of the OWH cards!!  Sounds fun, doesn't it??!!  LOL   See you Monday for the new challenge!!  Hope you are having a great weekend!!  Love ya
Karen

Monday, June 30, 2014

CAS Floral Cards

Hi Dreamers!
Hope you had a great weekend!  Not too much going on here.  Just did some grocery shopping and work in the yard.   Today, I would like to share a group of cards I made for Operation Write Home.  I went all Clean and Simple adding no embellishments or decorative papers.  I used dark ink colors on white and cream CS.


Materials List:
Stamps: all from A Muse Studios
CS: white; cream; maroon; Poppy Parade and Rich Razzleberry -- Stampin' Up
Inks: maroon; Poppy Parade and Rich Razzleberry -- Stampin' Up


Instructions:

  • Make A2 size cards from the dark CS
  • On white and cream CS, stamp the flowers and sentiments with ink that matches the CS card base
  • Add to the card bases
  • Add a white liner on the inside for the Operation Write Home cards


A few fun challenges for my CAS floral cards:
Stamped Blessings: anything goes
Simon's Wednesday: anything goes
Sentimental Sundays: summer with a sentiment
Sister Act:anything goes
Sisterhood of Crafters: monochormatic

Well, I better get going.  I have a bunch of errands to run today.  Hope you have enjoyed my CAS cards!!!  See you next time.  Love ya.
Karen

Monday, May 19, 2014

Love to Scrap Challenge Blog Anything Goes Challenge


Hello Dreamers!!

Time for a new challenge at The Love to Scrap Challenge Blog!!!  The new challenge theme is:

ANYTHING GOES

Now, that is nice and easy.  You can make anything you like with some stamping on it.  And, check out the sponsors for this challenge:


Prize: Stamp set and 6x6 pad of winner's choice
Lawn Fawn

and
Prize: $10 gift certificate
Stitchy Bear's Digi Outlet


For my Design Team project, I used stamps from Lawn Fawn to create a pretty all occasion card.  A perfect little card to send out to someone special.   Check out my project:


Materials List:
Stamps: Sew Lovely and Just My Type from Lawn Fawn
CS: Solar White Neenah; Almost Amethyst -Stampin' Up; Purple - Bazzill
Ink: Rich Cocoa - Memento
Copic Markers: BV02, BV11,BV31, E33, E55


Instructions:

  • Make a card from the Almost Amethyst CS
  • Layer with purple CS
  • On Solar with CS, stamp the images with Rich Cocoa ink  ---a nice change from using black ink with Copic Markers
  • Color with Copic Markers


A Few fun Challenges for my Hello card:
Come and Get It: bingo---I used three or more layers/free/flowers
Sentimental Sundays: funky flowers= sentiment
Paper Players: Clean and Simple flowers
All Sorts: purple passion
CMC Copic Challenge: pretty pastels
Mark's Finest: no DP
Created with Love: lots of layers/at least 3


Head over to the Love to Scrap Challenge Blog and link up your project---and have fun!!!  See you later for a few pics of what's happening in the garden.  Love ya
Karen

Monday, February 10, 2014

Sharing a Little Love with Pretty in Pink Valentine's Day Cards

Hi Dreamers!!
Very wintery here in good old Michigan, USA.  About another inch of snow this weekend.  We are all tired of shoveling.  I have had a nasty cold and am finally feeling better.  So, I had a few days off to be miserable and felt  able to work on a project yesterday.  I will share that project later on .....maybe next weekend.


For today, I have some pretty in pink Valentine's Day Cards I made to send out to family and friends.  The cards are more on the CAS side made with pretty papers and no stamping (I did stamp sentiments on the inside).   I really enjoy using all the beautiful papers I have in my stash.  Sometimes I think my  papers get neglected.  So, get those papers out and let them shine!!     I gave my heart punch a little work out too.


Materials:
CS: white and cream
Decorative Papers: various pink and heart themed papers
Heart Punched
Pink Ribbon
Pearls


Instructions:

  • Make a card base from cream and white CS
  • Punch a heart shape from pink papers
  • Cut a square from another Decorative paper and position under the heart cut out
  • Layer this unit onto the card base
  • Add a bow


  • Add pearls 


I saw a sample like this on Pinterest and wanted to try it.  TIP: Try it on a scrap piece first to get the placement of the punched hearts right.  I found that the depth of my punch's reach kind of dictated where my hearts were on the paper piece.  I threw one out before getting the placement how I liked it.  LOL


  • Punch three hearts from pink paper 
  • Layer over a second decorative paper
  • Add two bows


  • This paper was pretty enough to stand on its own.  I cut a 4.25 x 5.50 inch piece from an 8x8 sheet and layered onto a cream card.


***************And, how about a few challenges for my Pretty in Pink Valentine's!!!
Cut it Up: Valentine's + die cut
Craftin Desert Divas: use the colors red, pink, and white
Brown Sugar: Valentine's
Craftitude: Valentine's or love
Crafts 4 Eternity: With Love
Challenges 4 Everybody: anything goes
Come and Get It: make it girly
Eclectic Ellapu: heart on card  *************


I will be back later in the week with my last Valentine's post.  Then I have a cute baby card to share and a  Lost Coast Designs project.  So stayed tuned for that!!  I hope you are having a great day!  Love ya.
Karen

Wednesday, January 22, 2014

One Layer Valentine's Day Cards

Hello Dreamers!

As you know, I have been working on cards for the "Cards From the Heart" Card drive.   The card drive calls for Valentine's Day Cards that will be sent to hospitalized children.  Today, I thought I would share a few of the cards.  The samples today are one layer cards.


The cards are made with White CS stamped with Real Red ink (Stampin' Up).   The stamps are used are all older Stampin' Up stamps.  As you can image, the cards were quick to make, so I made multiples.  You could really use any stamps you have to make something similar.


Challenges for my one layer Valentine's Day Cards:
One-Layer Simplicity Challenge: restock your card supply-make multiples***New Challenge Blog***
Addicted to Stamps and More: CAS
Crafting with Dragonflies: anything goes
Victorine Stamps: Love/Valentine's
Creative Creations: less is more
Little Red Wagon: CAS
Send a Smile 4 Kids: anything goes for a child
CASology: contrast


The cards went out today to Winter ( card drive organizer).  I will be sharing all of the cards over the next few weeks.  So, check back for that...And have a super day!!  Love ya.
Karen

Tuesday, May 7, 2013

CAS Lamp Post Card with Blockheads Stamps

Hi Dreamers!
I am back--the busy-ness continues.  I am tearing apart my studio ---again!  I have a new desk with hutch (I have to assemble this piece) and a new bookcase ( I will pick that up on Thursday).  So, as you can image things are in a great big mess right now.  I had to get some projects ready for Card Ministry yesterday.  I will share those with you tomorrow.  But, today is Blockheads' day!  I had lots of stamps out and was playing with ink combos.  And, as a result, I came up with this CAS card.    I love the effect you get by layering shades of Distress Inks!


Materials List:
Stamps: Architecture Half Sheet--Blockheads Stamps
Inks: Forest Moss and Crushed Olive Distress Inks --Ranger
CS: Cream and Medium Olive


Instructions:

  • Stamp the Alphabet stamp with Crushed Olive Distress Ink on Cream CS.
  • Stamp the Lamp Post with Forest Moss Distress Ink
  • Layer onto a Medium Olive CS card

Inside


  • On the inside: Stamp the Alphabet two times on a separate piece of Cream CS; cut out the letters to spell "Hello". 
  • Stamp the lamp post


Detail of Inside


Check out the projects from the rest of the Blockheads' Design team on the Design blog.   So, I had better get going.  My to-do list for today is really long!!  Yikes!  I hope you are having a great day!  Love ya.
Karen

Tuesday, January 8, 2013

CAS Butterfly Duo with Blockheads Stamps

Hi Dreamers!
I just don't get tired of all the beautiful Butterfly stamps from Blockheads Stamps!!  Today, I would like to share this CAS butterfly duo.  This card is pretty quick and easy to make.  --- If you needed to make a stack of cards---this would be a great design.  Take a look.


Materials List:
Stamps: Large Butterfly from the Inspired by Nature Full Sheet -Blockheads Stamps
(Also available as a single stamp on cling cushion)
Ink: Sweet Plum and Pear Tart Memento 
Cardstock: Pale pink, ecru, and white


Instructions:

  • Make card base from the pale pink CS
  • Tear on edge of the ecru CS and add to card base
  • Stamp the butterfly on white CS  and add to card


See how quick this is??!!  You could add some ribbon and a sentiment if liked.  I will put a sentiment on the inside when I need this card to send out.  Sometimes I leave the sentiment off until I know what type of card I need.  So, I always have plenty of cards on hand with someone needs a little love.


A few fun Challenges for my Butterfly Duo.
365 Cards: Create a CAS nature scene
ABC Challenges: CAS
Dream Valley: anything goes
Lady Anne's: anything goes

So, that's it for me today.  I have been working on a bunch of children's cards for Operation Write Home.  I will share some photos of those this week.  Stayed tuned for that!  Have a great day!  Love ya.
Karen