Showing posts with label Copic markers. Show all posts

Tuesday, December 10, 2013

The Twenty-Five Days of Christmas Day Ten

Hello Everyone!!

Welcome to Day Ten of The Twenty Five Days of Christmas!!
                                    
And Blog Candy!!

I will be showcasing a different Christmas card each day of December from the 1st through the 25th.  On Today's cards I stamped an  owl and branches which were colored with Copics.


Materials:
Stamps: Owl Be Thankful (CL293) Impression Obsession; Owl Be Thinking of You Sentiment from
Victorine Originals. {Sentiment on inside from Mark’s Finest/Heinrich.
Card Stock: Solar White Classic Crest from Neenah; Poppy Parade from Stampin’ Up; Greens from American Crafts.  
Ink: Tuxedo Black (ME-900) Memento.
Embellishments: Ribbon - Celebrate It from Michaels Craft Store.
Other: Copic Markers; Square Scallop Die (655776) Sizzix; 3-D Zots-Therm-o-Web; Fabri-Tac glue -Beacon Industries.


Instructions:
  • Make card from Poppy Parade CS and layer with two shades of Green CS.  
  • Stamp the leafy branch on a piece of Solar White CS.  
  • Stamp the Owl on a separate piece of CS.  
  • Color the images with Copic Markers.  
  • Die cut the stamped piece and add to card front.  
  • Cut out the owl and add to card with 3D-Zots.  
  • Wrap ribbon around card and tie in a bow.   
  • Stamp the sentiment and cut out; add to card front with 3d-Zots. 
  • On the inside: repeat the layers of Green CS.  On Solar White CS, stamp a partial image of the leafy branch and one owl.  Color with Copic Markers.  Stamp the sentiment on the Solar White CS.


 Inside


And, don't forget the blog candy!!!!


Ways to Win the Blog Candy:

  1. Leave a comment on any of the 25 Days of Christmas posts--each time you leave a comment your name goes in the drawing.  So the more you comment, the more chances of winning.
  2. Become a Follower--Leave a comment to let me know!
  3. Post about the 25 Days of Christmas on your Blog--Leave a comment to let me know!
  4. Post about the 25 Days of Christmas on Facebook--Leave a comment to let me know!
See all the details about the Blog Candy on Day One post here.


******A Few Fun Challenges!!
Paper Playtime: winter fun
AMusing challenge: trees
That Craft Place: Christmas
Ribbon Carousel: Anything goes + ribbon


See you tomorrow for Day Eleven!!!   Well, we are up to day Ten and I am hanging in there.  By the end of the 25 days I will probably just insert the photo and say...here it is...the card.   LOL LOL.    Hope you are having a great day and finding some time to be creative.  Love ya.
Karen

Wednesday, November 27, 2013

Christmas Owl

Hi Dreamers!
How is your week going?  Tomorrow is Thanksgiving here in the USA.  We are having a big family dinner with turkey and all the trimmings.  I am making desserts.  Should be a great get-together!!

**********************************************************
Okay, so I will tell you a bit more about my surprise for December:  I will be doing what I am calling 

The Twenty-Five Days of Christmas!!! 

Beginning December 1, 2013 I will be showcasing 25 different Christmas cards!  One each day until December 25th!! As you can imagine, I have been very busy preparing for my event!!  I have all the cards finished and photographed.  I have to get the photo editing done and then POST!!!  One card a day!!!  I will  have  a little blog candy on offer too--keeping that a surprise---You will have to check back on Sunday, December 1 for all the details!!  As you can imagine, I am pretty excited about this event.  I hope you will enjoy all the Christmas inspiration!!!  

**********************************************************

Now, back to reality and to get you in the Holiday spirit.......Today, I have a fun Christmas card made with a Meljens digi stamp.  I used lots of bright colors and tons of glitter.


Materials:
Stamps: Cozy Winter Owl digi -Meljens Designs; Sentiments-My Sentiments Exactly and Stampin' Up
Copic Markers
CS: Black polka Dot- A Muse Studios; Real Red -Stampin' Up; White
Spellbinders die
Dots Embossing Folder-Cuttlebug
Stripe red and sheer red ribbon
Gold and Diamond Stickles Glitter Glue


Instructions:

  • Make a card base from the black polka dot CS 
  • Dry Emboss a piece of Real Red CS and add to card base
  • Print out the digi on white CS--make sure the ink is dry before coloring!


  • Color the image with Copic Markers
  • Die cut the image and add to card with dimensional adhesive
  • Add the Glitter glue to the image and the Red CS


  • Decorate the inside in the same manner as the front and add a Holiday sentiment.


Challenges for my Christmas Owl:
Meljens: use a black card base
New Challenge Blog***** Crafting From the Heart: anything goes
Cutie Pie: cute scenes and backgrounds
Ribbon Carousel: Holidays and a spooled item
Simon's Wednesday: anything goes
ABC Christmas: no square cards--"Out of the box"

Okay, join me on December 1 for The Twenty-Five days of Christmas!!  I think it will be a lot of fun!!  I have really enjoyed making all the cards!!  See you then!!  Love ya.
Karen

Thursday, October 31, 2013

Spicy and Sassy Girl in Shades of Yellow and Gold

Hi Dreamers,
I am back today with my Guest Design Project for the 4 Krafty Girlz Challenge!!!   The Theme for this fortnight is ANYTHING GOES!!  Very nice and easy.  The sponsors for this challenge are:

Meljen's Designs
Glamoureyes
Sassy Studio 

^^^^^^^^^^^^^^^^^^ A SPECIAL THANK YOU to 4 Krafty Girlz for having  me design this month---Very fun!!  Thanks Grilz!!!  ^^^^^^^^^^^^


For my project I used a fun image from Sassy Studios---And is this lovely every sassy!!  I paired her with lots of gorgeous decorative papers in shades of yellows and gold.


Materials:
Stamps: Sassy Studios Digi; sentiment- My Favorite Things
CS: Crushed Curry - Stampin' Up
Decorative Paper: Essentials Collection from Authentique
Copic Markers
Ribbon: Lido from A Muse Studios
Yellow Tulle
Dies: Label Four and Fancy Tags - Spellbinders; 


Instructions:

  • Make a card from Crushed Curry CS
  • Layer with Decorative Paper


  • Print out the digital image on white CS---make sure the ink is dry before coloring
  • Color image with Copic Markers


  • Cut out the image with die Labels Four


  • Die cut two pieces of with the Harlequin die from DP
  • Die cut two Eiffel Towers from Crushed Curry and Houndstooth DP


  • Add the Harlequin die cut pieces (diamonds) to the card front with dimensional adhesive along the left side and the bottom
  • Wrap Yellow tulle around card and tie in knot
  • Tie the Lido (yellow) ribbon around the tulle
  • Add the Eiffel Towers with Dimensional adhesive


  • Stamp the sentiment on Crushed Curry CS and cut out 
  • Die cut the Fancy Tag from DP and add the sentiment to it
  • Add to card with dimensional adhesive


  • Add more of the papers and a piece of the Harlequin die cut for the inside
  • Leave room to write a little note or stamp an additional sentiment.  This would make a cute birthday card.


Inside


Cute!!??  Pretty sure I will use this for a birthday card for one of my lovely friends.

**********Challenges for my Spicy, Sassy Gal
Simon's Wednesday: anything goes
Die Cuttin Divas: anything goes with die cuts
Flourishes Timeless Tuesday: plaid or houndstooth pattern---I used Houndstooth patterned paper to die cut the Eiffel Tower and I used the same paper on the inside of the card
Through the purple haze: :for the girls


Oh, Happy Halloween.  I am working on covering three hat boxes with fabric (not paper).  I decided to use fabric since the boxes are made of wood.  I still have a lot of work to do on those, but, I will show you when I am all done.  I have to fly...lots on the schedule for today!!  Have a great day!!  Love ya.
Karen

Wednesday, July 3, 2013

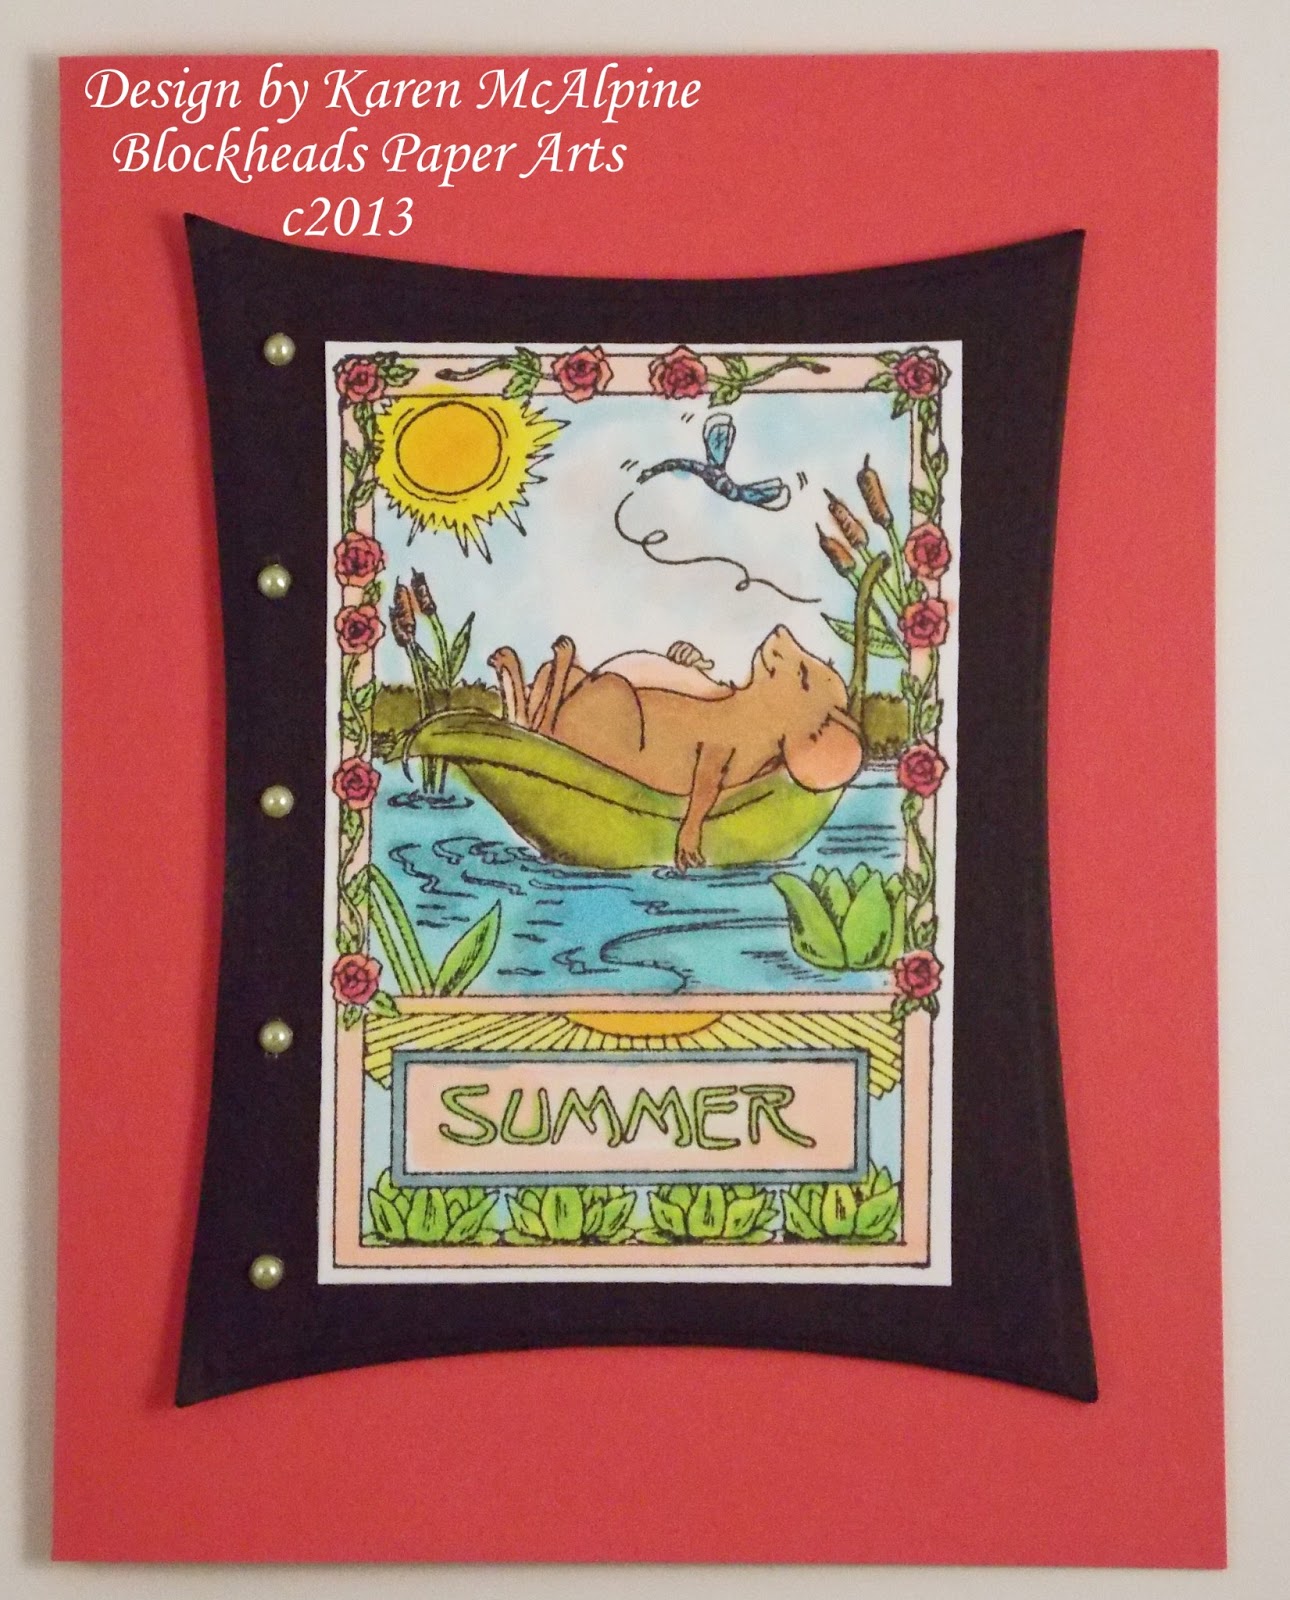
Summer Fun with Blockheads Stamps

Hi Dreamers!
Today, I have two summer themed cards.  The stamp is from the Hearth Mice full sheet by Blockheads.  This set is on sale for $10!!!  In fact, the entire Blockheads Online store is 50% off!!  Check out all the stamps and supplies!!


I stamped the Summer Mouse on Solar White Neenah CS and colored with Copics.


Card #1


Card #2


Same stamp, but different color scheme for the cardbase and background papers.


Isn't this little guy sweet!??  Such a relaxing image!    Lots of fun coloring with this stamp!

A few fun Challenges!!!
Loves Rubber stamps: anything goes
Addicted to stamps: markers
Rhedd and Rosie: summer

See you tomorrow with a vintage bird single layer card!!  Doesn't that sound fun!!?  Hope you are having a great day!!  I mowed the lawn this morning.  Still have a pile of ironing to do.  Better get at that!  Love ya.
Karen

Tuesday, June 18, 2013

Wedding Cards for that Special Occasion with Blockhead Stamps

Hi Dreamers!
Today I have a pair of Wedding themed cards that I made using a pretty wedding cake stamp from Blockheads Stamps.  The stamp is available as a single or on the Love and Romance half sheet.


And, by the way:
Everything is 35% off on the Blockheads Paper Arts WebSite until June 30th!!!   Stock up on your favorite inks, supplies, and pick up a few new stamps!!


Take a look at my Wedding Cards:  Here is the pink version.


Materials List for both Cards
Stamps: Love and Romance half sheet from Blockheads Stamps
Inks:Tuxedo Black Memento;Shell Pink Adirondack
Copic Markers
CS: Solar White Neenah; White, Pink, Lavender, Gray
Tulle
Ribbon
Embossing Folder-Rosa (Anna Griffin) Cuttlebug
Tiny Pearls


Inside


Instructions:

  • Stamp the Wedding Cake with Tuxedo Black ink and color with Copic Markers
  • Stamp the Heart image with Shell Pink ink on the edge of the card base.  
  • Layer with Pink CS
  • Add some Tulle, ribbon, and tiny pearls


And, the Lavender card:


  • Stamp and color with Copics
  • Dry emboss a piece of Gray cardstock
  • Add to a lavender card base


  • Tie a bow in sheer gray ribbon and leave very long tails
  • Add a line of glue to the card and pleat the ribbon tails--press into the glue as you pleat


Love the soft stylized drawing of this stamp!  The cake makes such a great card for Weddings or Anniversaries.  Now, I have two to file in my card box to be sent when the need arises.


**********Challenges:
abc Challenge: pretty in pink---card #1
Make my Monday: purples with one neutral---card #2
Through the Craftroom Door:anything goes
**************************


Hope you day is happy and bright!  Love ya.
Karen

Saturday, March 2, 2013

Lavender Fairy Birthday Card

Hi Dreamers!
Today, I would like to share a card that   my BF commissioned.  She wanted a birthday card for her niece.  The requirements were: had to have purple and fairies.  I grab one of my Baby Bud digis and made this card.


As you can see, I added some of the paper to the envelope flap for a custom look.  


The Baby Bud fairy is printed out on White CS and colored with Copic Markers.  I die cut a banner (die cut from A Muse Studios).   The letters were stamped with an alphabet set and cut out.


The frame is cut and embossed with a Spellbinders die. I added lots of bling with purple and pink rhinestones


On the inside, I stamped a sentiment from Victorine Originals.


My BF said her niece loved the card.  So, that was a success!  Love this Sentiment too.

And, let's have fun with a few challenges!!

Card crafter circle: make believe
Lady Anne's: anything goes
Sweet n Sassy digis: girl time
2 Sisters: fairy tales/fantasy
Allsorts: for a lady
Victorine Stamps: stamp, emboss, embellish
Simon Says Stamp: anything goes

What is coming up this coming week, you ask?  I will be posting some fun projects made with Lost Coast Designs, Paper Artsy Lynne Perrella stamps, and I don't know what else.  Should  be fun!  See you later!  Love ya.
Karen

Thursday, January 31, 2013

Cute Cocoa Mouse on Valentine's Day Cards for Kids

Hi Dreamers,
I have a few more Valentine's Day cards to share with you.  The cards are part of the group of cards I made for the Cards For The Heart Card Drive hosted by Winter. Today is the last day of the drive.  I sent another group of cards in on Monday.  So that makes a total of 80 cards I made for the drive.  I will share more of the cards up till Valentine's day.   Today, we have  cute Cocoa Mouse from Sweet N Sassy.


I stamped with black dye ink and colored with Copics.  Oh, I think a few fun challenges are in order:

Simon Says Stamp: anything goes
Sweet N Sassy Digi: white

That's it for me today!  See you tomorrow!  Love ya.
Karen

Monday, January 28, 2013

Valentine's For the Kids

Hi Dreamers,
I thought I would post a few more pics of the cards I made for the "Cards From the Heart" card drive.  The cards are made with Dearie Dolls digis.  I colored the images with Copic Markers.


Here is the whole bunch in one photo (Group 1).


Winter was saying she had only received 150 cards for the "Cards From the Heart" drive so far.  I spent the whole weekend making more Valentine's Day cards.  I made an additional 50 cards!!  I put them in the mail this morning and I will share the photos of the this  group 2 later.


And, now how about a few fun Challenges!!
Artistic Inspirations: love/anything goes
The Cheerful Stamp Pad: pink
Marker Pop: use pink Copics
Victorine Stamps: pink, white, and red valentines

I will be back tomorrow with a Blockheads Design Team project!!  Not telling what--it is a surprise!  LOL.  (It is not because I haven't made it yet--no, not at all) Smile.
Have a super day!  And why not make a few cards for The Cards from The Heart card drive!??  Love ya.
Karen