Showing posts with label Christmas home decoration. Show all posts

Thursday, October 13, 2016

Star Book Decoration with Technique Junkies

Hello Everyone,
We are now enjoying Fall weather here in Michigan, USA.  Almost time to plant bulbs.  The leaves are just beginning to change color and drop off the trees.  And, although it is only Fall, I have been making Christmas projects this month. Trying to get a bit of a head start this year.  Today's project is made with a gorgeous October New Release from Technique Junkies.  This what the stamp looks like.

When I first saw that stamp, I thought silver embossing and then decoration or ornament.  Putting on the old thinking cap, I decided on the  Graduated Star Book (tutorial is from the Fancy Folds and Motion CD from Technique Junkies)


Materials List:
Stamp: Stars Are Brightly Shining from Technique Junkies
Ink: Versa Mark
Silver Embossing Powder
CS: white, dark green
DP: DCWV and Anna Griffin metallic papers
Green Ribbon
Green Stickles
Snowflake Punch
Tree Edge Punch
Happy and Christmas Words die cuts

Following the Graduated Star Book Tutorial I constructed the book.  I omitted the instructions for punching in the top layer.

Cover: Back
The book looks like this when it is closed and tied shut with ribbon.


Cover: Front

 Cover:Front and Back

Make It:

  • Follow the instructions on the tutorial to construct the book using white CS for the pagers and metallic papers for the second layer 
  • On white CS, stamp the Stars are Brightly Shining Stamp with Versa Mark ink and heat emboss with silver embossing powder - make 3
  • Cut the stamped image in half
  • Add the stamped pieces to the pages


  • Punch strips of dark green CS with the edge punch and glue to the edges of each page
  • Punch 14 snowflakes from metallic papers and add to the pages
  • Add glitter glue to the snow flakes


  • Die cut the words Happy and Christmas from green CS and add to the front and back covers
  • Glue long pieces of ribbon- one to the back and one to the front cover.  The ribbon will be  used to tie the book closed
  • Embellish covers with punched snowflakes, glitter glue and ribbon bows --Glue bows over the ends of the long ribbon pieces


More Pics:


This lovely star book could be hung or placed on a table for a pretty Holiday decoration.  It would also be a super nice card for an extra special person.  The stamp can also be used to make gorgeous cards.  Be sure to check out all the fabulous new release stamps here.

Thanks for stopping by.  See next time for a few Fall themed projects!!
Karen

Sunday, December 16, 2012

Christmas Morning Wall Hanging with Character Construction

Hi Dreamers!
A bit of Christmas spirit in Dreamland today.  I made a small wall hanging project with The Vintage Christmas sets from Character Construction.  I wanted to make a scene with trees and then I started thinking about a snowy morning....and then, that children would want to get out and play with the new sled.  And, that is how this project evolved.


Materials List:
Stamps: Sets #2, #3, and #4 from Vintage Christmas-Character Construction
Inks: 
Distress Inks-Forest Moss, Black Soot, Frayed Burlap
Versa Magic Chalk - Jumbo Jan, Pink Petunia, Aspen Mist
Cardstock: White and Brown
DP: holiday from My Mind's Eye
Stickles
Corragated Cardboard
Wide Wired Ribbon
Gems
a Twig


  • I used white CS and made a watercolored background for the base.  The trees are stamped in Forest Moss ink, the sledders and sentiment in Black Soot.
  • Distress the stamped piece with Frayed Burlap
  • Layer with Brown CS


  • Tear the top layer off the cardboard.
  • Distress the cardboard with the chalk inks
  • Glue the DP to the cardboard.
  • Add the stamped piece with dimensional adhesive


  • Add the gems
  • Add two ribbon loops to the back of cardboard for hanging
  • Add a big bow.
  • Add Stickles to trees
  • Hang on wall
Challenges for my Christmas Morning Wall Hanging
Simon Says Stamp: favorite--Watercolored backgrounds
Allsorts: Oh Christmas Tree
Christmas blog: Christmas tree
365 Cards: rough and smooth
One Stop Craft: distressed Christmas
Reasonable Ribbon: Christmas + ribbon
Craft a Scene: Winter scene

Isn't this a fun project.  I have it on the wall near my fireplace.  Love the vintage feel to the stamps and they work so well with the cardboard and rustic DP.   Hope your weekend is going well.  Love ya.
Karen

Tuesday, December 4, 2012

Vintage Christmas Box with Paper Artsy

Hi Dreamers!


A happy hello to my new followers!!  And an extra hello and thanks to visitors and regulars.  Love all your comments...some are quite funny and really make me chuckle.  LOL  Blogging is so entertaining!  LOL  So, hello all and today we have a pretty vintage box.  The stamps are from Paper Artsy available in the USA from Blockhead Paper Arts.  Can you guess what the box is covered with??  Take a look.


Top


Front


Materials List:
Stamps:
Holiday Theatre -Paper Artsy
Grunge It Up - Blockheads Paper Arts
Inks: 
Pearlescent Poppy and Cosmic Copper - Brilliance
Vintage Photo Distress - Ranger
Pioneer Glue Stick
White Tissue Paper
Paper Mache Box
Large Beads
Large Gems
Sealer - Plaid Royal Coat


Top Detail


Instructions:
  • Smooth out a piece of White Tissue Paper
  • Stamp the Angel/chicken Joy image on the tissue paper with Pearlescent Poppy ink.
  • Stamp once for the top
  • Stamp multiple times in a horizontal row for the sides
  • Stamp the Mandolins from the Holiday Theatre set and the Swirl from the Grunge It Up set with Cosmic Copper in the empty areas around the main image


 Top Detail


  • Heat set the inks
  • Apply Pioneer Glue stick to box
  • Place the tissue paper over the box top
  • Trim tissue leaving enough to wrap to inside
  • Repeat for sides


  • Pat some of the Cosmic Copper ink onto the corners
  • Apply Vintage Photo Distress ink to all areas

Bottom


  • On bottom of box, glue a piece of white CS
  • Add four large beads for feet
  • Paint box with one layer of the sealer
  • When sealer is dry, glue ribbon around box lid and add the large gems


Detail of front 


Did you guess that the box was covered with Tissue Paper??  How fun is that.  You could use any color tissue you wanted.  I will fill this with something sweet and will have a nice little gift for someone.  I really should make a whole bunch of these.  Oh, wouldn't it be cute to put some truffles in the box and lay a gift card on top.  I think I will do that.  LOL

Some fun Challenges for My Vintage Christmas Box:
Stampin for the Weekend: Texture
Totally Papercrafts: anything but a card
Pile it On: embellishments
Anything But a Card: anything goes-no cards
Live and Love Crafts: anything but a card
Sugar Creek Hollow: vintage + distressing
Artistic Inspirations: anything goes
Flourishes: an altered item

See you tomorrow for WOYWW  and some photos of my cards for the sale on Friday.  Love ya.
Karen

Saturday, December 1, 2012

Holiday Gift and December Stampsmith Challenge

Hi Dreamers!
Happy December 1!! Twenty four days and counting until Christmas.  I have not done any shopping yet.  Eeek!  May end up being a gift card year.  LOL.   As it is the first of the month, that means a new challenge at The Stampsmith Challenge blog.  Click over and see all the DT projects, the winner of the gift certificate, and the top picks for the November Challenge.   The December Challenge theme is:

Handmade Holiday

You can make a gift, card, decoration, or anything with a Holiday theme.  Please also use one Stampsmith stamp.  One random entry will receive a $21 gift certificate to The Stampsmith!! 

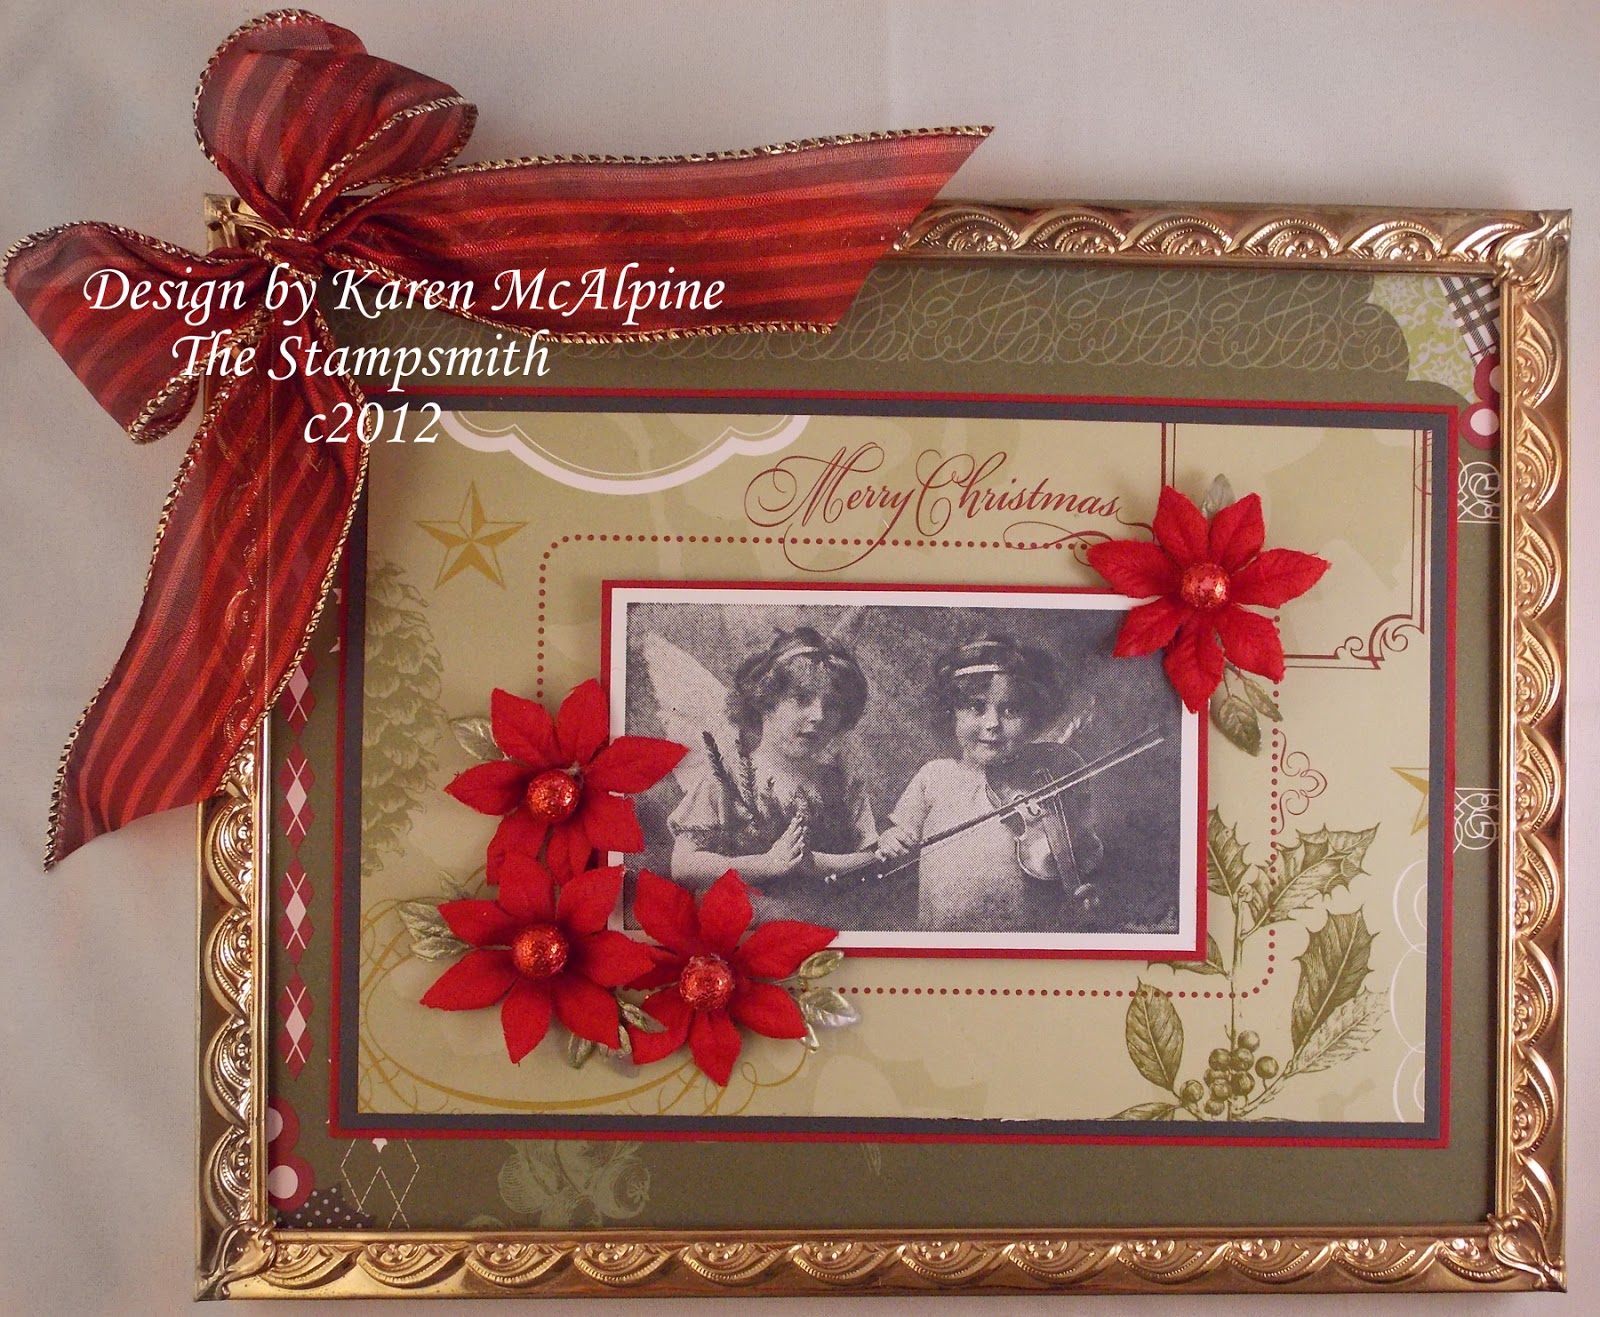
I decided to make a home decor piece for my DT Handmade Holiday project.  This framed piece could hang on the wall, sit on an easel, on the mantel, or it may end up in a gift bag for someone. LOL


My Framed Christmas picture is made with the Two Angels image from the Stampsmith Full Sheet called
Thank Heaven for Little Girls #1


  • The image is stamped on white glossy CS with black dye ink.
  • Layer onto Red CS


  • The image is mounted onto a piece of Christmas DP from Me and My Big Ideas (in my stash).
  • The base is made of heavy mat board and covered with the DP.
  • Place the picture into the frame (remove the glass from frame)
  • Now add  the Poinsettias and glue the glitter balls in the center.


  • Tie a bow in a wide wired ribbon and leave long tails.
  • The bow is attached to the frame with large glue dot.
Let's see what you can come up with for the Stampsmith Handmade Holiday Challenge!!  I need some ideas for gifts...so get crafting!!  Hope you are having a great weekend!  Love ya.
Karen