Pages

Saturday, February 27, 2016

Take a Picture with Technique Junkies

Hello Everyone,
I am away on a weekend in Canada.  I have scheduled this post to keep you company while I am away.  We are attending a fund raising benefit for a close relative going thru cancer treatment.  So, enjoy this cute project with February new release stamps from Technique Junkies.


Materials List:
Stamps: Oh, Snap! and Houndstooth Background both from Technique Junkies
Ink: Yellow Pigment and Jet Black Archival
CS: Brown, black, wine
DP: Wine
Ribbon
Glitter Glue


Make It:

  • Cake a card base from wine CS
  • On a piece of wine DP stamp the Houndstooth Background with the yellow pigment ink; heat set to dry
  • Stamp the Camera and sentiment on the brown CS with Jet Black ink; add a layer of black Cs and add to card


  • Tie ribbon in a bow and leave long tails
  • Add a few drops of glue along the sides of the stamped piece
  • Lightly gather the ribbon tails and press them into the glue to hold gathers in place
  • Trim the ends of the ribbon
  • Add several drops of glitter glue on top of the ribbon and in the corner of the stamped piece

Love this stamp set.  It has several really cute sentiments included and the slide frame I used on my Travel Purse card.  See pic below.

Lots of fun stuff coming in March.  The Technique new release blog hop on the first, more projects with Technique Junkies (including a decorated gift bag).  So, stop back for that.  Hope you are having a great weekend.  Love ya
Karen

Wednesday, February 24, 2016

Vintage and Distressed with Technique Junkies

Hello Everyone,
We are getting lots of snow today here in Michigan.  Good thing I don't have to go anywhere.  LOL  I will just fire up my new gas fireplace and enjoy the pretty snow.
Today, I wanted to share two projects that are very distressed and on the vintage side made with Technique Junkie Stamps  .  There are two versions using the same large collage stamp from the Palettini Stamps collection.   The look was changed on each project by varying the way the stamp was inked  --  Distress Markers on the first and two colors of Archival ink on the second.


Card #1

Stamps for both projects:
London Eye, Have Wings (sentiment) and ATC Keep Your Balance all from Technique Junkies


 Make It:

  • Make a card base from White Crinkle Paper
  • Tear a layer of gray Crinkle Paper and ink the edges with Black Soot Distress ink


  • Ink the stamp with Weathered Wood, Pumice Stone, and Black Soot Distress Markers and stamp on White CS and tear edges
  • Ink the edges with Stormy Sky  Distress ink
  • Stamp Sentiment with Black Soot ink


Card #2

  • Make a card base from Navy CS and add a layer of black CS
  • Ink the stamp with Jet Black and Cobalt Archival inks--make sure to get the black ink on the scroll areas
  • Add to card base


  • Stamp the sentiment with Black ink on White CS and cut out
  • Add to card


Oh, it is really fun to see how you can get different looks by changing the way you ink the stamp.  I especially wanted to highlight the scroll areas on the stamp with the darker ink.

*********Challenges:
Addicted to Stamps and More: make your mark-use markers or pencils
Simon's Wed: anything goes

See you soon for more crafty goodness.  Have a great day!!  Love ya
Karen

Thursday, February 18, 2016

Travel Themed Purse with Technique Junkies

Hello Everyone!
How is your day going?  I am sitting here looking out on pretty snow flakes falling.  Pretty indeed, but I am looking forward to Spring this year.  I have a whole yard to landscape this year ( for the new house ).  In just a few months I will be able to get started on that project.  Fun!


So, for the present, I am enjoying my crafty projects.  Here is a cute fun fold card shaped like a purse and made with Technique Junkie stamps.


Materials List: 
Stamps: New York Music, Vintage Travel Cases, Oh, Snap, Paid in Full all from Technique Junkies
Technique: Purse Gift Card Holder from Fancy Folds and Motion Technique CD
Ink: Espresso Truffle Memento; Butterscotch Adirondack
CS: Kraft; Cream; Sahara Sand Stampin' Up
Sailor 2 Way Glue
Dimensional Adhesive
Ribbon


Make it:

  • Make the purse shape following the directions on the Fancy Folds and Motion CD.  I omitted the bottom fold as I did not want to use the purse as a gift card holder, but as a card.
  • Stamp New York Music on Kraft CS twice and cover front and inside with the pieces


  • Stamp Paid in Full with butterscotch ink, The couple and sentiment from Vintage Travel Case with Espresso ink and use for the inside top


  • On the flap, stamp New York Music 
  • To make the closure, stamp the Slide frame from the Oh, Snap stamp set on cream CS and on a scrap of paper--use image on scrap paper to create a mask
  • Cover Slide frame with the mask and stamp the couple
  • Fussy cut the slide frame
  • Put dimensional adhesive on the top half of the closure
  • One the bottom half of the closure put a small amount of the 2 Way glue and let it dry completely---now the glue will make a temporary adhesion to hold the purse shut
  • Punch two holes in the flap and add the ribbon handle


************Challenges:
2 Creative Chicks: anything goes
Just Keep on Creating: anything goes
ABC-Challenge: B is for you pick---I picked shades of brown
Creative Moments: anything goes
Craft Rocket: mother's day/female

See you next time!!  Have a great day!!
Karen

Sunday, February 14, 2016

Happy Valentine's Day Part Two

Hello Everyone,
Happy Valentine's Day!!  Here is the last of all my Valentine's day cards.  14 different designs in all.  I will end with a cute little owl card.   I made the cards for friends and family.


I started with a pink or red card base and rounded the corners on one of the cards.  I stamped the owl and stamped again on scarp paper-- I cut out the owl on scrap paper and used it for a mask.  I covered the owl with the mask and stamped the polka dot heart.  Added a ribbon and cute sentiment too.


*********Challenges*****
Pink Gem: love is in the air
Crafty Calendar:love is in the air
Crafty Catz: red as main color
Daring Cardmakers: party animals
CCEE stampers: heart animals

Hope you are having a great Valentine's Day!!  See you next week for more fun projects!! I have three projects coming up with Technique Junkies!!  Take care.
Karen

Happy Valentine's Day

Happy Valentine's Day!!
I have two more Valentine's Day cards to share today!  The first set of cards were made for the Cards from the Heart Card drive.  (Check out the last card in the next post)


I started with a white folded card and add two layers of pretty DP.  Then I hand cut white tags.  Strips of the DP and stamping were added to each tag.


A hole was punched in the tag and ribbon tied through.

 The inside:


****************Challenges:
Amusing challenge: Shades of pink
DL Art Thrusday: red, pinks, hearts
Just Us Girls: add a tag
Kitty Bee: Valentines
Just add ink: just add V
Left of Center: with love


See you soon!
Karen

Saturday, February 13, 2016

Love One Another Valentines

Hello Everyone!
I hope you are enjoying all the Valentines here in Dreamland.  I wanted to share two more with you today.  I made the cards for friends and family.  I used some cute digis from Michelle Perkett  and did  a little coloring with Copic markers.


I used more of the frames I cut for another card (you can see it here) and layered lots of pretty papers.


The digi was die cut and  colored with Copics.  It was added to the card with dimensional adhesive.

 And a pretty bow.


Second design:

The digi was colored with Copics and die cut.  I used blue and red to make it a touch more masculine.   I made this card for my husband...  I thought it was cute because we always talk about how we would like to buy an Airstream trailer and travel all over the country.  So, this is our little trailer of love.  LOL.


Two colors of ribbon were tied together.


********Challenges:
Alphabet Challenge: Y is for You choose---I choose the letter V for Valentines
Crafting with Friends: anything goes
Jo's Scrap Shack: use red, white, pink
DL Art Thursday: pink, red, and hearts


See you tomorrow for two more Valentines designs!  Love ya
Karen

Friday, February 12, 2016

Valentine's Day Event with Lost Coast Design

Hello Everyone!
The Lost Coast Design and Carmen's Veranda Valentine's Day Event is in full swing on the Portal to Creativity Blog. Head over to check out all the other great projects made by the Design Team.  And there is also a chance to win a prize by commenting and letting  us know what you like about the stamps.  Fun, fun, fun!!

I have four projects for you today that have a Valentines theme.
****I used the same stamp on three of the cards and varied the ink and CS colors.

****For the fourth card, I used a wide border stamp to make a background.

 Here we go with the fist set of projects: Lily Love Three Ways

Materials:
Stamp: Lily of the Valley Background from Carmen's Veranda


Ink: Ginger Adirondack and Black Soot Distress ink
CS: Gray and Rust
Sheer Brown Ribbon

  • The stamp was partially inked with the Ginger pad and then I filled in the other areas with  the black pad.  And, then stamped on gray CS.  
  • I added a spritz of Glimmer Mist too.


Ink: Oregano Adirondack and Barn Door Distress Marker
CS: Red, green, and white

  • Stamped with Oregano ink on green CS.  
  • Ink the square heart section on the stamp with the Distress maker and stamp on white CS; cut out.
  • Added some sparkle with a Wink of Stella marker


Ink: Stream and Ginger Adirondack
CS: Pink and light teal
Teal ribbon

  • Partially ink the stamp with the Ginger ink  pad and come back with the Stream pad to completely cover the stamp; stamp on pale pink CS
  • Color the leaves with a green Copic marker
  • Cut a small slit in bottom of card and insert ribbon.  Tie ribbon in bow.


Fourth Project: Love Borders

Stamps: Grunge Border 2" and License Plate Alphabet both from Lost Coast Designs
Ink: Lake Mist Adirondack; Gray Flannel Memento
CS: Taupe, pink, grayish green
Gray satin ribbon


  • Make a card from pink CS and sponge Lake Mist ink on edges
  • With Lake Mist ink, stamp the Grunge Border 2" twice on gray/green CS and once on pink; cut to size---I made sure I included the heart on the pink piece.  
  • Add a layer of taupe CS to the border pieces


  • Stamp the letters on the pink and gray/green CS with Gray Flannel ink; cut out and add to card


Please head over to the Portal to Creativity Blog and check out the other projects!!  Thanks for stopping by!!!
Karen

Thursday, February 11, 2016

Simple Valentine with Punched Heart

Hello Dreamers!
I am back with one more Valentine's Day Card!  This is a fun card and quite quick to make.


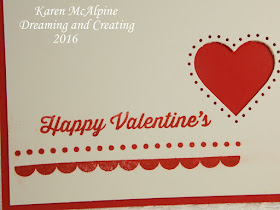
Make a red card base.  On white CS, use a punch and punch out the heart.  I used a Martha Stewart All Over the Page punch on this project.


I added a sentiment and two border stamps to complete the design.  Very easy to complete if you are making multiples.  I made three or four of these to send out to family and friends.


****Challenges:
Amusing Challenge: hearts
Odd Squad: hearts
Ruby's Rainbow: anything goes

I will be back tomorrow with my projects for the Lost Coast Designs Valentine Event.  You can check out the projects made by the other designers on the Portal to Creativity blog.  There are some awesome projects posted!!  
See you tomorrow!  Love ya
Karen

Masculine Valentine's Day Card

Hi Everyone,
Today, I wanted to share this masculine Valentine.  I used this heart stamp on another card ( see it here) done in red and white.  This time, I used all brown papers and ink.  I added some element type stamps on the edges and some distress ink.


Challenges for Masculine Valentine
Mod Squad: hearts
Crafting Musketeers: monochromatic
Cardz 4 Guys: Valentine or love


I will be back later today with another Valentine!!  See you then.
Karen

Wednesday, February 10, 2016

Dry Embossed Valentine

Hello Everyone!
Back today to share more Valentine Love.  Today's card is one of the designs I made for the Cards From the Heart Card Drive.  There were over 4000 cards sent in for the drive!  Winter Sims organized the drive and has the cards on the way to hospitalized children.  Yea Winter!
Okay, here we go with this cute dry embossed card.


I started with a red card base and dry embossed white CS with a Darice folder. The raised edges were highlighted with Distress inks.  The large sentiment is from the Valentines Spoon set by Simon Says Stamps and stamped with red ink.


On the inside, I added a cute sentiment from Stampin' Up.


********Challenges for my Dry Embossed Valentine:
Cards in Envy: cards from the heart
Crafting from the Heart: anything goes
The Paper Girls: love/Valentine
Little Red Wagon: Valentine's day

I will be back tomorrow with more Valentine Love.  I will post a Valentine card every day until the 14th.  That should make you feel loved??!!!   LOL   See you tomorrow!
Karen