Saturday, March 30, 2013

Spring Bike Ride with Lost Coast Design

Hi Dreamers!
We are really having nice  Spring weather this weekend!  Got out for a nice walk in the afternoon and ran some errands later.  The temps got up into the high 50's!  So, seems like Spring is on the way!   So, lets take a bike ride today in Dreamland.  Today's project was made with a Lost Coast Design stamp called Bikes Border and measures 8" long.


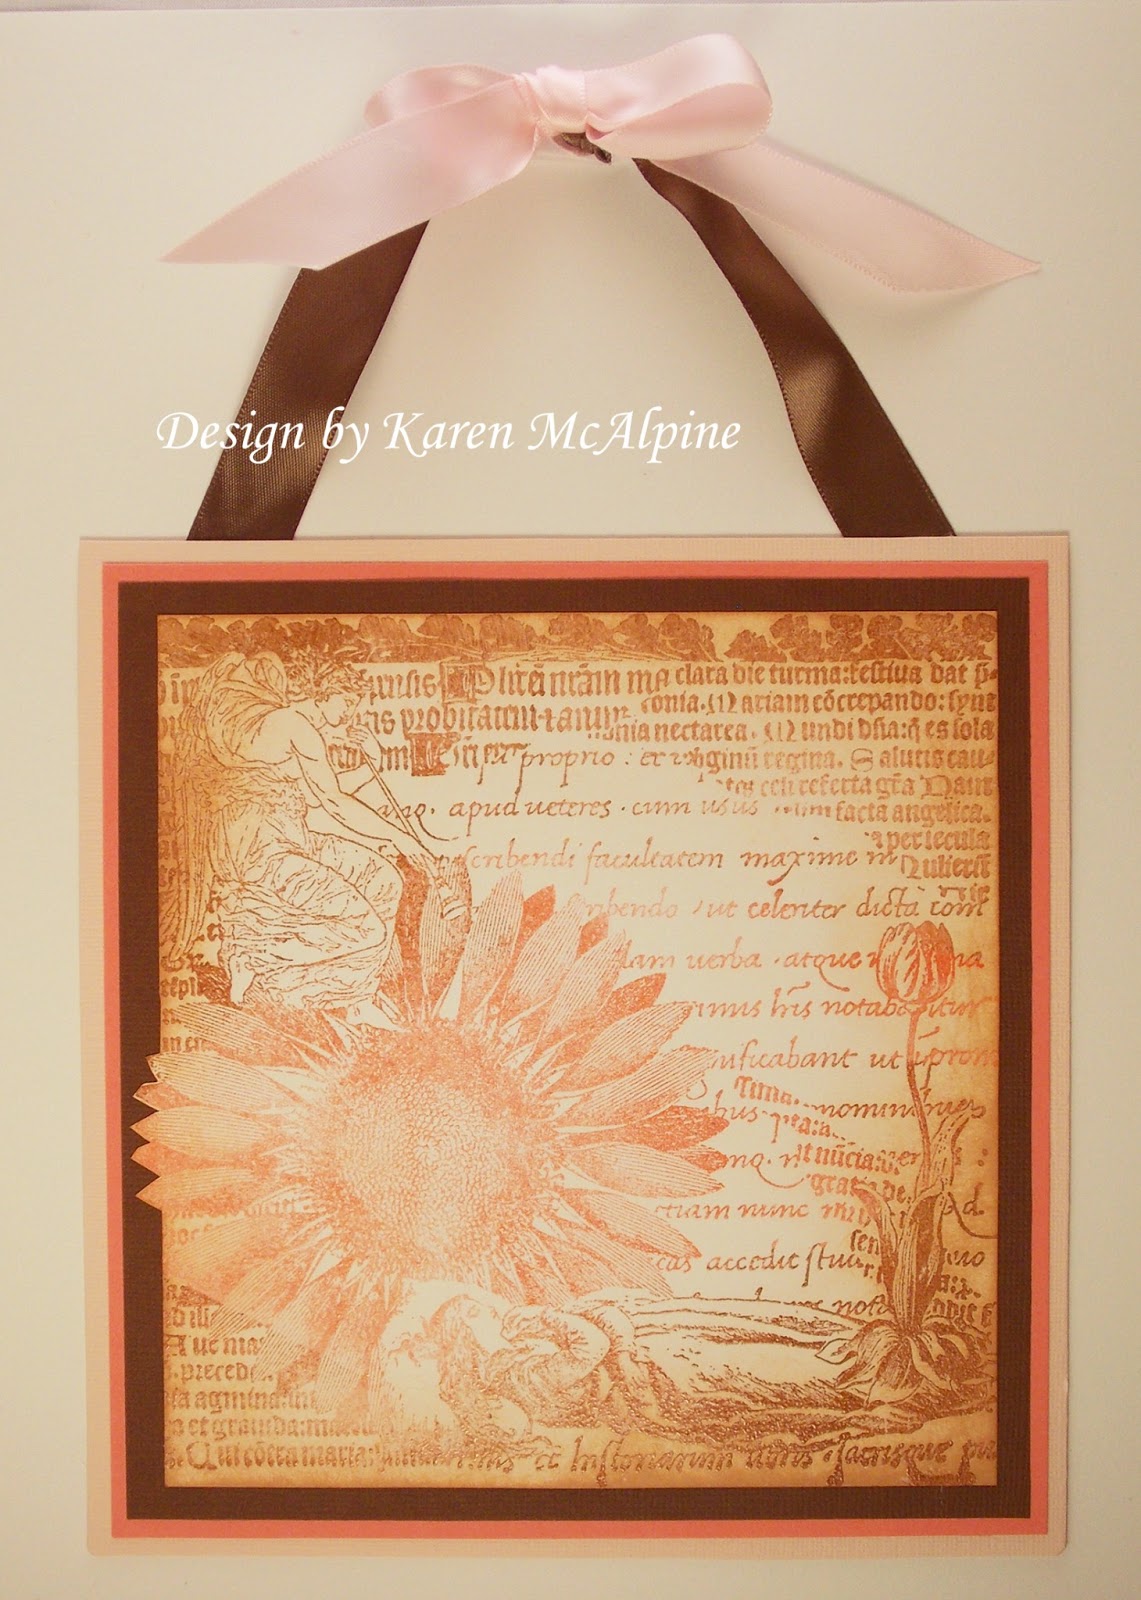
This is a long narrow card that incorporates shadow stamping and heat embossing.

  • Cover an acrylic block with Tan pigment ink (All inks from A Muse Studios) and stamp onto white CS
  • Heat set the ink
  • Ink the Bike Border with brown pigment ink and stamp over the shadow stamping.
  • Heat emboss with clear embossing powder


  • Layer with black CS 
  • Tie black ribbon around a Kraft card base 
  • Add a piece of polka dot DP from Canvas Corp.
  • Add the stamped bikes.


And, how about a few super fun challenges for my embossed bike ride card?!!
Creative corner challenge: anything goes
Simon Says stamp: anything goes
Penny's Challenge: anything but square
Love to Scrap: emboss it
Creative Creations: the letter B

I will taking the day off tomorrow to enjoy the Easter Holiday with my family.  My brother is making dinner.   Not to worry!  He is a good cook.  So, I will just enjoy getting together with everyone and celebrating the Resurrection of our Lord!    Hope your weekend is good and filled with the blessing of Easter!  Love ya.
Karen

Tuesday, March 26, 2013

Ready For Take Off -Steampunk Owl with Blockheads Stamps

Hi Dreamers!
Back today with a bit of whimsy.  To finish up our month of travel themed projects on the Blockheads Design Blog, I have made a fun card using one of my favs--the Steampunk owl from Blockheads Stamps.  He is ready to take off in his magical flying machine for places unknown!  I added a shimmery background  with some metallic distress stains.  


Materials List:
Blockhead Stamps: Steampunk Owl from Fringe Folktales set
Flyer from Victorian Inventions
Dot from Retro Shapes
Inks: Onyx Black Versa Fine; Black Soot and Frayed Burlap Distress ink
Distress Stains: Brushed Pewter Metallic and Pumice Stone
CS: white, Kraft, gray textured, Glossy Black
Watercolor Pencils
Black Wire
Black Brads
3-D Zots


Instructions:

  • On a piece of Kraft CS, stamp the Flyer with Onyx Black ink
  • Add shadowing under the Flyer with Pumice Stone Stain
  • Add the shimmery sky above the Flyer with Brushed Pewter Stain
  • Stamp the dots with Frayed Burlap Distress ink and distress edges with Black Soot
  • Add to layer of glossy black CS
  • Add brads to corners
  • Add to gray card base with 3-D Zots


  • On white CS, stamp the Owl with Onyx Black ink.
  • Color with watercolor pencils
  • Cut out the Owl
  • Add to card with 3-D Zots
  • Curl the wire and tuck under the Owl and sticking it into the 3-D Zots to secure


Oh, LOL.  Isn't this a fun card!?  Love this little Steampunk Owl!!

How about a few Challenges for my Steampunk Pilot:

Creative Moments: animals
Crafty Ribbons: one for the boys
613 Avenue: anything goes
Artistic Inspirations: fantasy
Creative Card Crew: masculine

Next month The Blockheads Design team will be working with Grungeboard.  Stay tuned for that.  I have some pins planned!  I hope you have a great day!!  Love ya
Karen

Monday, March 25, 2013

Paris in the Spring "Time"

Hi Dreamers!
Hope your weekend was great!   Mine was super fun with an all day card making event on Saturday.  Even though we had snow last night here in Michigan, USA, I wanted to share a Spring themed card with you today.  I used lots of Spring colored CS and a stamp of the Eiffel Tower from The Stampsmith's Paris Full Sheet.     I called this project Paris in the Spring "Time".  See why!


  • I stamped the Eiffel Tower with a Kaleidacolor Pad - Creole Spice
  • Then covered the image with Versa-Mark ink
  • Cover with UTTE and heat emboss
  • Add another layer of UTTE


Look at the cool effect you get with the UTTE!

  • Layer the image with black and white CS
  • Add to a white card base layered with green and yellow CS


  • Tie the Eiffel Tower ribbon in  a big bow.  I bought this ribbon at Hobby Lobby and have been dying to try it out on something.  This project was prefect!!
  • Add the clock with a piece of wire ---Paris in the Spring "Time"---get it!??!  LOL
  • Add the yellow rhinestones to the background area. 


What a cheerful card!  This was a fun one to make.  And, I finally was able  to use this ribbon on something!!  

How about a few challenges for my Spring "Time" card??!!
Crafty Catz Weekly: sparkle and bow
Simon Says Stamp: spring/easter
Pause dream enjoy: anything goes

Check back tomorrow for a little bit of Steampunk fun!!  See you then.  Have a great day.  Love ya.
Karen

Sunday, March 24, 2013

Easter Cards -Quick and Easy

Hi Dreamers!
I spent the day yesterday at a card making event sponsored by, Suzanne Everett. My friend, Sharon, and I spent the day making 14 cards.  You have to hustle a bit to get them done, but it sure was fun!  We did not make any Easter cards, but that is fine as I had finished my Easter cards this week.  I thought I would share the Easter cards I made.  I had quite a few to make and wanted to make them "quick and easy".  Take a look.


I had all these tulips in my already stamped box.  I just pulled them out and added some layers, ribbon, and Easter Sentiments.   Here is a close up of one.  I did a bit of distressing on this one with Vintage Photo Distress ink.


This batch was made with papers and some pre-cut shapes from a Crate Paper set.  I had a pack of Easter Rub-ons from My Sentiments Exactly.  I added the rub-ons to the pre-cut shapes...and instant cards!  The Easter blessing is made with a piece of DP from Stampin' up---the colors worked well with the Crate Paper pre-cuts.


I stamped some tulips and added some papers from Stampin' up.  


This was a rub-on.  The papers are all from Stampin' Up.


So, I was able to get these cards done in time.   The cards that have to be mailed went out on Friday.   The rest will be hand delivered.

And, now how about a few Challenges for my Quick and Easy Easter Cards!!
Simon Says stamp: Easter/spring
No matter Which: anything goes
The squirrel and fox: Easter/Passover
Crafty Calender: Easter
My Sheri Crafts:Easter
Mark's Finest: Easter

Today, I am doing some blogging, as you can see.  And, catching up with the laundry...how exciting!.  Check back tomorrow for  Paris in the Spring "Time".  This is a project made with Stampsmith Stamps and spring colors.   Have a great weekend!  Love ya.
Karen

Wednesday, March 20, 2013

Fairy Garden Wall Hanging with Lost Coast Designs

Hi Dreamers!
Let's dream of a garden full of lovely flowers and magical beings!  Oh dear, I guess I am getting carried away.  But, how could I not get carried away while working with this lovely stamp called Dreamer Collage from Lost Coast Designs.   This stamp is nice and large ---- 5.75" square.    I decided to make a wall hanging with this gorgeous stamp.


Instructions:

  • To get this multi-colored effect, I used three colors of pigment ink --brown, light red, and pink.  
  • Cover the stamp with the pink pigment ink.  Apply the brown ink on all the edges of the stamp making sure to cover the fairies.
  • Add  the red to the flowers.  
  • Now stamp onto cream CS.  
  • Trim around the flower petals.
Note: I used pigment so that the ink would stay wet while inking this large stamp.


  • Heat emboss with clear embossing powder.  
  • Distress the edges with Tea Dye Distress ink.


  • Layer with pink, salmon, and brown CS.


  • Glue brown ribbon loop to the back -- for hanging.
  • Tie pink ribbon in a bow around the brown ribbon.


Check out the super cool elements of this stamp!  Love how the brown ink really brings out the Fairy images.


Some really fun challenges for my Dream Collage Wall Hanging:
Craft-room challenge: in the garden/no cards
Love to create: anything goes
Craft my Life: no cards/anything goes
Anything but a card: spring or Alice in wonderland
Crafting for all seasons: anything but a card
Simon Says stamp: spring


Well, I hope you are having a great week!  I am getting some of my submissions finished up and they will go out in the mail today.  Those deadlines just seem to come out of nowhere!!  LOL.  It is all fun!   I think I will share the quick and easy Easter cards with you this week.  So, stay tuned for those.  See you then.  Love ya.
Karen

Tuesday, March 19, 2013

Bon Voyage with Blockhead Stamps

Hi Dreamers,
Welcome to new followers!!  So glad you have joined us here in Dreamland.  Travel is the theme today.  All the designers on the Blockheads' blog are showing ideas for using your travel themed stamps.  We are traveling to the far east today.  I used my mono printing Plate to create a background that perfectly showcases this Asian style stamp.


Materials List:
Stamps: Japanese Moonlight, Japanese Musicians, Vintage Travel (the sentiment) all from Blockheads
Inks: Northern Pine Memento; Black Soot Distress Ink - Ranger
Lulu Lavender Memento Marker
mono printing Plate
Acrylic Paints
Oriental Weave Set and Corners and Damask set-Embossing Folders from Cuttlebug


Instructions:
  • Make the background with a mono printing Plate, acrylic paints, white CS, and embossing folders
  • When paint is dry, stamp the Geisha, flower, and Sentiment with Northern Pine ink
  • Color the flowers with the marker
  • Distress the edges with Black Soot ink.


  • Layer onto a dark Lavender card base and dark green CS
  • Add Lavender rhinestones


  • Add the ribbon detail -- run a line of Fabri-Tac glue along edge of card.
  • Pleat the ribbon pressing it into the glue.
  • Tie a bow and glue to top of the pleated ribbon


  • On the inside, stamp the flower and color with marker
  • Sponge a bit of the Northern Pine ink on the edges.
  • Leave lots of room to write a nice note to someone special.


How about a few fun challeges!!
Craft Your Passion;ribbon or lace
Kaboodle Doodles: anything with frills
Pause Dream Enjoy:anything goes
Mark's Finest: green

I did get a few Easter Cards finished.  I made them quick and easy.  I used some pretty papers, rub ons, and some pre-cut shapes.  I also found some tulips that I had stamped previously.  I will share those with you this week.
Check out my Published Work page for updates.   You can find my work in Take Ten, Scrap and Stamp Arts, and Just Cards this month.  

Hope you had a great weekend and your week has started off well.  I will be back tomorrow with something to tempt you to get out those stamps and make a few cards.  Hope you have a great day!  Love ya.
Karen

Wednesday, March 13, 2013

Sitting Harlequin in Two Poses with Lost Coast Designs

Hi Dreamers!
I have been playing with a fun new stamp from Lost Coast Designs called Sitting Harlequin.  I came up with two pretty different projects using the same stamp.  One this first card, I stamped a large background stamp, Yourba Adire (also from LCD) twice in two different color palettes.


  • I stamped the background by covering the large stamp with 3 shades of the same color family Distress Inks- greens and reds/oranges.  
  • The green stamped background was sliced up into strips.  
  • I created lots of color and textural interest by layering the strips over the red colored background.  


  • Stamped the Harlequin with black ink
  • Color with Markers


  • Tie a sheer green ribbon around the card.
  • Slip a piece of red velvet (that has been cut with pinking shears) under the bow.  Secure with a dab of Fabri-Tac glue.  


 Card #2

The second card is made with the same Sitting Harlequin stamp.  I created a different type of background for this card.  
  • Cover an acrylic block (the kind you use with your clear and cling stamps) with gray pigment ink. 
  • Press the block onto white CS.
  • Heat set the gray ink


  • Stamp the Harlequin with blue pigment ink and heat emboss with Pearl embossing powder.  -----All pigment inks and embossing powder are from A Muse Studios.
  • Layer onto black and blue CS.
  • Add black/white bakers twine and rhinestones


I just love the shimmery effect of the blue pigment ink and Pearl embossing powder!!

How about a few fun challenges for my Harlequin cards??!!!
For Card # one
Mandarin Orange Monday: orange artwork
Eclectic Paperie: use fabric
365 Cards: add texture
Crazy Amigo: color challenge-red, orange, yellow, black, white
Tuesday Alchemy: anything goes

Oh, I guess that is about it for me today.  I still have not started on those Easter Cards.  I cleaned my house today instead.  Still trying to think of something I can make for Easter that will be quick and easy.  I may just do something with pretty papers, ribbon, and a sentiment.  Not sure though.  Well, I hope you are having a great  day.  We had snow last night.  Yuk.  Winter is still hanging on.  See you soon.  Love ya.
Karen

Tuesday, March 12, 2013

Dreaming of Far-a-way Places with Paper Artsy

Hi Dreamers!
I am back after a few days off.   We had a really nice weekend here in Michigan, weather wise.  Temps in the 60's.  So, took advantage of that and spent some time outside.  Back in the 30's with snow flurries today! Crazy.
 This month, the Blockheads' design team has picked the theme---Travel.  We all wanted to show you fun ways to use your travel themed stamps.  The project for the today, makes me think of far-a-way places.  I used some dreamy stamps from Paper Artsy (available in the US from Blockheads).


Materials List:
Stamps: Paper Artsy-LPC010 ( Nina) and LPC013 (Maria);
Blockheads stamps- Willow single or on the  Japanese Musicians half sheet
Inks: Onyx Black VersaFine, Cottage Ivy Memento, Forest Moss and Tumbled Glass Distress Ink.
Spray Inks: yellow, blues and blue greens
Mini Splats Crafters Workshop Template
Mint Green Wide Satin Ribbon
Pearls
Needle and thread


Instructions: 
  • Begin by making the background with the Crafters Workshop Template and spray inks.  (For more info on making this type of background see my tutorial here.)  
  • Stamp the lady with Onyx black ink.  Make a mask and stamp the Willow stamp with Cottage Ivy ink on the edge.
  • Stamp the circular stamp with Cottage Ivy and Onyx Black using the mask over the lady image.  
  • Distress the edges with Distress ink.
  • Layer with Teal, aqua, and black CS


  • Make the poofy ribbon arch on top of the card.
  • Run a few hand stitches on the ribbon starting and ending stitches a few inches from the ends.
  • Pull up the thread to gather.
  • Glue ungathered ends to underside of card front.


  • Tie a knot in another piece of the ribbon and add to lower edge.
  • Add Pearls


Let's Travel around blog land and enter a few challenges!!
Simon Says stamp and Show: shabby chic
Flourishes: add some green
Really Reasonable Ribbon: ribbon and green
Paper Artsy: use PA stamps, or wood, or paints

Thanks for taking the journey to far-a-way places!  Stay tuned this week for more fun projects!  I am going to try and get a few Easter cards made this week too.  See you soon.  Love ya.
Karen

Friday, March 8, 2013

Let's Dance with The Stampsmith!

Hi Dreamers,
Happy Friday!  Let's  do a happy dance!  Check out this cool photo stamps from The Stampsmith's Let's Dance full sheet.   What could be more fun than watching Fred and Ginger skip the light fantastic!


Materials:
Let's Dance Photo Stamp from The Stampsmith
CS from Bazzill
DP from MME
Ribbon and Tag Die Cut from A Muse Studios
Spellbinders Die
Gold Rhinestones


To get the best results with photo stamps, stamp the image on glossy white cardstock with black dye ink. Add some layers and ribbon---instant fun!  Wouldn't this be a great card to cheer up a friend, or just to say hello??!!


Let's dance our way to a few fun challenges!!
Card Crafters Circle: vintage flair
4 Crafty chicks: die for dies
Creative Moments: add a sentiment
New Challenge Blog hosted by my buddie, Leslie!!!
Love to Scrap Challenge: anything goes

Don't forget to head over to the Stampsmith Challenge blog and check out the March Challenge-Spring Colors and Flowers.  Also, leave a comment there with a challenge theme idea for a chance to win a mystery gift!!.......
I hope your weekend is full of fun stamping time!  Love ya.
Karen

Thursday, March 7, 2013

Wild Flowers Card with Lost Coast Designs

Hi Dreamers!
How is your week going?  Doing good here.  I have been making cards is spurts...where I will make a bunch over a couple of days and then take a couple of days off.  I spent about a week making projects with my Lost Coast Design stamps.  I have been sharing some of those projects with you .  Today's project is one of those projects.  I made this card with a large Lost Coast Design stamp.  This stamp, called Shrubbery   is 5.5 " x 7.75" long!   I stamped and cropped  the stamped image  to make smaller projects.  Here is one of those:


I stamped the Shrubbery stamp over a hand made background.

  • The Background is made by: Placing reinkers and metallic stains on a craft sheet.  Spritz with water.  Press white CS into the inks.  Let dry.
  • Stamp with black dye ink.


I wrapped tulle around the card and tied a green satin ribbon around the tulle.


This card would be perfect for an all occasion card.  I would just stamp a sentiment on the inside. 

This project is also perfect for the Simon Says stamp challenge: green.
And, Twisted Tuesday: green
Craft Your Passion: odd number of embellishments--three pearls, one ribbon, one tulle

Stayed tuned this week for some Stampsmith projects!  Hope you are having a great day!  Love ya.
Karen

Wednesday, March 6, 2013

Lost Coast Designs-wild flowers

Hi Dreamers!
Today, I have a project that I made with a Lost Coast Design large stamp. This stamp, called Shrubbery   is 5.5 " x 7.75" long!   The perfect size for a page out of a Mixed Media pad (my 5.5" x 8.5" pad is made by Strathmore) .  Check it out!!


I started by tearing a page out of my mixed media pad.  I sprayed the paper with purple, blue, yellow, and gold spray inks.


I stamped this large stamp with Espresso Truffle Memento ink.   To handle this large stamp, here is what I did.  I coated the back of the stamp with Sailor 2 in 1 glue.  Let the glue dry completely!  The glue must be completely dry---when it is dry--it is now a temporary glue.  Now you can put the stamp on an acrylic block.  It will come right off when you are done stamping.  I did not use any cling cushion.   I did not have a block big enough for this stamp.  So, I used a smooth piece of wood.  Then I pulled it off the wood and put it on my cling binder.


A sheer omber ribbon is threaded through the spaces made by the spiral binding and tied in a knot.  


I added a dragonfly brad.  This piece could be framed or used for journaling.  I made two pieces and sliced up the other project to make a card.  I will show you that project later.  

I would like to enter my "Shrubery Page" into:
Sir Stampalot: outdoors
Ribbon Carousel: spring + ribbon
365 Cards: wings

Well, I hope you are having a great day!  See you soon!  Love ya.
Karen

Tuesday, March 5, 2013

Dreamy Tags with Paper Artsy Stamps

Hi Dreamers!
This month the Designers for Blockheads stamps will be showing fun ways to use your travel themed stamps.   That would include stamps with transportation images, far away places, luggage, tickets, that sort of thing.  I have named my projects for today Dream Travel.  I used stamps by Paper Artsy available in the USA from Blockheads Stamps.


Materials List:
Stamps: Paper Artsy by Lynne Perrella LPC013-Maria and LPC010-Nina from Blockheads Stamps
Inks: Onyx Black Versa Fine; Pistachio Memento; Forest Moss Distress Ink Ranger
Inks for the Background: Shabby Shutters and Forest Moss Reinkers; Antique Bronze Metallic Distress Stain from Ranger
White CS 
Ribbon, Lace, pearls


Instructions:

  • Make the background by placing the reinkers and metallic stain on a Craft sheet.  
  • Spray a little water onto the inks
  • Press White CS into the inks
  • When dry cut into a tag--5 1/2" x 2 1/2"


  • Stamp the Paper Artsy images onto the tags with Onyx Black ink
  • Stamp the circle stamp with Pistachio ink


I wanted some kind of a border on the edge of the tags.  So, I partially stamped the keys from LPC010-Nina stamp set along the edges.  Here is the second tag.


Love the dreamy images!  When I look at the images, I think that the person is dreaming of being in this far away exotic place.  Hence the title "Dream Travel"


A few Super fun Challenges for my Dream Travel tags

Quirky Crafts: no dp, make your own backgrounds
Sandy's Crafty Creations: green
Really Reasonable Ribbon: ribbon + green
Simon Says stamp: anything goes
Loves Rubber Stamps: anything goes

Stayed tuned this week for some projects made with Lost Coast Design Stamps , The Stampsmith, and lots more fun!!  LOL.  I hope you have a great day!  Love ya
Karen